
 Pin it
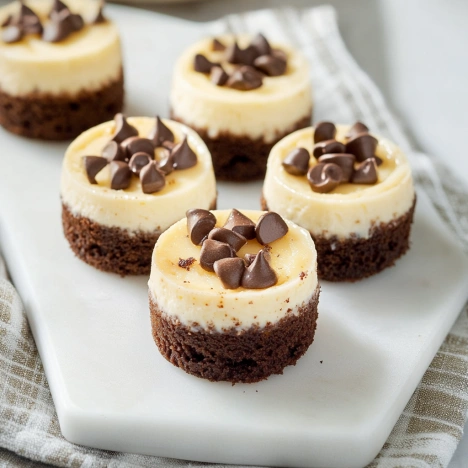
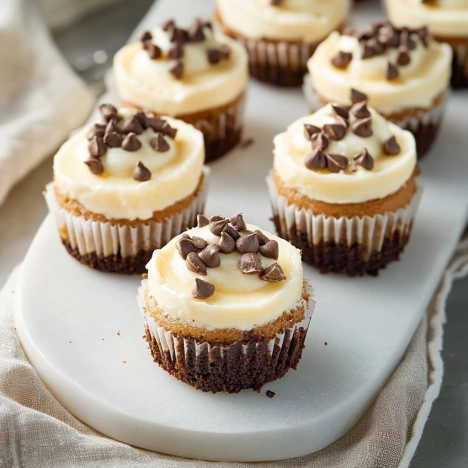
These brownie bottom mini cheesecakes blend two beloved desserts into perfectly portioned bite-sized treats. The rich, fudgy brownie base creates a sturdy foundation for the creamy, tangy cheesecake layer that sits atop. Each miniature dessert delivers the perfect ratio of chocolatey brownie to velvety cheesecake in every bite, making them ideal for parties, potlucks, or whenever you need a sophisticated yet simple dessert option.
I've made these countless times for family gatherings, and they always disappear within minutes. Last Christmas, my sister-in-law requested them specifically, claiming they were "the perfect balance of richness without being overwhelming."
Ingredients
- Unsalted butter (1/4 cup/56g): Creates that distinctive fudgy texture; always use unsalted to control the salt content precisely
- Semisweet chocolate (2 ounces/56g): Choose a quality brand with 54-60% cacao for the perfect balance of sweetness and chocolate intensity
- Granulated sugar (1/4 cup/50g): Provides sweetness and helps create that crackly top texture brownies are known for
- Large egg (room temperature): Acts as a binder and contributes to the fudgy texture; room temperature ensures proper incorporation
- Vanilla extract (1/2 teaspoon): Enhances the chocolate flavor with warm, aromatic notes
- All-purpose flour (1/3 cup/40g): Just enough to provide structure without making the brownies cakey
- Salt (1/4 teaspoon): Essential for highlighting the chocolate flavors and balancing sweetness
- Cream cheese (8 ounces/226g, room temperature): The foundation of any good cheesecake; Philadelphia brand consistently performs well
- Granulated sugar (1/4 cup/50g): Sweetens while helping create that distinctive smooth texture
- Large egg (room temperature): Provides structure and richness; must be room temperature to prevent lumps
- Vanilla extract (1/2 teaspoon): Rounds out the tangy cream cheese with warm, sweet notes
- Sour cream (3 tablespoons, room temperature): Adds tanginess and creaminess that makes cheesecake irresistible
- Sweetened whipped cream: Optional but recommended for a light, airy contrast to the rich dessert
- Toppings (toffee bits, nuts, sprinkles): Choose based on personal preference for texture and flavor contrast
Step-by-Step Instructions
- Step 1:
- Prepare your equipment and workspace. Set your oven to preheat at 350°F (175°C). While it's heating, line your mini muffin pans with paper liners – this makes removal effortless and presentation cleaner. If you don't have liners, take the time to thoroughly grease each cup, making sure to get into all the corners. Gather all ingredients measured and ready at room temperature for the smoothest results.
- Step 2:
- Create the chocolate mixture for brownie base. Combine the butter and chocolate in a microwave-safe bowl that's large enough to allow stirring. Heat at 50% power, stopping every 30 seconds to stir – this prevents scorching and ensures even melting. Continue this process until both are completely melted and the mixture looks glossy and smooth when stirred. Set it aside for about 5 minutes – not too long or it will solidify, but just enough that it won't cook the eggs.
- Step 3:
- Complete the brownie batter. In a medium bowl, whisk together sugar, egg, and vanilla until the mixture lightens slightly in color. Pour in your slightly cooled chocolate mixture, stirring with purpose until completely incorporated – you'll notice the color become uniform and rich. Finally, sprinkle the flour and salt over the surface and fold in using a gentle hand, stopping immediately when no dry streaks remain. Overmixing at this stage leads to tough brownies.
- Step 4:
- Fill muffin cups with brownie base. Using a teaspoon measure or small cookie scoop (the 2-teaspoon size works perfectly), portion the thick brownie batter evenly among your prepared cups. Each should receive about 2 teaspoons of batter, enough to cover the bottom with a thin layer. Tap the filled pan gently on the counter to settle the batter into an even layer.
- Step 5:
- Pre-bake the brownie layer. Slide the pans into your preheated oven and bake just until the brownie layer begins to set – approximately 6-8 minutes. They should look slightly underdone, as they'll continue baking with the cheesecake layer. Remove from the oven but keep the oven on. The brownies will have puffed slightly but will settle as they cool.
- Step 6:
- Prepare the cheesecake filling. While the brownie bases cool slightly, beat the cream cheese in a medium bowl using an electric mixer on medium speed until completely smooth – about 2 minutes, scraping down the sides of the bowl halfway through. Add sugar and continue beating until the mixture lightens in texture. Add the egg and vanilla, mixing until fully incorporated, then fold in the sour cream with a spatula until the mixture is silky and homogeneous.
- Step 7:
- Assemble and bake the cheesecakes. Using a tablespoon measure or 1-tablespoon scoop, carefully divide the cheesecake mixture among the muffin cups, placing it directly on top of the partially baked brownie bases. Fill each cup with a scant tablespoon of the mixture, leaving a small margin at the top to allow for expansion. Return the pans to the oven and bake for 12-15 minutes or until the cheesecakes are just set in the center with a slight jiggle.
- Step 8:
- Cool and chill properly. Allow the mini cheesecakes to cool completely in the pans, placed on wire racks to ensure air circulation. Once they reach room temperature (about 1 hour), transfer the entire pan to the refrigerator for at least 2 hours, preferably 4 or overnight. This chilling time is crucial for developing flavor and achieving the perfect texture. Just before serving, top with a small dollop of sweetened whipped cream and your choice of garnishes.
 Pin it
I've found that dark chocolate has become my preferred choice for the brownie base after experimenting with different varieties. My grandmother, who typically avoids sweets, always requests these minis during family gatherings, saying the tanginess of the cheesecake balances the brownie's sweetness perfectly.
The Secret to Perfectly Smooth Cheesecake Filling
The temperature of your ingredients makes all the difference between silky cheesecake and a lumpy disappointment. Always let your cream cheese, eggs, and sour cream sit at room temperature for at least 30 minutes before beginning. This simple step allows the cream cheese to blend completely with the other ingredients. I learned this lesson the hard way after rushing through preparation one Thanksgiving morning, resulting in tiny lumps throughout my filling. For ultra-smooth results, beat the cream cheese alone first until perfectly creamy before adding any other ingredients, scraping down the bowl frequently during the process.
Mastering the Make-Ahead Timeline
These mini cheesecakes are the perfect dessert for busy hosts because they improve with time. Make them up to three days before your event and store them, covered, in the refrigerator. The flavors will actually develop and meld together, resulting in an even better taste profile than freshly made versions. For longer storage, freeze the plain cheesecakes without toppings for up to a month. Simply thaw overnight in the refrigerator, then add fresh toppings before serving. I've prepared batches for consecutive weekend events, and guests at the second gathering always receive more complex, flavorful treats.
 Pin it
Creative Variations to Try
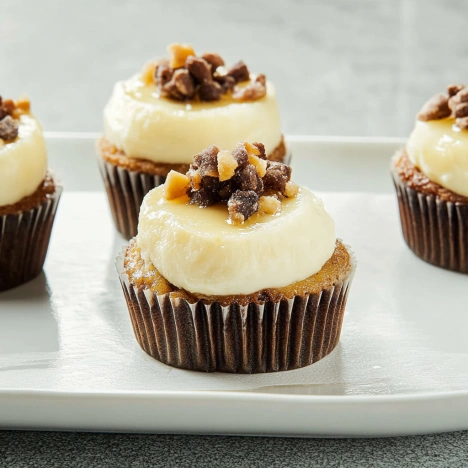
Don't limit yourself to the basic recipe – these mini treats offer endless customization possibilities. For a holiday twist, add peppermint extract to the cheesecake layer and top with crushed candy canes. Seasonal adaptations work beautifully: pumpkin puree and cinnamon in fall, lemon zest in spring, or coffee extract for an elegant mocha version. The brownie base can be enhanced with chopped nuts, orange zest, or even a hint of chili powder for sophisticated heat. My family particularly enjoys the salted caramel variation, where I drizzle homemade caramel sauce over the tops and finish with a tiny sprinkle of flaky sea salt that highlights both the chocolate and tangy cheesecake flavors.
Frequently Asked Questions
- → How do I prevent the brownie crust from overbaking?
Bake the brownie base only until slightly set—about 6 to 8 minutes. It will continue to bake with the cheesecake filling, ensuring a fudgy texture.
- → Can I make these ahead of time?
Yes, you can prepare these mini desserts a day in advance. Store them in an airtight container in the refrigerator until ready to serve.
- → What toppings go best with these mini cheesecakes?
Whipped cream, toffee bits, chopped nuts, sprinkles, or fresh fruit make excellent garnishes to complement these cheesecakes.
- → Can I substitute the semisweet chocolate in the brownie crust?
Yes, you can substitute with bittersweet chocolate for a richer flavor or milk chocolate for a sweeter base.
- → What should I do if the cheesecake filling cracks?
If cracks occur, don’t worry—they can be concealed with whipped cream or other toppings. Ensuring proper cooling helps reduce cracking.