
 Pin it
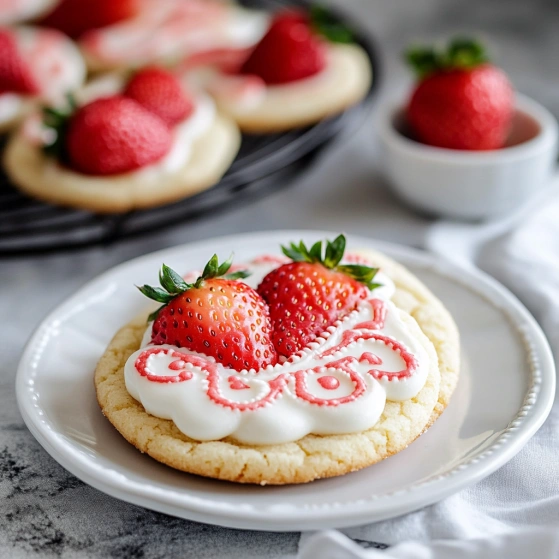
These strawberry pop tart sugar cookies transform a beloved breakfast treat into a delectable dessert. Soft, buttery cookies cradle sweet strawberry jam centers, topped with creamy frosting and colorful sprinkles. The combination creates an irresistible nostalgic sweetness that bridges childhood memories with sophisticated baking techniques.
I first made these for my sister's birthday brunch, expecting them to be fussy and difficult. To my surprise, they came together easily, and the gasps of delight when guests bit into the jam-filled centers made them an instant family favorite.
Ingredients
- 1 cup salted butter: Creates the rich, tender base for the cookies and adds essential flavor depth; use quality butter at cool room temperature for best results
- ¾ cup white granulated sugar: Provides sweetness and helps create the cookie structure; fine granules incorporate more evenly
- ¾ cup light brown sugar: Adds moisture and caramel notes; make sure it's fresh and not hardened for proper mixing
- 1 large egg: Binds ingredients and adds structure; room temperature egg incorporates more smoothly
- 1 teaspoon vanilla extract: Enhances all the flavors; pure extract rather than imitation gives the best flavor
- ½ teaspoon salt: Balances sweetness and activates flavor receptors; fine sea salt works wonderfully here
- 1 teaspoon baking soda: Provides the perfect lift and texture; check that it's fresh for proper rising
- 2½-3 cups all-purpose flour: Forms the structure of the cookie; start with 2½ cups and add more if dough is too sticky
- 1 cup strawberry jam: The star filling; choose a quality jam with visible fruit pieces for best flavor and texture
- 4 oz. cream cheese, room temperature: Creates a tangy base that balances the sweetness; must be completely softened
- 4 Tablespoons salted butter, room temperature: Adds richness and helps create a pipeable consistency
- 3 cups powdered sugar: Provides structure and sweetness; sift first to avoid lumps
- 1 teaspoon vanilla extract: Rounds out the flavor profile with warmth
- 2 Tablespoons whole milk or heavy whipping cream: Adjusts consistency; cream will make a richer frosting
- 2 Tablespoons multicolored or red sprinkles: Adds visual appeal and textural contrast; jimmies work better than nonpareils
Step-by-Step Instructions
- Step 1:
- Cream the Butter and Sugars: Place the cup of salted butter in a stand mixer fitted with the paddle attachment (or use a large bowl with an electric hand mixer). Add both the white and brown sugars. Beat on high speed for a full 3 minutes, stopping occasionally to scrape down the sides with a rubber spatula. This extended beating time incorporates air into the mixture, making it noticeably lighter in color and fluffier in texture—critical for the cookie's final texture.
- Step 2:
- Add Wet Ingredients: Add the room temperature egg and teaspoon of vanilla extract to the butter-sugar mixture. Mix on medium speed for about 1-2 minutes until the mixture looks fluffy and well-combined. The egg should be completely incorporated with no streaks visible. This stage builds the foundation for your cookie structure.
- Step 3:
- Incorporate Dry Ingredients: Sprinkle the salt and baking soda evenly over the mixture and mix briefly just until combined. Add the flour gradually, one cup at a time, mixing on low speed after each addition. This prevents flour clouds and ensures even incorporation. Mix until the flour just disappears—about 1 minute total. The dough should pull away from the sides of the bowl but still feel soft. If it's too sticky, gradually add the remaining flour until it reaches a manageable consistency.
- Step 4:
- Prepare for Baking: Preheat your oven to 350°F and position racks in the upper and lower thirds. Line two baking sheets with parchment paper or silicone baking mats. This prevents sticking and ensures even browning. Allow the oven to fully preheat while you prepare the cookie dough balls.
- Step 5:
- Form and Fill Cookies: Using a ¼ cup measuring cup or cookie scoop, portion out 12 equal balls of dough. Hold one ball in your palm and use a rounded tablespoon measure to press a deep indentation into the center—it should look like a small bowl in your hand. Spoon exactly 1 tablespoon of strawberry jam into the depression, being careful not to overfill. Gently fold the edges of the dough over the jam and pinch to seal completely. Roll the ball between your palms until smooth with no visible cracks where jam might leak. Place 6 cookies on each prepared sheet, spacing them at least 2 inches apart.
- Step 6:
- Bake Strategically: Bake one sheet at a time for 10-12 minutes in the center of the oven. The cookies are done when you see small cracks forming on the surface and the edges are just barely turning golden. Don't overbake—they'll continue firming up as they cool. While the first batch bakes, prepare your frosting.
- Step 7:
- Create the Frosting: In your cleaned stand mixer bowl with whisk attachment (or using a hand mixer), beat the softened cream cheese and butter on medium-high speed for 2-3 minutes until completely smooth and fluffy. Add the powdered sugar one cup at a time, mixing on low speed after each addition until fully incorporated. After all sugar is added, pour in the vanilla extract and milk or cream. Increase to medium speed and beat for another 1-2 minutes until the frosting is light, fluffy and smooth enough to pipe but still holds its shape.
- Step 8:
- Assembly and Decoration: Allow cookies to cool completely on the baking sheets for 10 minutes, then transfer to wire racks to finish cooling—at least 30 minutes. The cookies must be completely cool before frosting or the frosting will melt. Spoon the prepared frosting into a piping bag fitted with a large round tip. Starting from the outside edge of each cookie, pipe in a spiral pattern toward the center. Immediately top with sprinkles before the frosting sets. Allow frosting to set for about 20 minutes before serving.
 Pin it
Last summer, my daughter and I made a batch with homemade strawberry jam we'd preserved from our garden harvest. The depth of flavor was remarkable—those bright, sunny notes of fresh berries transformed these cookies into something truly special. Even my husband, who typically passes on desserts, couldn't resist having seconds.
The Magic of Jam Selection
The jam you choose fundamentally changes the character of these cookies. While strawberry creates that classic pop tart flavor, don't be afraid to experiment. I've made these with raspberry preserves for a more sophisticated edge, and apricot for a lovely tangy sweetness. The key is selecting a quality jam with good viscosity—too runny and it will leak during baking, too thick and it won't create that luscious jammy center. For a holiday version, I use spiced cherry preserves with a touch of almond extract in the cookie dough, which creates a festive twist that disappears from cookie platters within minutes.
Perfecting Your Technique
Creating the perfect jam pocket requires a delicate touch. If your kitchen runs warm or your hands tend to heat the dough quickly, consider chilling the portioned dough balls for 15 minutes before forming the pockets. This makes the dough less sticky and easier to work with. When sealing the jam, ensure there are absolutely no cracks or thin spots in the dough. I use a gentle twisting motion between my palms rather than just rolling to help properly distribute the dough around the jam. Remember that patience during this step prevents the heartbreak of jam eruptions during baking—something I learned the hard way the first few times I made these cookies.
 Pin it
Serving and Storage Wisdom
These cookies reach their prime texture about four hours after baking, when the exterior maintains its slight crispness while the interior achieves that perfect chewy consistency. Store them in a single layer in an airtight container at room temperature for up to three days. If you need to stack them, place parchment paper between layers to preserve the frosting design. For gifting, I've found that placing each cookie in a cupcake liner inside a bakery box creates an impressive presentation. They make stunning additions to dessert tables when arranged on a cake stand with fresh strawberries scattered around the base—the visual connection between the cookies and their flavor inspiration never fails to delight guests.
Frequently Asked Questions
- → How do I prevent the cookie dough from cracking?
When sealing the dough after adding the jam, roll it gently between your hands to smooth out the surface. Make sure there are no visible cracks before baking.
- → Can I use a different type of jam?
Yes, you can substitute strawberry jam with other fruit jams like raspberry, blueberry, or apricot for variety. Just make sure to use a thick jam for best results.
- → Can these cookies be made ahead of time?
Absolutely! You can prepare the cookie dough and fill them with jam, then freeze the unbaked dough balls. Bake straight from the freezer, adding an extra 2-3 minutes to the baking time.
- → How should I store these cookies?
Store the frosted cookies in an airtight container in the refrigerator for up to 5 days. Let them come to room temperature before serving.
- → Can I make the frosting ahead of time?
Yes, you can prepare the frosting a day or two in advance. Store it in the fridge in an airtight container, and bring it to room temperature before piping it onto the cookies.
- → How can I customize the sprinkles?
You can match the sprinkles to any theme or occasion. Use red and green for Christmas, pastel colors for Easter, or any combination to suit your style.