
 Pin it
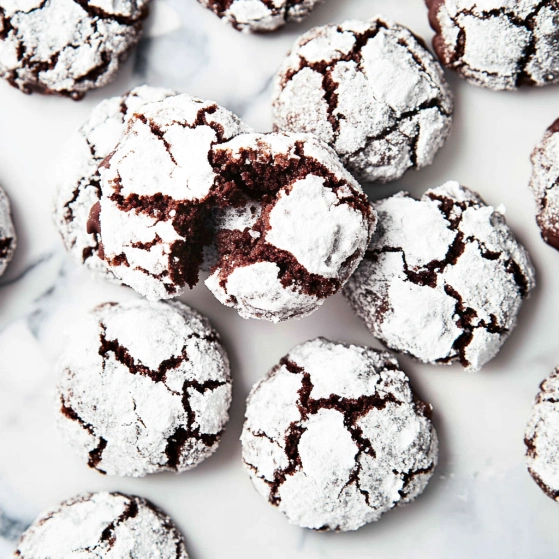
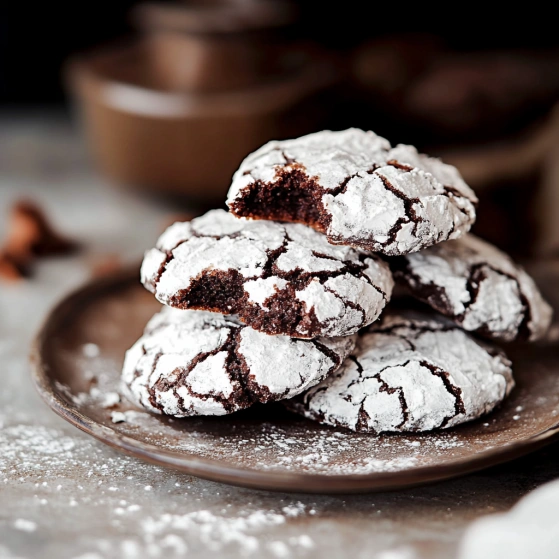
Chocolate Crinkle Cookies are absolute perfection when you're craving something deeply chocolatey with that distinctive crackled appearance. These cookies strike the perfect balance between a fudgy brownie-like interior and a slightly crisp exterior, all wrapped up in that beautiful snow-capped finish from the powdered sugar. The secret to their incredible texture lies in proper chilling time and not overbaking them, which preserves their wonderful chewiness.
I made these last weekend when my sister visited with her kids, and watching their faces light up at the first bite was priceless. My nephew declared them "the best chocolate cookies ever" and proceeded to eat four in one sitting!
Ingredients
- Unsweetened cocoa powder (1 cup, sifted if lumpy): The foundation of the chocolate flavor; sifting prevents dry lumps in your dough and ensures even distribution of chocolate goodness
- All-purpose flour (2 cups): Provides structure while allowing the cookies to remain tender; measure by spooning into measuring cups and leveling for best results
- Baking powder (1.5 teaspoons): Creates the perfect rise and contributes to the signature cracking effect
- Salt (¼ teaspoon): Enhances the chocolate flavor and balances sweetness; don't skip this!
- Butter (⅓ cup, softened): Adds richness and helps create the chewy texture; leave it out for 30 minutes before using
- White sugar (1½ cups): Sweetens the cookies and creates structure; the sugar crystals help form the crackled exterior
- Vanilla extract (2 teaspoons): Adds depth and complements the chocolate flavor; use pure extract if possible
- Large eggs (4): Provide moisture, structure, and help bind everything together
- Powdered sugar (½ cup): Creates the distinctive crackled, snowy appearance; the key to their classic look
Step-by-Step Cooking Instructions
- Step 1:
- Mix the cocoa powder, flour, baking powder, and salt in a medium bowl until well combined. Take a moment to break up any lumps in the cocoa powder with a whisk or fork. This step seems simple but it's crucial for evenly distributed flavor and texture. Don't rush this process as proper mixing now prevents flour pockets in your finished cookies.
- Step 2:
- Place the softened butter, white sugar, and vanilla in a large mixing bowl. Beat these ingredients together with an electric mixer until they form a creamy, cohesive mixture—about 2 minutes on medium speed. You're looking for a light, fluffy texture as this incorporates air into the dough. Add the eggs one at a time, mixing for about 10 seconds after each addition on medium-low speed. Be careful not to overbeat as this can introduce too much air and make the cookies cakey rather than chewy.
- Step 3:
- Add the dry ingredient mixture to your wet ingredients and mix on low speed until just incorporated. Scrape down the sides of the bowl with a rubber spatula halfway through to ensure everything is evenly mixed. Stop mixing as soon as you no longer see dry flour—overmixing will develop gluten and make the cookies tough instead of tender and chewy.
- Step 4:
- Cover the bowl with plastic wrap, pressing it directly onto the surface of the dough to prevent it from drying out. Refrigerate for at least 1 hour, though overnight chilling will produce thicker, more flavorful cookies. This step is non-negotiable as it solidifies the fats and allows the flour to hydrate properly, which results in that perfect chewy texture we're after.
- Step 5:
- Preheat your oven to 350°F and line baking sheets with parchment paper. Pour the powdered sugar into a medium bowl. Remove the chilled dough from the refrigerator and scoop tablespoon-sized portions, rolling each into a ball between your palms. Roll each ball generously in powdered sugar, making sure they're completely coated on all sides. The thicker the coating, the more dramatic the crinkle effect will be.
- Step 6:
- Arrange the sugar-coated dough balls on your prepared baking sheets, leaving about 2 inches between them as they will spread during baking. Bake for 10-15 minutes, watching carefully after the 10-minute mark. The cookies are done when they've spread and developed distinctive cracks, but still look slightly underdone in the center. Don't wait until they look completely set or you'll lose the chewy texture. Let them cool on the baking sheet for 5 minutes before transferring to a wire rack to cool completely.
 Pin it
I'm particularly fond of using Dutch-processed cocoa in these cookies when I can find it. My grandmother always said good cocoa powder is worth investing in, and after watching my children fight over the last cookie from a batch made with premium cocoa, I have to agree. The difference in flavor is remarkable.
The Science of Cookie Chilling
Chilling cookie dough isn't just an annoying extra step—it's transformative for your results. When dough rests in the refrigerator, the flour fully absorbs the liquid ingredients, creating a more concentrated flavor. The cold dough also takes longer to spread in the oven, resulting in thicker cookies with better texture. I've tested this recipe with 1-hour chills and overnight chills, and the difference is noticeable. The cookies chilled overnight had deeper flavor, better defined crinkles, and a more satisfying chew. If you're in a hurry, the 1-hour chill works, but when possible, give these cookies the gift of time.
Storage and Serving Suggestions
These chocolate crinkle cookies maintain their wonderful texture for about 3-4 days when stored in an airtight container at room temperature. To keep them extra fresh, place a slice of bread in the container—it works like magic to maintain moisture. For longer storage, freeze them in a single layer until solid, then transfer to a freezer bag where they'll stay perfect for up to 3 months. I love serving these slightly warmed with a small scoop of vanilla ice cream sandwiched between two cookies for an elevated dessert. They also pair beautifully with coffee, especially an afternoon espresso when you need a little pick-me-up.
 Pin it
Troubleshooting Common Problems
Even experienced bakers sometimes encounter issues with crinkle cookies. If your cookies aren't developing those beautiful cracks, your oven temperature might be too low—consider using an oven thermometer to verify. Another common problem is cookies that spread too much, which usually happens when the dough isn't chilled enough or your butter was too warm when making the dough. For powdered sugar that stays bright white rather than absorbing into the cookie, try rolling the dough balls in granulated sugar first, then in powdered sugar. This creates a barrier that keeps the moisture of the cookie from dissolving the outer sugar layer. I discovered this trick after a disappointing batch where all my powdered sugar seemed to disappear, and it's been foolproof ever since.
Frequently Asked Questions
- → What makes chocolate crinkle cookies soft and chewy?
Achieving the soft and chewy texture comes from creaming the butter and sugar properly, as well as chilling the dough to retain moisture and structure.
- → Why do I need to chill the cookie dough?
Chilling the dough allows the butter to firm up, preventing the cookies from spreading too much during baking and ensuring a thicker, chewier texture.
- → How do I get the perfect crinkled look?
Rolling the dough balls generously in powdered sugar ensures that as the cookies spread and crack in the oven, the crinkled effect is emphasized.
- → Can I substitute butter with another ingredient?
While butter provides the classic flavor and texture, you can use margarine or coconut oil as alternatives, but the taste and consistency may change slightly.
- → How should I store these cookies?
Store them in an airtight container at room temperature for up to a week, or freeze them for longer storage while maintaining freshness.