
 Pin it
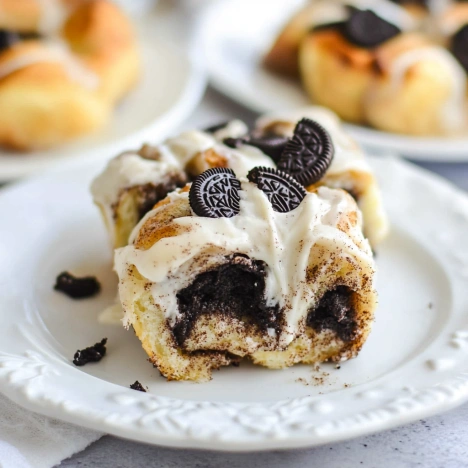
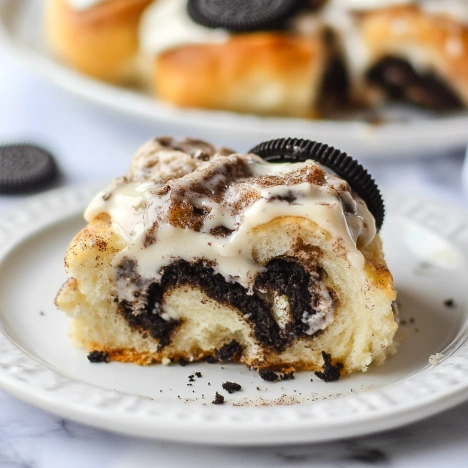
Oreo Cookie Stuffed Cinnamon Rolls transform the classic breakfast treat into an irresistible dessert experience. These indulgent rolls feature a soft, pillowy sweet dough filled with crushed Oreo cookies and topped with a rich cream cheese frosting. The combination creates a perfect balance between the familiar warmth of cinnamon rolls and the beloved chocolate cookie flavor that makes these rolls disappear from the table in minutes.
I made these for my sister's birthday brunch last month and watched everyone's eyes widen as they took their first bite. The plate was empty before I could even suggest seconds.
Ingredients
- Non-Dairy Milk (1½ cups): Creates the perfect soft dough texture while keeping the recipe dairy-free. Choose unsweetened almond or oat milk for best results.
- Granulated Sugar (¼ cup + ¼ cup for filling): Activates the yeast and provides just enough sweetness to complement the Oreos.
- Active Dry Yeast (2½ teaspoons): The magic ingredient that makes your dough rise. Always check the expiration date for freshness.
- Non-Dairy Butter (6 tablespoons melted for dough + 3 tablespoons for filling): Adds richness and helps create those distinct flaky layers.
- All-Purpose Flour (3½-4 cups): The foundation of your dough. Measure using the spoon-and-level method for accuracy.
- Kosher Salt (1 teaspoon): Enhances all the flavors and balances the sweetness.
- Oreo Cookies (16): The star of the show. Use classic Oreos, though any variety works for creative variations.
- Non-Dairy Cream Cheese (⅓ cup): Creates that tangy, creamy frosting that makes cinnamon rolls complete.
- Powdered Sugar (2 cups): Provides structure and sweetness to the frosting.
- Vanilla Extract (½ teaspoon): Adds depth and warmth to the frosting.
Step-by-Step Cooking Instructions
- Step 1:
- Pour the non-dairy milk into a large bowl and warm it to about 110°F (slightly warmer than body temperature). Stir in the sugar until dissolved, then sprinkle the yeast over the surface. Let it sit undisturbed for 10 minutes until foamy and fragrant. This tells you your yeast is alive and active – if no foam appears, you'll need fresh yeast before proceeding.
- Step 2:
- Add the melted butter to the yeast mixture and stir gently. Gradually incorporate 3½ cups of flour and the salt, stirring with a wooden spoon until the mixture forms a shaggy dough. The dough should pull away from the sides of the bowl but still feel slightly tacky. If it's too sticky, add the remaining flour a tablespoon at a time.
- Step 3:
- Turn the dough onto a lightly floured surface and knead for 3-4 minutes. Use the heel of your hand to push the dough away, then fold it back toward you, rotate a quarter turn and repeat. The finished dough should feel elastic and smooth, like a soft earlobe. When you press it with your finger, it should spring back slowly.
- Step 4:
- Lightly oil the same bowl you mixed the dough in, place the dough ball inside, and cover with a clean kitchen towel. Place in a warm, draft-free spot for 1½-2 hours, or until doubled in size. The dough is ready when you can gently press two fingers about ½ inch into it and the indentation remains.
- Step 5:
- While the dough rises, place the Oreos and ¼ cup sugar in a sealed plastic bag. Use a rolling pin to crush the cookies into small pieces varying from fine crumbs to small chunks. This texture variation creates pockets of intense Oreo flavor throughout the rolls.
- Step 6:
- Grease a 9"x13" baking pan with non-dairy butter or cooking spray. On a lightly floured surface, roll the dough into a 15"x10" rectangle about ¼ inch thick. Brush the surface evenly with 3 tablespoons melted butter, leaving a ½-inch border along one long edge. Sprinkle the crushed Oreo mixture evenly over the buttered surface, pressing lightly so it adheres.
- Step 7:
- Starting with the long edge that has filling all the way to the edge, roll the dough into a tight cylinder, pinching the seam to seal. Using unflavored dental floss or a sharp knife, cut the log into 12 equal pieces about 1½ inches thick. Arrange the rolls in the prepared baking pan with slight space between them.
- Step 8:
- Cover the pan with a kitchen towel and let the rolls rise for 30 minutes in a warm spot. Meanwhile, preheat your oven to 350°F. Once risen, bake the rolls for 28-32 minutes until golden brown on top and a thermometer inserted into the center reads 190°F.
- Step 9:
- While the rolls bake, combine non-dairy cream cheese and sifted powdered sugar in a medium bowl. Mix with a spatula until well incorporated and no lumps remain. Add the vanilla extract and 1 teaspoon of non-dairy milk, stirring until smooth. Add additional milk by the teaspoon until you reach your desired consistency – thicker for spreading, thinner for drizzling.
- Step 10:
- Allow the rolls to cool for 5-10 minutes before spreading the frosting generously over the top. If desired, sprinkle with additional crushed Oreos for decoration and that unmistakable cookies-and-cream look. Serve warm for the most heavenly experience.
 Pin it
My youngest daughter, who typically turns her nose up at anything new, took one bite of these and declared them "the best thing I've ever made." I've found that the crushed Oreos develop an almost fudgy quality when baked inside the rolls, creating little pockets of chocolate bliss that perfectly complement the tangy cream cheese frosting.
Troubleshooting Your Dough
Getting your dough right is the foundation of perfect Oreo cinnamon rolls. If your dough feels too sticky after mixing, resist the urge to add too much flour all at once. Add just a tablespoon at a time while kneading, as too much flour will create dense, tough rolls. Conversely, if your dough tears easily and won't hold shape, it might need more kneading to develop the gluten properly. The perfectly kneaded dough will feel slightly tacky but won't stick to your fingers, and it will stretch without breaking when you pull a small piece between your fingers.
Make-Ahead Options
These Oreo cookie stuffed cinnamon rolls are perfect for special mornings when you want to impress without early wake-ups. You can prepare everything up to the second rise, then cover the pan tightly with plastic wrap and refrigerate overnight. In the morning, remove the rolls from the refrigerator and let them sit at room temperature for about 45 minutes before baking. This slow, cold fermentation actually improves the flavor of the dough, creating an even more complex and satisfying roll. I've found this method particularly useful for holiday mornings when kitchen time competes with family moments.
 Pin it
Creative Variations
Don't feel limited by the classic recipe – these rolls welcome creative adaptations. Try using different Oreo varieties like mint, peanut butter, or golden Oreos for completely different flavor profiles. You could add a teaspoon of espresso powder to the dough for a mocha-Oreo experience, or fold mini chocolate chips into the filling for extra chocolatey goodness. My family particularly loves when I drizzle caramel sauce over the frosting for a turtle-inspired version. The basic dough recipe is so reliable that it serves as a perfect canvas for whatever flavor combinations inspire you. Just remember that wet additions might require a slight flour adjustment to maintain the proper dough consistency.
Frequently Asked Questions
- → What makes these cinnamon rolls unique?
The combination of a soft, homemade dough and crushed Oreo filling makes these rolls a unique twist on traditional cinnamon rolls.
- → Can I use regular butter and cream cheese?
Yes, you can substitute non-dairy ingredients with regular butter and cream cheese if dietary restrictions are not a concern.
- → How do I store leftover rolls?
Store the rolls in an airtight container at room temperature for up to 2 days, or refrigerate for 4-5 days. Reheat before serving for best results.
- → Can I make the dough ahead of time?
Yes, you can prepare the dough a day in advance and let it rise in the refrigerator overnight. Allow it to come to room temperature before shaping.
- → Can I use a different type of cookie for the filling?
Absolutely! You can substitute Oreos with other cookies like chocolate chip, graham crackers, or your favorite option to customize the flavor.
- → Do I need special equipment to make the dough?
No special equipment is necessary! You can mix and knead the dough by hand or use a stand mixer if preferred.