
 Pin it
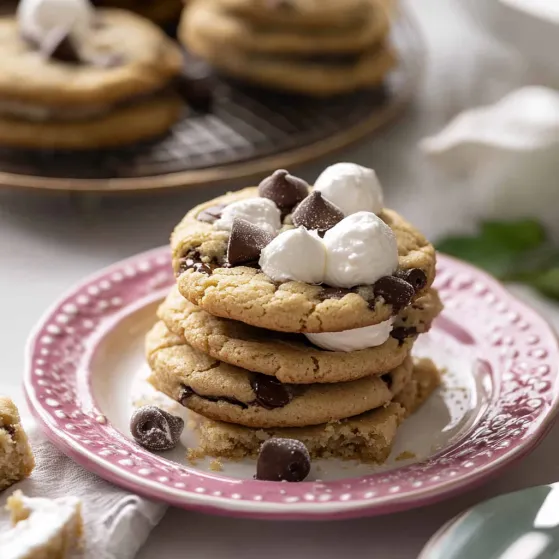
S'mores Cookies are the ultimate comfort dessert, combining everything we love about traditional s'mores in a convenient cookie form. The chewy centers, crisp edges, and that perfect balance of chocolate, marshmallow, and graham cracker create an irresistible treat that brings campfire memories right to your kitchen. These cookies capture all that nostalgic flavor without requiring a bonfire or sticky fingers.
After testing these cookies multiple times (much to my family's delight), I found the perfect balance of marshmallow and chocolate. The first batch disappeared within hours, with my youngest declaring them "better than actual s'mores" because they're less messy but just as delicious.
Key Ingredients
- All-purpose flour: Creates the perfect structure - measure by weight for best results
- Cornstarch: The secret ingredient that keeps these cookies tender and prevents them from spreading too much
- Mini marshmallows: Halving them prevents major cookie explosions while still delivering that gooey marshmallow pull
- Graham crackers: Use fresh, crisp crackers for the best texture and that authentic s'mores flavor
- Hershey's chocolate bar: The classic s'mores chocolate that melts perfectly and provides those iconic chocolate squares
- Butter: Room temperature is crucial - too soft and your cookies will spread, too firm and they won't cream properly
- Light brown sugar: Provides moisture and that subtle caramel note that enhances the graham flavor
Step-by-Step Instructions
- Step 1:
- Take time to properly prepare your add-ins. Roughly chop the graham crackers into pea-sized pieces - some larger chunks are fine for texture variation. Break the Hershey's bar along its natural divisions, then chop some pieces smaller while leaving others as squares. Most importantly, tear each mini marshmallow in half horizontally. This step might seem tedious, but it prevents the marshmallows from puffing too much and creating misshapen cookies.
- Step 2:
- In a medium bowl, whisk together the flour, salt, baking powder, baking soda, and cornstarch until evenly distributed. This pre-mixing ensures no single cookie gets a clump of baking soda or salt. The cornstarch is crucial here - it prevents the cookies from spreading too much and keeps them tender, almost like using cake flour.
- Step 3:
- Using your mixer, beat the room temperature butter with both sugars until the mixture is light and fluffy, about 2 full minutes. Don't rush this step - proper creaming incorporates air into the dough for the perfect texture. The mixture should lighten in color and appear almost fluffy. Add the egg and vanilla, mixing until just combined, then scrape down the sides of the bowl to ensure everything is incorporated.
- Step 4:
- Add the flour mixture to your butter mixture gradually, about one-third at a time, mixing on low speed just until the flour disappears. Overmixing at this stage will develop the gluten in the flour and make your cookies tough rather than tender. Stop mixing as soon as the last traces of flour disappear.
- Step 5:
- Before incorporating all your prepared mix-ins, set aside a small handful of marshmallow pieces and chocolate for topping later. Gently fold the remaining marshmallows, chocolate chips, and graham cracker pieces into the dough using a spatula or the lowest speed on your mixer. Just a few turns should do it - you want these ingredients distributed but not broken down.
- Step 6:
- This step is non-negotiable! Refrigerate the dough for at least one hour, though overnight is even better. This resting period allows the flour to fully hydrate and the flavors to develop. It also firms up the butter, preventing excessive spreading during baking. I often make the dough a day ahead, which makes the actual baking process quick and easy.
- Step 7:
- Preheat your oven to 350°F and line baking sheets with parchment paper. Portion the chilled dough into generous 2-tablespoon balls - I use a #40 cookie scoop for consistency. Place them on the baking sheet with at least 2 inches between each cookie. The initial 8-minute bake sets the edges while keeping the centers slightly underdone.
- Step 8:
- Working quickly, remove the partially baked cookies and press a few reserved marshmallow pieces and chocolate chunks into the top of each cookie. This creates that visual s'mores appeal and ensures perfect pockets of melty chocolate and toasty marshmallow. Return to the oven for just 2-3 minutes until the marshmallows puff and turn golden and the cookies are set at the edges but still soft in the center.
My grandmother introduced me to s'mores during summer camping trips in Michigan, and these cookies bring back those memories in the best way. We've made these cookies for three family reunions now, and my brother always asks for them specifically. There's something about the combination of toasty marshmallow and melty chocolate that creates pure happiness on a plate.
Storing Your S'mores Cookies
These cookies stay fresh in an airtight container at room temperature for 3-4 days, though they rarely last that long in my house. For the best texture, slightly underbake them as they'll continue to set as they cool. If you want to recreate that fresh-baked experience after storage, pop them in the microwave for 8-10 seconds. The chocolate will get melty again, and the marshmallow regains some of its gooey quality. For longer storage, you can freeze the baked cookies for up to 3 months, though the marshmallows might change texture slightly upon thawing.
Make-Ahead and Variations
The cookie dough can be prepared and stored in the refrigerator for up to 3 days before baking, which makes these perfect for planning ahead. You can also roll the dough into balls and freeze them solid on a baking sheet, then transfer to a freezer bag for storage up to 2 months. When ready to bake, place the frozen dough balls on your baking sheet and add just 1-2 minutes to the baking time. For variations, try different chocolate types like dark chocolate chunks or even peanut butter cups. Some of my readers have successfully added cinnamon to the dough for a Mexican hot chocolate twist, while others sprinkle a tiny bit of flaky sea salt on top for a sweet-salty balance.
Troubleshooting Common Issues
If your cookies spread too much during baking, the butter was likely too warm or the dough wasn't chilled long enough. Pop the remaining dough back in the refrigerator for 30 minutes before continuing. For cookies that don't spread enough, gently press down on the dough balls before baking. Marshmallows can be tricky - if they cause your cookies to become misshapen, use a round cookie cutter to reshape them while still hot from the oven. Simply place the cutter around the cookie and gently swirl to create a perfect circle. For more even baking, rotate your pan halfway through the baking time, especially if your oven has hot spots. Finally, for the ultimate s'mores experience, serve these cookies slightly warm when the chocolate is still melty and the marshmallow is at its gooiest.
Frequently Asked Questions
- → Can I use regular marshmallows instead of mini ones?
Yes, you can use regular marshmallows, but be sure to chop them into small pieces to prevent excessive melting and spreading.
- → How do I store these cookies?
Store the cookies in an airtight container at room temperature for up to 5 days or freeze them for longer storage.
- → Do I need to refrigerate the dough?
Yes, refrigerating the dough for at least an hour helps improve texture and prevents excessive spreading during baking.
- → Can I use milk chocolate instead of semisweet?
Absolutely! Milk chocolate gives the cookies a sweeter taste, while semisweet balances the flavor with a touch of richness.
- → Why should I cut the marshmallows in half?
Cutting the marshmallows in half helps control their expansion during baking, preventing them from puffing up excessively or melting unevenly.
- → Can I substitute graham crackers with another ingredient?
If you don't have graham crackers, digestive biscuits or similar crumbly cookies can work as a substitute, though the flavor will differ slightly.