
 Pin it
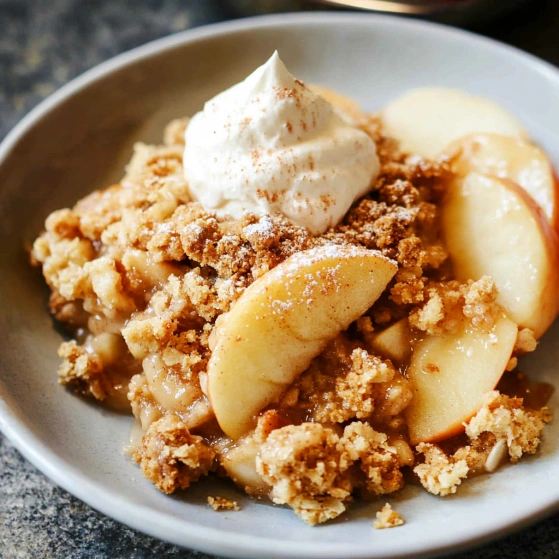
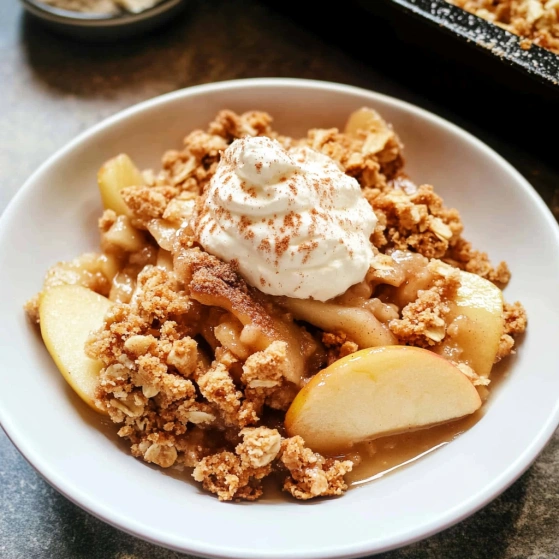
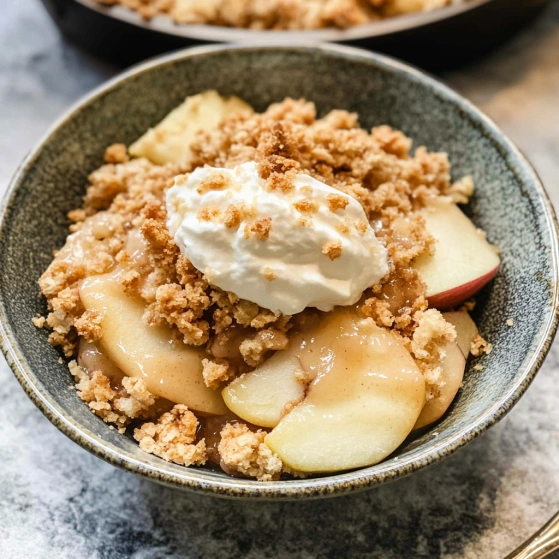
This classic apple crisp recipe transforms ordinary apples into a warm, comforting dessert with a perfect balance of tender fruit and crunchy topping. The combination of cinnamon, nutmeg, and brown sugar creates that nostalgic aroma that fills your home as it bakes.
I first made this apple crisp for my husband on our anniversary during an unexpected snowstorm. The power went out midway through baking but the residual oven heat finished it perfectly. Now it has become our lucky dessert that makes an appearance at every special occasion.
Ingredients
- Old fashioned rolled oats: give the perfect hearty texture and rustic appearance
- All purpose flour: provides structure to hold the crumble together
- Light brown sugar: adds a rich caramel note that white sugar simply cannot match
- Ground cinnamon: warms up the flavor profile creating that classic apple crisp taste
- Baking powder: helps the topping achieve a slight rise and lightness
- Salted butter: delivers both richness and enhances the other flavors
- Granny Smith apples: maintain their shape when baked and provide tartness to balance the sweet topping
- Melted butter: creates richness and helps form the sauce
- All purpose flour: thickens the filling so it isn't watery
- Lemon juice: brightens the flavor and prevents apple browning
- Milk: adds creaminess to the sauce without making it too heavy
- Vanilla extract: rounds out the flavor profile with subtle warmth
- Light brown sugar: caramelizes beautifully with the apples
- Ground cinnamon and nutmeg: create that signature apple pie spice flavor
Step-by-Step Instructions
- Preheat the Oven:
- Set your oven to 375 degrees Fahrenheit. This moderate temperature allows the apples to cook through while the topping gets golden without burning. Position a rack in the center of the oven for even heat distribution.
- Prepare the Crumble Topping:
- Combine all dry topping ingredients in a medium bowl including the oats flour brown sugar cinnamon and baking powder. Mix thoroughly to distribute the spices evenly. Add the cold butter pieces and use a pastry blender or fork to work it into the dry ingredients. Continue until the mixture resembles coarse crumbs with some pea sized pieces of butter remaining. This texture creates the perfect crispy topping. Place in refrigerator while preparing the filling.
- Create the Apple Filling:
- Peel core and thinly slice your Granny Smith apples to about 1/4 inch thickness. Consistent sizing ensures even cooking. In a separate bowl whisk together melted butter and flour until completely smooth forming the base of your sauce. Add lemon juice milk and vanilla whisking after each addition. Stir in brown sugar cinnamon and nutmeg until fully incorporated. Pour this mixture over your prepared apples and toss gently until every slice is evenly coated.
- Assemble and Bake:
- Transfer the coated apple mixture to an 8×8 inch baking dish spreading into an even layer. Remove the chilled crumble topping from the refrigerator and sprinkle it evenly over the apples ensuring complete coverage. Press down very lightly to adhere. Bake in the preheated oven for approximately 35 minutes until the topping is golden brown and the filling is bubbling around the edges.
- Rest and Serve:
- Allow the crisp to cool for at least 15 minutes before serving. This resting time lets the filling thicken to the perfect consistency. Serve warm with a scoop of vanilla ice cream and a drizzle of caramel sauce if desired.
 Pin it
My grandmother always insisted on using a mix of apple varieties in her crisp. She claimed using at least two different types created more complex flavor. I now follow her tradition by mixing Granny Smith with Honeycrisp when available. The contrast between tart and sweet apples makes each bite slightly different and more interesting.
Apple Selection Guide
The apple varieties you choose make a significant difference in your final dessert. While Granny Smith apples are specified in the recipe they are not your only option. For the best apple crisp use firm apples that hold their shape when baked. Honeycrisp Braeburn Pink Lady and Jonagold all work beautifully. Avoid softer varieties like McIntosh or Red Delicious which break down too much during baking. The ideal approach is combining a tart variety with a sweeter one for balanced flavor. Always taste your apples before baking as their sweetness varies throughout the season which might require adjusting the sugar in your recipe.
Make It Your Own
This recipe serves as a wonderful base that welcomes customization. Add 1/2 cup chopped nuts like walnuts or pecans to the topping for extra crunch. Mix in dried cranberries or raisins with the apples for chewy sweetness. For a more complex flavor profile incorporate a tablespoon of bourbon or dark rum to the filling. During fall a pinch of cardamom or ginger adds seasonal warmth. For a gluten free version substitute the all purpose flour with a 1 to 1 gluten free baking blend and use certified gluten free oats. The versatility of apple crisp makes it perfect for experimenting with your personal preferences.
Serving Suggestions
While apple crisp is delicious on its own it reaches new heights with thoughtful accompaniments. Warm vanilla bean ice cream creates the perfect temperature contrast when placed atop the hot crisp. For a less sweet option try serving with lightly sweetened whipped cream or crème fraîche. A drizzle of homemade caramel sauce takes this dessert into special occasion territory. For brunch serve apple crisp with a dollop of Greek yogurt and a sprinkle of granola. When entertaining place the warm crisp in the center of the table with various toppings allowing guests to customize their servings. This interactive approach makes dessert time more engaging and fun.
Storage and Reheating
Apple crisp maintains its quality remarkably well when stored properly. Cover leftovers tightly with plastic wrap or transfer to an airtight container and refrigerate for up to 5 days. The topping will soften somewhat but the flavor often improves as the spices meld together. To reheat individual portions microwave for 30 to 45 seconds or until just warmed through. For the best texture reheat larger portions in a 350°F oven for about 15 minutes covered with foil. Remove the foil for the final few minutes to recrisp the topping. Apple crisp also freezes beautifully for up to 3 months. Thaw overnight in the refrigerator before reheating according to the above instructions.
 Pin it
Frequently Asked Questions
- → Can I use different types of apples for this crisp?
Yes! While Granny Smith apples are ideal for their tartness and firm texture, you can also use Honeycrisp, Braeburn, or Jonagold. For a sweeter result, try combining Granny Smith with sweeter varieties like Gala or Fuji.
- → How do I store leftover apple crisp?
Store leftover apple crisp covered in the refrigerator for up to 4-5 days. Reheat individual portions in the microwave for 30-45 seconds or place the baking dish in a 350°F oven for 15 minutes until warmed through.
- → Can I make this apple crisp ahead of time?
Yes, you can prepare the apple filling and crumble topping separately up to 24 hours in advance. Store both in the refrigerator, then assemble and bake when ready. You can also fully bake the crisp, refrigerate, and reheat before serving.
- → Is this apple crisp gluten-free?
The standard recipe isn't gluten-free, but you can easily adapt it by substituting the all-purpose flour with a gluten-free flour blend and ensuring your oats are certified gluten-free.
- → What's the difference between apple crisp and apple crumble?
The main difference is in the topping. Apple crisp typically contains oats, which give it a crispier, crunchier texture when baked. Apple crumble usually has a streusel-like topping made with flour, sugar, and butter, but no oats.
- → Can I freeze apple crisp?
Yes, you can freeze baked apple crisp for up to 3 months. Cool completely, cover tightly with plastic wrap and aluminum foil, and freeze. Thaw overnight in the refrigerator and reheat in a 350°F oven until warm.