
 Pin it
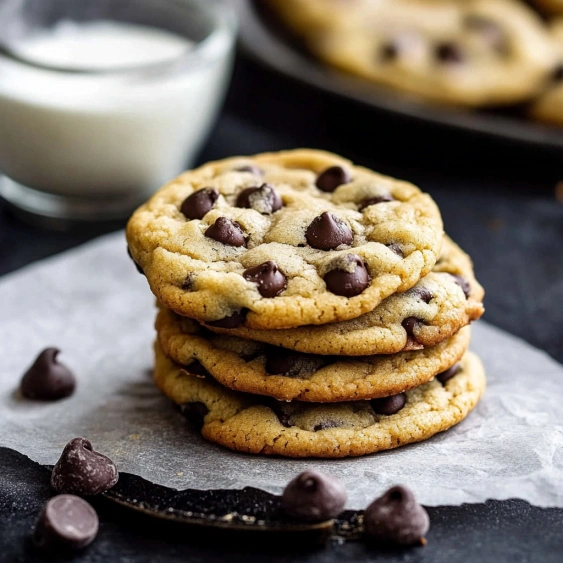
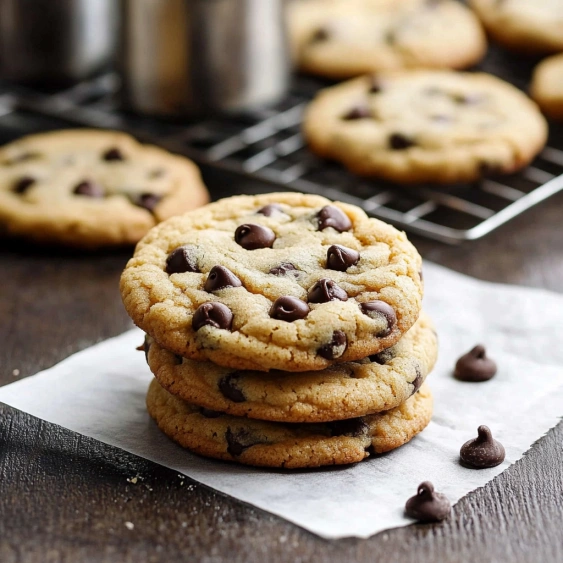
This soft chocolate chip cookie recipe delivers the perfect homemade treat with a buttery interior and just-right edges. I've tested and refined this recipe over dozens of batches until it reached perfection - these cookies stay soft for days and disappear in minutes whenever I make them.
When my daughter had a tough day at school last year, I whipped these up to cheer her up. Now they've become our special tradition whenever someone needs a little comfort.
Ingredients
- Salted butter: Gives these cookies their incredible flavor foundation while keeping the ingredient list simple
- White sugar: Provides the perfect structure and sweetness level; I recommend raw cane sugar for extra depth
- Light brown sugar: Creates that classic chewy texture and caramel undertones essential to great chocolate chip cookies
- Vanilla extract: Enhances all the other flavors; look for pure vanilla, not imitation
- Egg: Binds everything together while creating the perfect texture
- All-purpose flour: Creates the ideal structure; choose unbleached for best results
- Baking soda: Provides just enough lift without making them cakey
- Salt: Enhances all flavors and balances the sweetness; most people undersalt their cookies
- Chocolate chips: Bring the essential melty pockets of chocolate; use a mix of chips and chunks for texture variety
Step-by-Step Instructions
- Prepare butter:
- Gently melt butter in microwave for about 40 seconds until mostly liquid but not hot. This creates the perfect texture base while ensuring the cookies spread properly. The butter should be warm but not hot enough to cook the egg.
- Mix wet ingredients:
- Beat the melted butter with both sugars until creamy and slightly lighter in color, about 1 minute. Add vanilla and egg, beating on low speed for only 10-15 seconds. This quick incorporation prevents air from developing which would make the cookies tough.
- Add dry ingredients:
- Mix in flour, baking soda and salt just until crumbles form. Resist overmixing which develops gluten and creates tough cookies. The mixture should look somewhat dry and crumbly at this stage.
- Form dough:
- Use your hands to press the crumbles together. The warmth of your hands helps bind the ingredients perfectly. The dough should form a cohesive ball that holds together without being sticky or too dry.
- Add chocolate:
- Fold in chocolate chips using your hands for even distribution without overmixing. This gentle technique preserves the delicate texture we've been developing.
- Shape and bake:
- Form dough into 12 equal balls for perfect portion control. Place on cookie sheet with adequate spacing and bake for precisely 9-11 minutes. The cookies should look slightly underdone, puffy, pale and barely golden when removed from oven.
- Cool properly:
- Allow cookies to remain on the hot baking sheet for 30 minutes after baking. This carryover cooking completes the process perfectly while keeping that soft center intact. The cookies will gradually flatten into dense buttery perfection.
 Pin it
My favorite part about these cookies is the mix of chocolate chips and chunks. I discovered this trick after running short on regular chips once and now I deliberately use both for the perfect chocolate distribution in every bite. When my nephew visits, we make a double batch together just so he can take some home.
Why Underbaking is Essential
Removing cookies from the oven when they still look slightly underdone is the professional secret to perfect texture. At the 9-11 minute mark, these cookies will appear puffy, pale and not fully set. This intentional underbaking allows the cookies to finish cooking slowly as they cool on the hot pan. Trust the process even when they look too soft when first removed. The difference between perfect cookies and disappointing ones is often just 1-2 minutes of baking time.
Storage Secrets
These cookies maintain their exceptional softness when stored properly. Place completely cooled cookies in an airtight container with a slice of bread. The bread releases moisture that keeps the cookies fresh without making them soggy. For longer storage, freeze the shaped dough balls on a tray until solid, then transfer to a freezer bag. You can bake them straight from frozen by adding just 1-2 minutes to the baking time. Having cookie dough ready in the freezer has saved countless last-minute entertaining situations in my home.
Customization Options
While this recipe creates perfect classic chocolate chip cookies, it also serves as an excellent base for variations. Add 1/2 cup chopped nuts for texture, substitute white chocolate chips and dried cranberries for a holiday version, or mix in 1/4 cup toffee bits for caramel notes. For chocolate lovers, replace 1/4 cup of flour with cocoa powder. My family particularly loves when I add a sprinkle of flaky sea salt just after baking for a sophisticated sweet-salty contrast that enhances the chocolate flavor beautifully.
 Pin it
Frequently Asked Questions
- → Why do my chocolate chip cookies get hard after baking?
Cookies typically harden because of overbaking or improper storage. Take them out when they look puffy and barely golden (even if they seem underdone), and let them finish cooking on the warm baking sheet. Store in an airtight container once completely cooled.
- → Can I freeze chocolate chip cookie dough?
Absolutely! Form the dough into balls, place on a baking sheet to freeze individually, then transfer to a freezer bag. You can bake them straight from frozen, just add 1-2 minutes to the baking time.
- → What makes these cookies so soft?
Several factors contribute to their softness: using melted (not hot) butter, mixing the egg minimally, not overbaking, and allowing them to cool on the warm pan. The combination of white and brown sugars also helps maintain moisture.
- → How do I know when chocolate chip cookies are done baking?
They should look puffy, dry on top, and just barely golden around the edges. They'll appear slightly underbaked in the center - this is perfect! They continue cooking on the hot baking sheet after removal from the oven.
- → Can I use all brown sugar instead of a mixture?
Using all brown sugar will create a more caramel-like flavor and chewier texture. While delicious, it will change the classic flavor profile and appearance. The white sugar helps create those characteristic crinkles on top.
- → Why melt the butter instead of using softened butter?
Melted butter creates a denser, chewier cookie with a more buttery flavor distribution. It also means you don't have to wait for butter to soften! Just be sure it's barely melted and not hot to prevent spreading.