
 Pin it
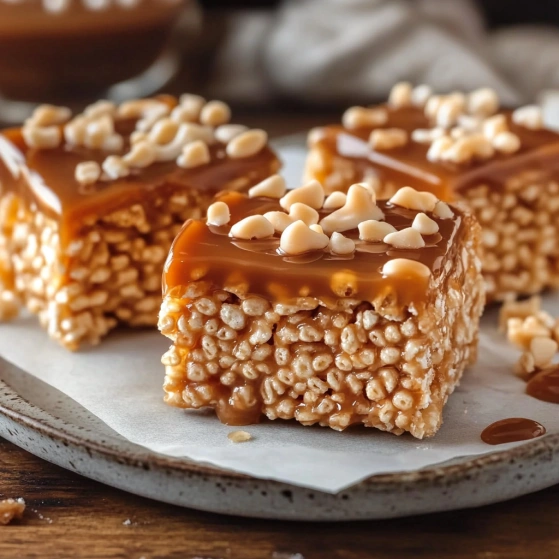
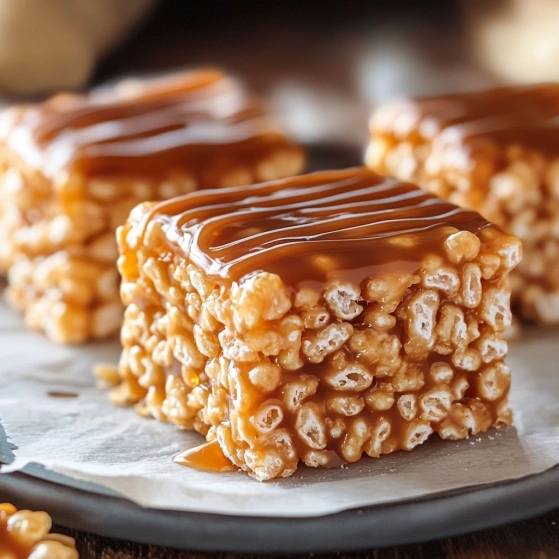
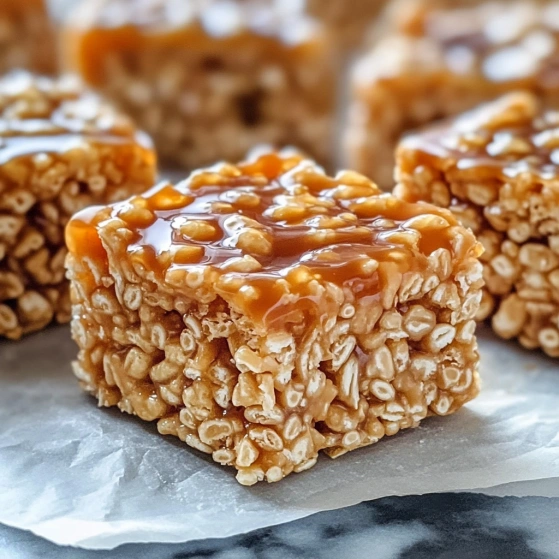
This salted caramel rice krispie treat recipe elevates the classic childhood favorite with luxurious layers of homemade caramel and chocolate. The combination creates an irresistible sweet and salty dessert that disappears quickly at gatherings.
I first made these treats for my daughter's birthday party when the oven broke unexpectedly. What started as a kitchen emergency became our most requested dessert. The adults devoured them faster than the kids.
Ingredients
- Butter Provides richness and prevents sticking. Use unsalted so you can control the salt level.
- Marshmallows Creates that classic gooey base. Fresh marshmallows work better than stale ones for optimal stretchiness.
- Rice Krispie cereal The foundation that provides the signature crunch. Always use fresh cereal for maximum crispiness.
- Vanilla extract Adds depth and warmth to the marshmallow layer. Pure extract is worth the splurge here.
- Caramels or caramel bites The star ingredient that creates the luscious middle layer. Look for soft caramels that melt easily.
- Sweetened condensed milk Makes the caramel extra creamy and smooth. The milk proteins help develop deep caramel flavor.
- Heavy cream Thins the chocolate to perfect drizzling consistency. Full fat is essential for the right texture.
- Milk chocolate chips Creates a sweeter topping than dark chocolate. Choose good quality chips that melt smoothly.
- Sea salt The finishing touch that balances the sweetness. Flaky sea salt provides the best texture and visual appeal.
Step-by-Step Instructions
- Prepare the Baking Dish
- Generously butter every corner of a 9×13 inch baking dish. Be thorough here as proper greasing prevents heartbreak when removing the treats. The butter also adds a subtle flavor that enhances the final result.
- Make the Rice Krispie Base
- Melt butter slowly over medium heat in a large saucepan until it just begins to foam. Add marshmallows while constantly stirring with a silicone spatula ensuring no spots burn. Continue stirring for about 5 minutes until completely smooth with no lumps. Remove from heat immediately to prevent scorching then quickly stir in vanilla extract until fully incorporated. The mixture should be glossy and stretch when pulled with a spoon.
- Combine with Cereal
- Pour marshmallow mixture over cereal in a large bowl working quickly before it sets. Fold gently but thoroughly using a buttered spatula until every piece is coated. Press into prepared dish using buttered hands or parchment paper to create an even layer without compacting too firmly. Allow to cool for about 10 minutes until just set but still slightly warm.
- Make the Salted Caramel Layer
- Combine sweetened condensed milk butter and unwrapped caramels in a medium saucepan over medium low heat. Stir constantly with a wooden spoon to prevent scorching as the caramels slowly melt about 7 10 minutes. The mixture should become smooth and glossy with a pourable consistency. Pour immediately over the rice krispie base spreading to the edges. Sprinkle generously with sea salt while still warm to ensure it adheres.
- Create the Chocolate Drizzle
- Heat heavy cream in a small saucepan just until bubbles form around the edges about 2 minutes. Pour over chocolate chips in a heat safe bowl letting sit for 30 seconds before stirring. Begin stirring from the center outward until completely smooth and glossy about 1 2 minutes. Allow to cool slightly until thickened but still pourable.
- Add Final Touches
- Drizzle chocolate over the caramel layer using a spoon or piping bag creating decorative patterns. Finish with another light sprinkle of sea salt focusing on areas with the most chocolate. Allow to set completely at room temperature about 1 hour or refrigerate for 30 minutes for cleaner cuts.
 Pin it
The caramel layer is truly what makes this recipe special. I discovered that warming the caramels with sweetened condensed milk creates a much smoother consistency than using just cream. My grandfather who rarely eats sweets always asks for seconds of these treats he says the salt reminds him of the salted caramels his mother made during the holidays.
Storage Tips
These treats stay fresh for up to 5 days when stored properly. Keep them in an airtight container with parchment paper between layers to prevent sticking. At room temperature they maintain their chewy texture but I prefer storing them in the refrigerator especially during summer months. The cold temperature firms up the caramel and chocolate creating a delightful contrast with the soft marshmallow base. Let them sit at room temperature for about 10 minutes before serving if refrigerated.
Perfect Substitutions
This recipe welcomes creative variations to suit your pantry or preferences. If you dont have caramel bites soft caramel candies work perfectly. For a shortcut you can use jarred caramel sauce about 1 cup thickened with 2 tablespoons of butter. The cereal itself is versatile too try Cocoa Krispies for a chocolate base or Golden Grahams for a graham cracker flavor. For a more grown up version dark chocolate can replace milk chocolate and a tablespoon of bourbon can be added to the caramel mixture.
Serving Suggestions
These treats shine when cut into precise squares and displayed on a white platter for maximum visual impact. For special occasions try cutting them into shapes using cookie cutters or serving as the base for an ice cream sundae bar. They pair wonderfully with coffee especially a dark roast that balances the sweetness. For an elegant dessert plate cut smaller portions and serve alongside fresh berries and a dollop of unsweetened whipped cream to balance the richness.
Troubleshooting Tips
Occasionally caramel can become too firm after cooling making the treats difficult to cut. If this happens allow the entire pan to sit at room temperature for 30 minutes before attempting to slice. Always use a sharp knife dipped in hot water and wiped clean between cuts. If your treats seem too soft they likely need more cooling time in the refrigerator. The perfect texture should be firm enough to hold its shape but yield easily when bitten into.
 Pin it
Frequently Asked Questions
- → How long do these salted caramel treats stay fresh?
When stored in an airtight container at room temperature, they'll stay fresh for up to 3 days. For extended freshness, store in the refrigerator for up to a week. For best texture, let refrigerated treats sit at room temperature for 10-15 minutes before serving.
- → Can I use store-bought caramel sauce instead of making my own?
Yes, you can substitute about 1½ cups of thick store-bought caramel sauce. Warm it slightly before pouring over the cereal base. However, homemade caramel provides better texture and flavor integration with the other components.
- → What type of sea salt works best for this dessert?
Flaky sea salt like Maldon or fleur de sel works beautifully as it provides both visual appeal and bursts of saltiness that contrast with the sweet components. If unavailable, coarse kosher salt can work as an alternative.
- → Can I use dark chocolate instead of milk chocolate?
Absolutely! Dark chocolate (60-70% cocoa) creates a more sophisticated flavor profile that pairs wonderfully with the caramel. You may want to add an extra tablespoon of cream to maintain the proper drizzling consistency.
- → How do I prevent the treats from sticking to my hands when pressing into the pan?
Lightly butter your hands or spray them with cooking spray before pressing the cereal mixture into the pan. Alternatively, use a piece of parchment paper or the butter wrapper to press down the mixture without sticking.
- → Can I make these treats in advance for a party?
Yes! These treats are perfect for make-ahead preparation. Complete the entire process up to two days before your event, store in the refrigerator, and slice just before serving. The flavors actually meld nicely with a bit of resting time.