
 Pin it
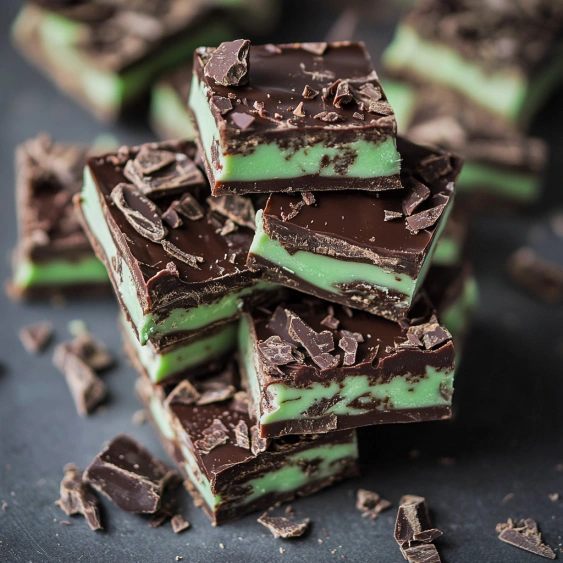
This decadent mint chocolate fudge brings together rich chocolate and cooling mint in perfect harmony. The marbled green and brown layers create a stunning visual that's as impressive as the flavor combination itself.
I first made this mint chocolate fudge for a Christmas cookie exchange and it disappeared faster than anything else on the table. Now it's my signature treat when I need something impressive with minimal effort.
Ingredients
- Semi-sweet chocolate chips: create the rich chocolate base layer with deep flavor
- White chocolate chips: provide the perfect canvas for the mint flavor and green color
- Sweetened condensed milk: gives that classic fudge texture without complicated cooking
- Mint extract: adds the signature cooling flavor use mint not peppermint for best results
- Green food coloring: transforms the white chocolate layer into a festive visual treat
- Andes mint baking pieces: add texture and enhance the mint chocolate experience
Step-by-Step Instructions
- Prepare the Pan:
- Line your 8 or 9 inch square baking pan with aluminum foil or parchment paper making sure to leave some overhang on the sides for easy removal. Press the lining into corners to prevent wrinkles in your finished fudge.
- Divide Condensed Milk:
- Split the can of sweetened condensed milk exactly in half pouring one portion for each chocolate variety. The precision here ensures both layers will set properly with identical consistency.
- Prepare Chocolate Layers:
- Place the semi-sweet chocolate chips in one microwave safe bowl with half the condensed milk. In a separate bowl combine white chocolate chips with the remaining condensed milk. Keep the bowls separate to maintain distinct layers.
- Melt Chocolate Mixture:
- Microwave each bowl individually starting with the semi-sweet chocolate at 50 percent power for 1 minute. Stir thoroughly then continue microwaving in 30 to 45 second intervals at 50 percent power until completely smooth. The reduced power prevents scorching which would ruin the texture and flavor.
- Flavor the Mint Layer:
- Once the white chocolate mixture is smooth and fully melted add the mint extract and enough green food coloring to achieve your desired shade. Start with just a few drops and add more as needed until you reach a vibrant mint green color.
- Create Marbled Effect:
- Working quickly while both mixtures are still warm pour them in alternating patterns into your prepared pan. Use a knife or toothpick to create beautiful swirls by dragging through the layers with a light touch. Avoid overmixing which would blend the colors completely.
- Add Toppings:
- Immediately press Andes mint pieces into the top of the warm fudge distributing them evenly across the surface. The residual heat will slightly melt the bottom of the pieces helping them adhere to the fudge.
- Set and Cut:
- Let the fudge cool completely at room temperature for 2 to 3 hours until firm. For cleaner cuts chill in the refrigerator for 30 minutes before slicing into squares with a sharp knife.
 Pin it
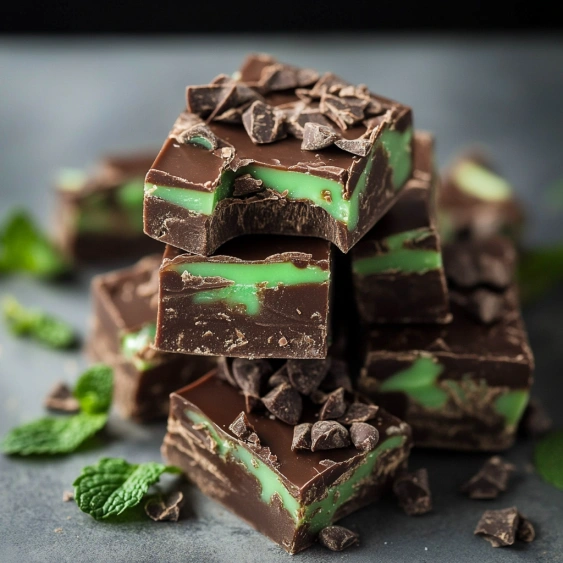
The mint extract is truly the star ingredient here. I once made the mistake of substituting peppermint extract and while still delicious it had that candy cane flavor rather than the smooth cooling mint that makes this fudge special. My daughter now requests this every year for her March birthday because the green color perfectly matches her St. Patricks Day themed celebrations.
Storage Solutions
This fudge keeps wonderfully at room temperature in an airtight container for up to two weeks making it perfect for preparing in advance. For longer storage place in the refrigerator where it will maintain quality for up to a month. If you notice any condensation forming when you remove it from the fridge simply let it sit at room temperature uncovered for about 10 minutes before serving. You can also freeze this fudge for up to three months just wrap pieces individually in plastic wrap then store in a freezerproof container.
Holiday Variations
Transform this treat for different occasions throughout the year. For Christmas replace the Andes pieces with crushed candy canes. Valentine's Day calls for a few drops of red food coloring instead of green and heart-shaped sprinkles on top. Halloween fans can add orange food coloring and top with black and orange sprinkles. The versatility of this base recipe makes it perfect for customizing to any celebration.
 Pin it
Serving Suggestions
Elevate this fudge by pairing it with complementary flavors. Serve alongside a scoop of vanilla ice cream for a decadent dessert. Include it on dessert platters with shortbread cookies and fresh berries for textural contrast. For an adult gathering pair small pieces with coffee or mint tea. I like to cut mine into tiny bite-sized cubes and serve in mini cupcake liners for an elegant presentation that controls portions of this rich treat.
Troubleshooting Tips
- If white chocolate seizes add a teaspoon of vegetable oil and gently reheat
- Work quickly once chocolate is melted as it sets fast especially in cool rooms
- For sharper swirls refrigerate the first layer for 10 minutes before adding the second
Frequently Asked Questions
- → Can I use peppermint extract instead of mint extract?
It's not recommended to substitute peppermint extract for mint extract in this recipe. Peppermint extract has a much stronger flavor profile that can overpower the fudge. Mint extract provides a more balanced, subtle flavor that pairs better with the chocolate.
- → How long does mint chocolate fudge stay fresh?
When stored properly in an airtight container, mint chocolate fudge stays fresh for up to 2 weeks at room temperature or up to 3-4 weeks if refrigerated. You can also freeze it for up to 3 months.
- → Can I make this fudge without food coloring?
Absolutely! The green food coloring is purely for visual appeal to indicate the mint flavor. The fudge will taste exactly the same without it, though you'll lose the distinctive green swirl effect.
- → What can I substitute for Andes mint pieces?
If you can't find Andes mint pieces, you can substitute with chopped after-dinner mints, mint chocolate chips, chopped mint chocolate bars, or even crushed peppermint candies for a different but complementary flavor.
- → Why should I microwave the chocolate at 50% power?
Microwaving at 50% power prevents the chocolate from overheating, which can cause it to seize or become grainy. The lower power setting allows for more controlled, gentle melting that results in a smooth, creamy fudge texture.
- → How do I achieve the best swirl pattern in my fudge?
For the best swirl pattern, pour the chocolate mixtures in alternating dollops rather than in two separate layers. Then use a knife or toothpick to gently swirl through the fudge with a figure-eight motion, being careful not to over-mix which would blend the colors completely.