
 Pin it
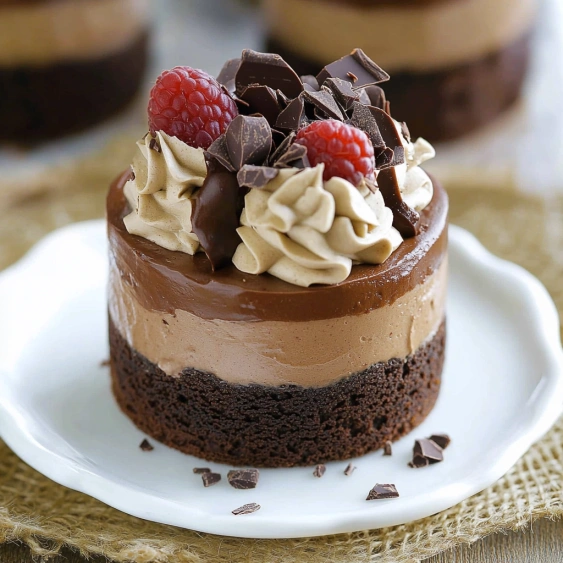
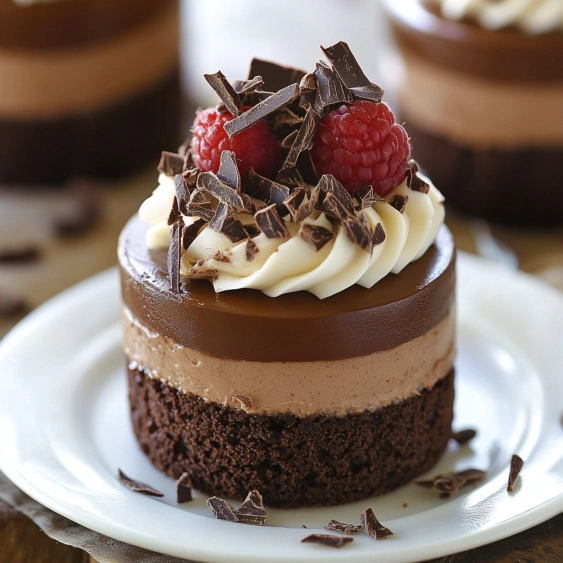
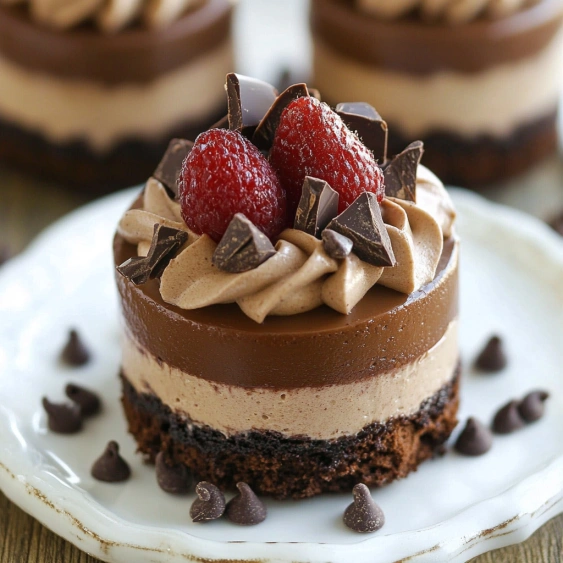
This triple chocolate mousse cake recipe creates elegant individual desserts with three distinct chocolate layers atop a fudgy brownie base. Each bite delivers a perfect balance of dark, milk, and white chocolate for the ultimate chocolate lover's treat.
I first made these for my sister's engagement dinner, and the moment everyone broke through all three layers with their forks, the table fell silent except for appreciative murmurs. They've become my signature dessert for celebrations ever since.
Ingredients
- For Brownie Layer:
- Unsalted butter provides richness and helps create that fudgy texture we all crave in a good brownie
- Semi-sweet chocolate forms the flavor foundation choose a quality brand with at least 60% cocoa content for best results
- Granulated sugar adds sweetness without overwhelming the chocolate
- Large eggs provide structure and moisture
- Vanilla extract enhances the chocolate flavor - always use pure extract, not imitation
- All-purpose flour gives just enough structure - use a light hand when measuring
- Unsweetened cocoa powder intensifies the chocolate flavor - use Dutch-processed for smoother taste
- Salt balances the sweetness and enhances chocolate notes
- For Chocolate Mousses:
- Heavy whipping cream with at least 36% fat content whips best for the perfect mousse texture
- Dark chocolate creates the deepest layer - choose one with 70-75% cocoa solids
- Milk chocolate provides the middle layer - look for quality brands around 40% cocoa
- White chocolate delivers the top layer - select one with cocoa butter as the main ingredient
- Unflavored gelatin powder stabilizes each mousse layer for perfect slicing
- Cool water activates the gelatin
- Additional heavy cream helps melt each chocolate variety
- For Ganache and Garnish:
- Milk chocolate creates a silky smooth topping
- Heavy cream blends with the chocolate for the perfect ganache consistency
- Semisweet chocolate block for creating delicate chocolate curls that elevate presentation
Step-by-Step Instructions
- Prepare the Brownie Base:
- Preheat your oven to 350°F and prepare your baking pan with liner extending over the edges. Gently melt the chocolate and butter together over low heat, stirring constantly. Add sugar and let cool for exactly 10 minutes. Incorporate eggs and vanilla, then fold in the dry ingredients. Spread the batter evenly in the pan and bake until just set, about 20-25 minutes. Cool completely before refrigerating.
- Cut and Prepare Brownie Discs:
- After chilling, lift the brownie slab and cut discs using a circular cutter. Turn each disc upside down. Create parchment collars to hold the mousse layers, ensuring stability.
- Create Dark Chocolate Mousse:
- Whip heavy cream to soft peaks and divide into three parts. Melt dark chocolate with heated cream. Hydrate gelatin in cool water, then dissolve gently. Fold the chocolate mixture with whipped cream and gelatin, then pipe onto brownie bases. Refrigerate until set.
- Build Milk Chocolate Layer:
- Repeat the process with milk chocolate, ensuring even distribution. Let this layer chill before proceeding.
- Create White Chocolate Layer:
- Use white chocolate and carefully fold it into whipped cream, making sure it stays stable. Aim for precise layering by setting each layer fully before adding the next.
- Finish with Ganache and Decoration:
- Remove the parchment collars carefully. Create ganache by pouring warm cream over chopped milk chocolate and stirring until smooth. Spoon over the cake, allowing elegant drips. Add chocolate curls as a final touch.
 Pin it
The gelatin is my secret weapon in this recipe. I learned after several failed attempts that proper stabilization is what separates amateur mousses from professional ones. The first time I served these at a dinner party, my culinary school-trained friend asked for my technique because the layers held so perfectly when sliced.
Storing Your Mousse Cakes
These elegant desserts can be stored in the refrigerator for up to 3 days. Place them in a covered container without touching each other to maintain their perfect appearance. The brownie base may firm up slightly over time, which actually improves the textural contrast. For best presentation, remove them from the refrigerator about 15 minutes before serving to allow the mousse to soften slightly. Avoid freezing these cakes as the mousse layers can develop ice crystals and lose their silky texture upon thawing.
Simplifying with Substitutions
If making all three mousse layers seems overwhelming, you can simplify by creating just two layers using dark and white chocolate for dramatic contrast. For a dairy-free version, coconut cream can replace heavy cream in both the mousse and ganache with surprisingly good results. Just ensure it's properly chilled before whipping. Store-bought brownie mix can be substituted for the base in a time crunch, though the homemade version provides better structural support for the mousse layers. Quality matters with chocolate, but if premium chocolate is beyond your budget, good supermarket brands like Ghirardelli or Lindt will still produce excellent results.
 Pin it
Serving Suggestions
Present these elegant cakes on individual dessert plates with a light dusting of cocoa powder around the edges for a professional touch. A small dollop of lightly sweetened whipped cream and fresh raspberries creates beautiful color contrast against the chocolate. For an adult version, serve with a small glass of ruby port or Amaretto which pairs beautifully with the multiple chocolate layers. If serving for a celebration, personalize each cake with a chocolate decoration or edible gold leaf on top of the ganache for an extra special touch.
The Science Behind Perfect Mousse
Understanding chocolate temperature is crucial for successful mousse. Each type of chocolate has different melting properties due to varying cocoa butter content. Dark chocolate with its higher cocoa solids remains stable at slightly warmer temperatures than milk or white chocolate. The gelatin provides structure while allowing the mousse to retain its airy texture. For perfect layers, each mousse must be set firmly in the refrigerator before adding the next. This setting process takes approximately 30-45 minutes per layer depending on your refrigerator temperature. The brownie base provides not only flavor contrast but structural support allowing for clean slices and easy handling.
Frequently Asked Questions
- → Can I make these mini chocolate mousse cakes ahead of time?
Yes, these mini mousse cakes are perfect for making ahead. They need to chill for 4-5 hours until firm, but can be made up to 2 days in advance. Keep them refrigerated until about 20 minutes before serving for the best texture and flavor.
- → What can I use instead of gelatin in the mousse layers?
For a vegetarian alternative, you can substitute each 3/4 teaspoon of gelatin with 1 teaspoon of agar-agar powder. You'll need to activate it according to package instructions. Note that the texture may be slightly different, as agar sets more firmly than gelatin.
- → Why did my white chocolate mousse separate?
White chocolate mousse is the trickiest layer because white chocolate has different properties than dark or milk chocolate. Make sure your melted white chocolate has cooled completely and is beginning to thicken before folding in the whipped cream. If it's too warm, the mixture will separate.
- → Can I use a different size pan for the brownie base?
Yes, you can use a different pan size, but you'll need to adjust the baking time accordingly. A smaller pan will require longer baking time, while a larger pan will need less time. The most important thing is ensuring you can cut out enough brownie disks for your desired number of cakes.
- → How do I make perfect chocolate curls for garnish?
For beautiful chocolate curls, slightly warm a block of chocolate (room temperature is often sufficient), then use a vegetable peeler to shave along the flat side of the chocolate block. For larger curls, warm the chocolate slightly more and use a sharp knife at a 45-degree angle to scrape thin layers from the block.
- → What's the best way to remove the paper collars without damaging the mousse?
After chilling the cakes completely (4-5 hours minimum), gently peel away the tape first. Then slowly unwrap the paper collar, starting from the top and working your way down. If the paper sticks slightly, you can run a thin knife around the edge before removing.