
 Pin it
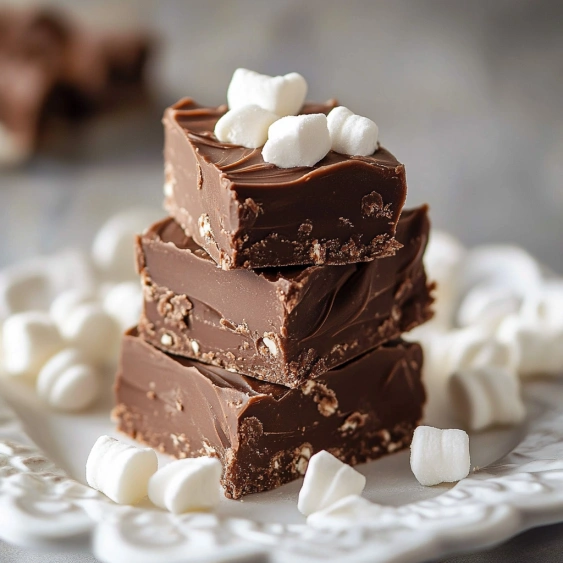
This creamy homemade marshmallow fluff fudge recipe transforms simple ingredients into a decadent treat that's perfect for holiday gifting or satisfying your sweet tooth. The combination of rich chocolate and fluffy marshmallow creates that classic fudge texture everyone loves without requiring candy-making expertise.
I discovered this recipe during a holiday baking marathon when my usual fudge recipe flopped. This version has become our family tradition with its foolproof method and consistently perfect results every time.
Ingredients
- Granulated sugar: provides the sweet foundation and proper crystallization for that perfect fudge texture
- Unsalted butter: creates richness and helps achieve the ideal creamy consistency
- Evaporated milk: delivers concentrated dairy flavor without thinning the mixture
- Semi sweet chocolate chips: melt beautifully and offer balanced chocolate flavor; use high quality for best results
- Marshmallow creme: gives that signature fluffy texture impossible to achieve with regular marshmallows
- Salt: enhances all the flavors and balances the sweetness
- Vanilla extract: adds depth and warmth to the chocolate
- Walnuts: optional but recommended for texture contrast and nutty flavor; use freshly chopped for best results
Step-by-Step Instructions
- Prepare the Pan:
- Line your 8×8 or 9×9 square pan with aluminum foil, ensuring you have overhang on all sides for easy removal later. For thinner fudge pieces, a 9×13 pan works well but will require less setting time.
- Create the Base:
- Combine sugar, butter, and evaporated milk in a medium saucepan over medium heat. This mixture forms the foundation of your fudge so stir constantly to prevent scorching or sugar crystallization on the sides. Continue stirring until the mixture reaches a full rolling boil where bubbles cannot be stirred down.
- Develop Proper Consistency:
- Maintain a constant boil for 4-5 minutes precisely while stirring continuously. This critical step determines your fudge texture. When your candy thermometer reaches 234°F (soft ball stage), you have achieved the perfect consistency. Remove from heat immediately to prevent overcooking.
- Add Flavor Elements:
- Working quickly, add chocolate chips, marshmallow creme, salt, and vanilla to the hot sugar mixture. Stir vigorously until completely incorporated with no streaks remaining. The residual heat melts everything into a glossy cohesive mixture.
- Incorporate Texture:
- Fold in chopped walnuts if using, distributing them evenly throughout the fudge. The nuts should be completely coated in the chocolate mixture, ensuring every bite has the perfect balance of smooth fudge and crunchy nuts.
- Set and Cool:
- Pour the finished fudge mixture into your prepared pan using a silicone spatula to spread it evenly into corners. If desired, sprinkle additional walnuts on top for decoration. Allow to cool at room temperature for 4-6 hours until completely set before cutting.
 Pin it
The marshmallow creme is truly the secret weapon in this recipe. I discovered its magical properties after years of failed fudge attempts. My grandmother always said good fudge needs a steady hand and patience but this ingredient gives beginners professional results every time.
Storage Secrets
Proper storage extends the life of your fudge while maintaining its perfect texture. After cooling and cutting, store pieces in an airtight container separated by layers of wax paper or parchment. At room temperature your fudge will stay fresh for up to two weeks in a cool, dry place. For longer storage, freeze individual pieces wrapped tightly in plastic wrap and placed in a freezer bag, where they'll maintain quality for up to three months. Thaw frozen pieces in the refrigerator overnight for best texture results.
 Pin it
Flavor Variations
This versatile base recipe welcomes creative adaptations. Swap semi sweet chocolate chips for white chocolate and add crushed peppermint for a holiday twist. Dark chocolate lovers can use 60% cacao chips and add a tablespoon of espresso powder for depth. For peanut butter fans, replace one cup of chocolate chips with peanut butter chips and garnish with chopped peanuts. My family particularly loves the mint chocolate version, where I add 1/2 teaspoon of mint extract and top with crushed Andes mints.
Troubleshooting Tips
Even experienced bakers occasionally encounter fudge challenges. If your fudge seems too soft, you likely removed it from heat before reaching the correct temperature. Conversely, overly hard or crumbly fudge indicates cooking beyond the soft ball stage. Humidity affects fudge making significantly; avoid making fudge on particularly humid days. For grainy texture, the sugar crystals likely formed during cooking; prevent this by avoiding stirring once boiling begins and using a pastry brush dipped in water to wash down sugar crystals from the pan sides.
Gifting Ideas
Homemade fudge makes an impressive yet economical gift. Cut into uniform squares and arrange in decorative tins lined with colorful parchment. For upscale presentation, wrap individual pieces in waxed paper and tie with baker's twine. Create variety gift boxes by making multiple flavors and arranging them in a checkerboard pattern. Include the recipe card for a personal touch, allowing recipients to recreate their favorite treat. I started a neighborhood tradition by gifting this fudge during holidays, and now receive special requests months in advance.
Frequently Asked Questions
- → How long does this fudge need to set?
The fudge needs 4-6 hours to fully set and cool before cutting into squares. This allows the mixture to achieve the perfect texture and ensures clean cuts.
- → Can I make this fudge without a candy thermometer?
Yes, though a thermometer helps with precision. Without one, boil the sugar mixture for exactly 4-5 minutes while stirring constantly, looking for a slightly thickened consistency before adding the remaining ingredients.
- → Are the walnuts necessary?
No, the walnuts are completely optional. The fudge will be deliciously smooth without them, or you can substitute with pecans, almonds, or even crushed cookies for texture variation.
- → What is marshmallow creme/fluff?
Marshmallow creme is a spreadable marshmallow product that comes in jars. It has a smooth, fluffy texture and is made from corn syrup, sugar, vanilla flavor, and egg whites. It's different from regular marshmallows and gives the fudge its signature texture.
- → Can I use milk chocolate instead of semi-sweet?
Yes, you can substitute milk chocolate chips for semi-sweet, though the fudge will be sweeter with a milder chocolate flavor. Dark chocolate chips are another option for a more intense chocolate taste.
- → How should I store this fudge?
Store the fudge in an airtight container at room temperature for up to 2 weeks, or refrigerate for up to 3 weeks. Place wax paper between layers to prevent sticking. You can also freeze it for up to 3 months.