
 Pin it
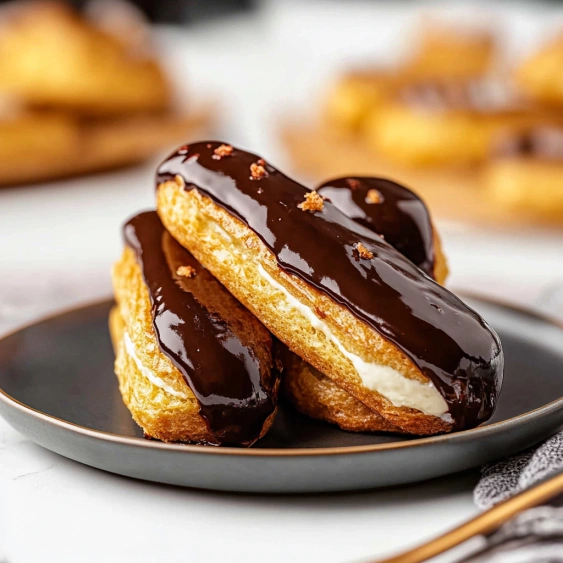
This classic chocolate éclair recipe delivers the perfect balance of crisp choux pastry, silky pastry cream, and decadent chocolate glaze that would impress even French pastry chefs. I've refined this technique over years of testing to create a foolproof method that works every time, ensuring you achieve bakery-quality results at home.
The first time I successfully made these éclairs, my French neighbor declared them better than her local patisserie. Now they're my signature dessert for special occasions, and I've taught this exact method in baking workshops.
Ingredients
- Butter: European-style with 82% fat content creates superior pastry structure and flavor
- Bread flour: Higher protein content provides the perfect structure for the choux pastry
- Eggs: Room temperature eggs incorporate more evenly into the dough
- Whole milk: Adds richness to both the pastry and cream filling
- Semi-sweet chocolate: Quality matters here use Callebaut or Lindt for the smoothest glaze
- Heavy cream: Minimum 36% fat ensures a glossy ganache that sets beautifully
Step-by-Step Instructions
- Prepare the choux pastry:
- Heat butter, water, milk, salt, and sugar until just simmering but not boiling. This gentle heating ensures the fat emulsifies properly with the liquids, creating a smoother dough base. Watch carefully as it approaches the simmer point, looking for tiny bubbles around the edge.
- Add flour and form dough:
- Remove from heat and add all the sifted flour at once, stirring vigorously with a wooden spoon or heat-resistant spatula. Work quickly to incorporate every bit of flour until you have a smooth ball. The transformation happens within seconds if your temperature is correct. The dough should pull away cleanly from the sides of the pan.
- Cook the dough:
- Return the pan to medium heat and cook for 3-5 minutes, stirring constantly. This crucial step removes excess moisture and partially cooks the starches. Look for a thin film forming on the bottom of the pan this indicates you've cooked it enough. The dough should also feel slightly drier and more compact.
- Add eggs gradually:
- Transfer the dough to a stand mixer with the paddle attachment and mix on low for about a minute to release steam before adding eggs. Add whisked eggs in small increments, fully incorporating each addition before adding more. The final consistency should be glossy and fall from the paddle in a V shape without being runny. This may require slightly more or less egg depending on your flour and cooking conditions.
- Pipe and freeze:
- Transfer dough to a piping bag with a French star tip and pipe 14 equal-sized logs onto a perforated mat or parchment paper. The star tip creates ridges that help the éclair expand evenly. Freezing the piped dough for at least one hour is my secret technique that prevents common issues like cracking and collapsing.
- Bake with precision:
- Bake initially at a higher temperature then reduce to allow proper rising without burning. The 40-minute bake time without opening the oven door ensures the structure sets properly. The éclair should be golden brown, feel light for its size, and not deflate when removed from the oven.
- Make silky pastry cream:
- Temper eggs with hot milk slowly to prevent scrambling. Cook until the mixture thickens and bubbles for at least one minute to ensure the cornstarch is fully activated. Strain if necessary for ultimate smoothness. Adding butter at the end creates a luxurious texture and glossy appearance.
- Create perfect chocolate glaze:
- Semi-melt chocolate first before adding hot cream for a smoother emulsion. The glaze should cool to about 30°C before dipping for the perfect consistency that coats without being too runny or thick. This temperature gives you the glossiest finish.
 Pin it
My grandmother taught me that the secret to perfect éclairs is patience during the egg incorporation stage. She would test the dough by running her finger through it if it slowly filled in the channel and left a soft peak, it was perfect. This memory guides me every time I make this recipe.
Make-Ahead Options
The unfilled éclair shells can be stored in an airtight container at room temperature for 1-2 days or frozen for up to a month. To refresh before filling, place in a 300°F oven for 5-7 minutes and cool completely. This makes them perfect for planning ahead for special occasions.
Troubleshooting Guide
If your éclairs deflate after baking, they likely need more time in the oven. The shells should feel light and hollow when tapped. If they feel heavy or soggy, continue baking for another 5-10 minutes with the oven door slightly ajar to release moisture.
Elegant Variations
For a sophisticated twist, flavor your pastry cream with espresso powder, orange zest, or a splash of liqueur like Grand Marnier. You can also decorate the tops with gold leaf, candied orange peel, or chopped pistachios for an elegant presentation that elevates these classic pastries for special occasions.
 Pin it
Cultural Context
Éclairs originated in France in the 19th century, reportedly created by chef Marie-Antoine Carême. The name "éclair" means "lightning" in French, possibly referring to how quickly they disappear once served. Traditional French patisseries consider the perfect éclair to have a crisp exterior, light interior, and balanced filling-to-pastry ratio exactly what this recipe achieves.
Frequently Asked Questions
- → Why do you need to freeze the piped eclairs before baking?
Freezing the piped eclairs for at least an hour before baking serves multiple purposes: it helps the eclairs maintain their shape during baking, creates a more dramatic rise, reduces the likelihood of cracking, and results in a crispier exterior shell. This technique gives the eclairs structural integrity and improves their overall texture.
- → How do I know when my choux pastry has the right consistency?
Choux pastry has the perfect consistency when it slowly falls from the paddle attachment in a V shape. It should be glossy and pipeable but not runny. The dough should hold its shape when piped. You may need to adjust the amount of egg depending on how much moisture evaporated during cooking and the type of flour used.
- → What's the best way to fill eclairs?
There are two effective methods for filling eclairs: either create three small holes in the bottom using a skewer or piping nozzle, or insert a piping nozzle into the side of each eclair. Gently pipe the pastry cream into each eclair until it feels full. Be careful not to overfill, which could cause the eclair to split.
- → How long do filled eclairs stay fresh?
Filled eclairs are best enjoyed immediately after assembly. Once filled with pastry cream, they will gradually lose their crispiness over time as moisture from the filling softens the choux shell. If necessary, leftovers can be stored in the refrigerator for about a day, but the texture will not be as ideal as freshly made.
- → Why is my pastry cream lumpy and how can I fix it?
Pastry cream can become lumpy if the eggs cook too quickly or unevenly. To fix lumpy pastry cream, continue whisking vigorously over low heat until the lumps dissolve. If that doesn't work, you can strain the mixture through a fine-mesh sieve. To prevent lumps, always temper the egg mixture properly by slowly adding hot milk while whisking constantly.
- → What temperature should the chocolate ganache be for glazing?
The chocolate ganache should cool to approximately 30°C (86°F) before glazing the eclairs. At this temperature, it will have the ideal consistency—not too runny (which would slide off) and not too thick (which would be difficult to spread evenly). The ganache should coat the back of a spoon smoothly but still flow slightly.