
 Pin it
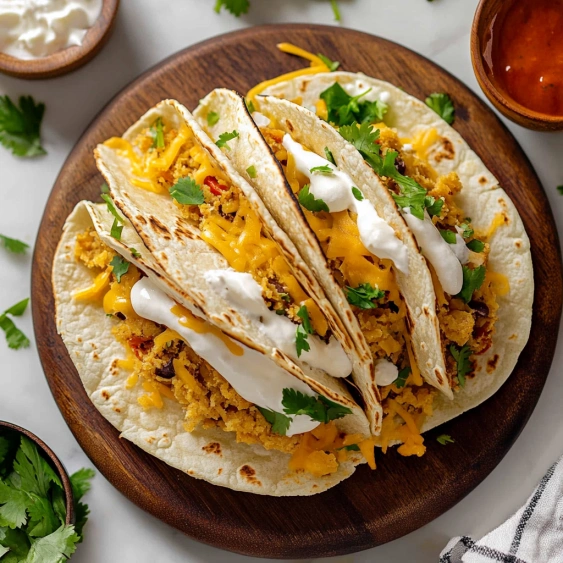
This homemade Gordita Crunch recipe brings the popular Taco Bell favorite right to your kitchen with a surprisingly simple preparation. The secret lies in the ingenious combination of a cheesy, soft flour tortilla wrapped around a crispy taco shell, creating that signature crunch-yet-soft texture that makes this dish so addictive.
I started making these after my teenager begged me to drive to Taco Bell three times in one week. Now our DIY version has become our Tuesday tradition, and everyone agrees they taste even better than the original.
Ingredients
- Shredded Mexican blend cheese: Provides the perfect melt that binds everything together; look for a quality blend with both yellow and white cheeses for best flavor
- Hard shell tacos: Create the essential crunch factor; choose sturdy brands that can withstand baking
- Fajita size flour tortillas: Work perfectly for wrapping around the hard shells; regular burrito size will be too large
- Cooked taco meat: Becomes the hearty filling; use 80/20 ground beef for best flavor
- Shredded lettuce: Adds freshness and crunch; the iceberg variety stays crispiest
- Additional toppings: Like sour cream and taco sauce complete the authentic experience
Step-by-Step Instructions
- Prepare Your Oven:
- Preheat your oven to 400°F ensuring it reaches full temperature for proper cheese melting. Position racks in the middle of the oven for even cooking.
- Arrange The Base:
- Divide the flour tortillas between two baking sheets, laying them flat without overlapping. This ensures even cooking and proper cheese melting.
- Add The Cheese Layer:
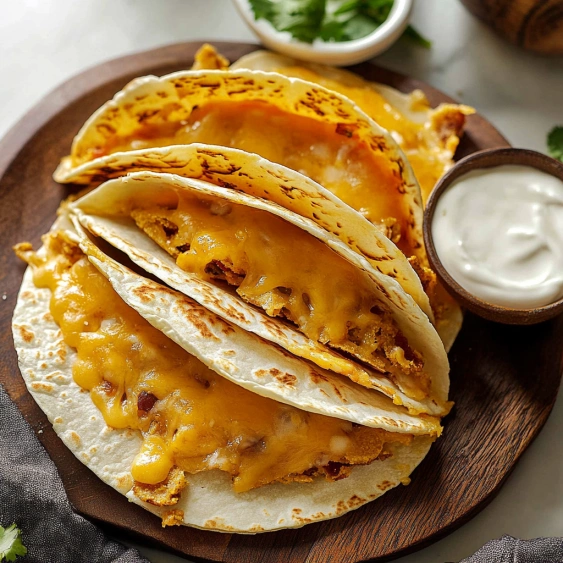
- Sprinkle the Mexican blend cheese evenly across each flour tortilla, leaving about a half inch border around the edges. The cheese will melt and create the adhesive that holds your gordita together.
- Position The Hard Shells:
- Place one hard taco shell directly in the center of each cheese covered flour tortilla. Ensure they're sitting flat so they don't tip over during baking.
- Bake To Perfection:
- Bake the tortilla and shell combinations for exactly 5 minutes. Watch carefully as the cheese should melt completely but not brown too much.
- Prepare Taco Filling:
- While shells bake, cook your ground beef in a large skillet over medium high heat until no pink remains. Add taco seasoning according to package instructions and stir until well coated.
- Form The Gordita Shells:
- Remove baking sheets from the oven and working quickly while everything is still hot, carefully fold the edges of each cheese covered flour tortilla up and around the hard taco shell. The melted cheese acts as glue to hold everything together.
- Fill And Serve:
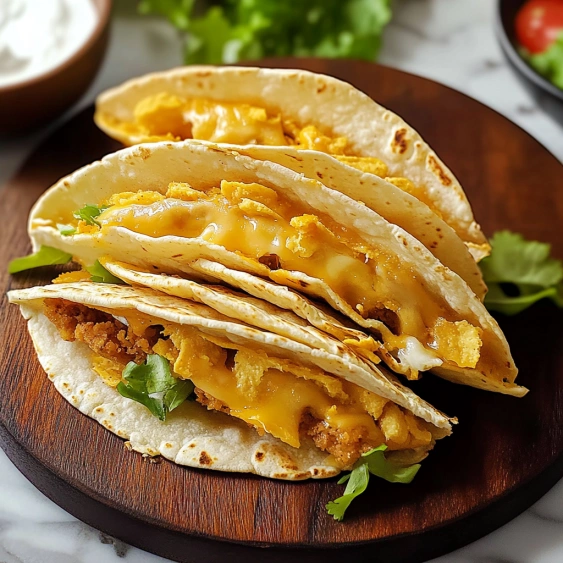
- Fill each gordita shell with prepared taco meat and top with shredded lettuce, additional cheese, sour cream, and taco sauce. Serve immediately while still warm and crispy.
 Pin it
The first time I made these for my family, my youngest son declared it better than the restaurant version. The key difference is using freshly shredded cheese instead of pre shredded, which contains anti caking agents that affect the melt quality.
Make Ahead Tips
These gorditas can be partially prepared in advance to make weeknight dinners even faster. Prepare the taco meat up to two days ahead and store in the refrigerator. You can also measure out and prepare all toppings in advance, storing them in separate containers.
When ready to serve, simply reheat the meat while the shells bake, and assembly will take just minutes. This preparation method makes them perfect for busy families or impromptu gatherings.
Customization Options
The beauty of this recipe lies in its versatility. Swap ground beef for shredded chicken, carnitas, or black beans for a vegetarian option. You can also experiment with different cheese varieties like pepper jack for heat or a Mexican queso fresco for authenticity.
For a healthier version, use whole wheat tortillas and lean ground turkey. Add diced avocado, pico de gallo, or sliced jalapeños for fresh flavor variations. This adaptability makes them perfect for feeding families with different dietary preferences.
 Pin it
Serving Suggestions
Transform this recipe into an interactive taco bar by setting out all components and letting everyone build their own gordita crunch. Pair with Mexican rice, refried beans, or a simple side salad with cilantro lime dressing for a complete meal.
For entertaining, prepare mini versions using small street taco tortillas and broken taco shells for bite sized appetizers. These are always a hit at parties and game day gatherings.
Frequently Asked Questions
- → Can I use corn tortillas instead of flour tortillas?
While flour tortillas are recommended for their pliability and ability to wrap around the hard shell, you could experiment with larger corn tortillas. However, they may crack more easily and won't provide the same soft texture contrast to the crunchy inner shell.
- → What can I use instead of Mexican blend cheese?
Monterey Jack, cheddar, or pepper jack cheese work well as alternatives. Look for cheeses that melt smoothly. You can use a single type or create your own blend based on your preference.
- → Can I make these ahead of time?
It's best to assemble the shells right before serving. However, you can prepare the taco meat in advance and reheat it when ready to serve. The wrapped shells will lose their crispiness if made too far ahead.
- → What protein alternatives work instead of beef?
Ground turkey, chicken, or plant-based meat alternatives work well. You could also use shredded chicken, pork carnitas, or black beans seasoned with taco spices for a vegetarian option.
- → How do I keep the taco shells from breaking when wrapping them?
Handle the shells gently when wrapping. Make sure the cheese is thoroughly melted, which helps the flour tortilla stick to the hard shell. Work quickly but carefully while the cheese is still warm and pliable.
- → What other toppings work well with gordita crunches?
Try diced tomatoes, sliced avocado or guacamole, pickled jalapeños, diced onions, cilantro, sliced olives, or hot sauce. You can customize the toppings based on your preferences.