
 Pin it
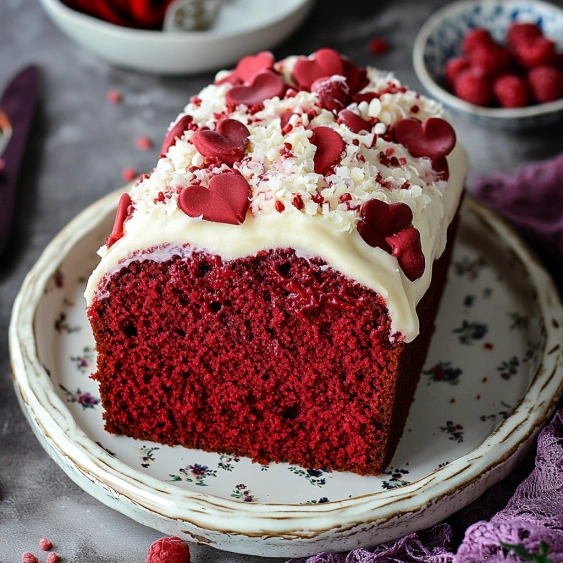
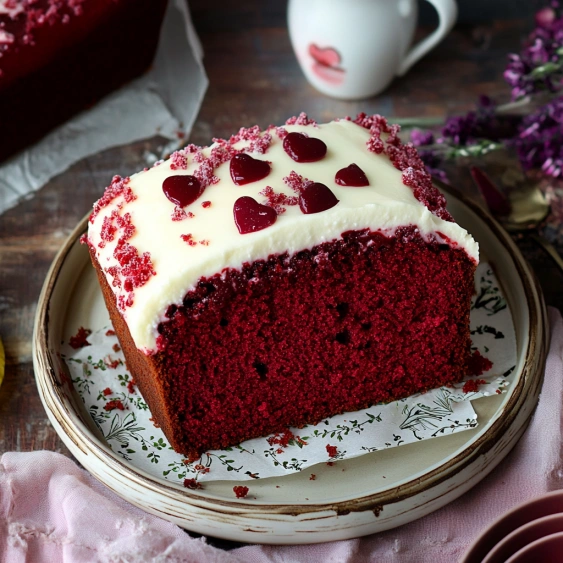
This indulgent gluten-free red velvet loaf cake brings all the rich flavor and stunning color of traditional red velvet in a convenient loaf form. The tangy cream cheese frosting perfectly complements the subtle cocoa flavor, creating that classic red velvet experience without the gluten.
I first made this cake for my niece's birthday when I discovered she had a gluten sensitivity. The look on her face when she realized she could actually enjoy a real red velvet cake was absolutely priceless. Now it's our special tradition for celebrations.
Ingredients
- Gluten free multipurpose flour: Choose one with xanthan gum already included to ensure proper binding and texture.
- Cocoa powder: Natural unsweetened provides that signature subtle chocolate flavor without overpowering.
- Granulated sugar: Adds sweetness and helps create that tender crumb.
- Baking powder and baking soda: The combination creates the perfect rise and texture.
- Kosher salt: Enhances all flavors and balances sweetness.
- Cornstarch and water mixture: Works as an egg replacer to bind the cake together.
- Milk and white vinegar: Creates a homemade buttermilk that adds tenderness and tang.
- Vegetable oil: Keeps the cake moist for days.
- Vanilla extract: Adds depth of flavor.
- Red food coloring: Creates that iconic red velvet color.
- Unsalted butter: Provides structure and richness.
- Cream cheese: Gives that signature tangy flavor.
- Confectioners' sugar: Creates sweetness and smooth texture.
- Vanilla extract: Enhances the flavor profile.
- Kosher salt: Balances the sweetness.
Step-by-Step Instructions
- Prepare the Pan:
- Line a 9x5 loaf pan with parchment paper leaving overhang on the sides. Skip greasing the pan as it can cause the cake to slip down while baking.
- Make Buttermilk:
- Combine milk and vinegar and let sit for 5-10 minutes until chunky. This creates homemade buttermilk which adds tenderness and a subtle tang to the cake.
- Mix Dry Ingredients:
- Whisk together the gluten free flour, cocoa powder, sugar, baking powder, baking soda and salt. This ensures even distribution of leavening agents for a consistent rise.
- Prepare Egg Replacer:
- Mix cornstarch and water until thin and watery. It will be thick at first but keep stirring until it loosens. This creates a binding agent similar to eggs.
- Combine Wet Ingredients:
- Add the cornstarch mixture, oil, additional vinegar, vanilla and red food coloring to the buttermilk. Whisk thoroughly until fully combined and vibrant red.
- Mix Batter:
- Slowly incorporate wet ingredients into dry ingredients until just combined. Be careful not to overmix which can lead to a tough cake. Switch to a spatula if the batter becomes too thick.
- Bake the Cake:
- Pour batter into the prepared pan and smooth the top. Bake for 65 minutes until springy to the touch. The long bake time ensures the center is fully cooked without drying out the edges.
- Cool Completely:
- Allow to cool in the pan for 15 minutes before transferring to a wire rack. Patience is key here for proper texture development.
- Make Frosting:
- Blend butter, cream cheese, confectioners' sugar, vanilla and salt until smooth and creamy. The room temperature ingredients ensure a lump-free frosting.
- Frost the Cake:
- Spread frosting over the completely cooled cake. The cool cake surface prevents the frosting from melting or sliding off.
 Pin it
The homemade buttermilk is my favorite component of this recipe. My grandmother taught me this trick years ago, and it makes all the difference in creating that distinctive red velvet tang. I remember making this recipe during a snowstorm last winter when we couldn't get to the store for cake mix, and my family declared it better than any boxed version.
Storing Your Red Velvet Loaf
This cake stays fresh at room temperature for up to 3 days when stored in an airtight container. For longer storage, refrigerate for up to a week, though the texture is best in the first few days. Let refrigerated slices come to room temperature before serving for the best flavor and texture experience. The unfrosted cake can also be frozen for up to three months wrapped tightly in plastic wrap and foil.
Making It Ahead
The unfrosted cake can be made a day in advance and stored at room temperature, wrapped tightly in plastic wrap. The frosting can also be prepared ahead and refrigerated, but bring it to room temperature and beat it briefly before spreading on the cake. For special occasions, make the entire cake the day before, refrigerate, and then bring to room temperature before serving.
Variations To Try
For a dairy-free version, substitute plant-based milk and vegan cream cheese and butter in the frosting. Around Valentine's Day, add heart-shaped sprinkles on top for a festive touch. For a more intense chocolate flavor, increase the cocoa powder to 3 tablespoons. During Christmas, add crushed peppermint on top of the frosting for a holiday twist that complements the subtle chocolate flavor beautifully.
The History Behind Red Velvet
Red velvet cake originated during the Victorian era as a velvet cake made with cocoa powder. The actual red color likely came from the reaction between acidic ingredients and raw cocoa powder, which contained anthocyanins that turned reddish when exposed to acids. During World War II when food rationing was common, bakers began using beet juice to enhance the color and maintain moisture. Today most recipes rely on food coloring for that distinctive hue, but the classic combination of subtle cocoa with tangy frosting remains timeless.
 Pin it
Frequently Asked Questions
- → Can I make this red velvet loaf cake without food coloring?
Yes, you can omit the red food coloring if preferred. The cake will turn out a light brown color from the cocoa powder, but will still have the same delicious flavor profile.
- → Why do you make homemade buttermilk for this cake?
The homemade buttermilk (milk combined with vinegar) creates an acidic environment that reacts with the baking soda, producing a tender crumb and helping the cake rise properly. This acid-base reaction is essential for the cake's texture.
- → What's the purpose of the cornstarch mixture in this loaf?
The cornstarch mixed with water acts as an egg replacer in this recipe, providing structure and binding without using eggs. This helps create the perfect texture while keeping the cake naturally gluten-free.
- → How should I store leftover red velvet loaf cake?
Store the frosted cake in an airtight container in the refrigerator for up to 5 days. Let it come to room temperature for about 30 minutes before serving for the best flavor and texture.
- → Can I freeze this red velvet loaf cake?
Yes! You can freeze the unfrosted loaf by wrapping it tightly in plastic wrap and then aluminum foil for up to 3 months. Thaw completely at room temperature before frosting. Alternatively, freeze individual slices of frosted cake for quick desserts.
- → What makes red velvet cake different from chocolate cake?
Red velvet cake contains significantly less cocoa powder than chocolate cake, resulting in a milder chocolate flavor. The combination of buttermilk, vinegar, and baking soda creates a velvety texture, and traditionally, red food coloring gives it its distinctive hue.