
 Pin it
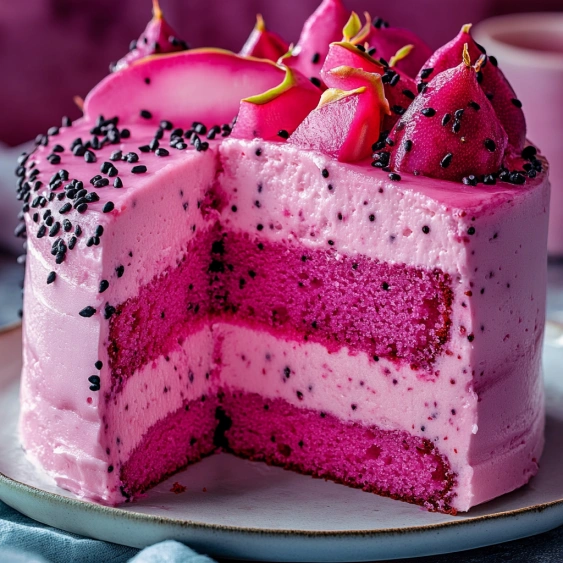
This vibrant pink dragon fruit layer cake transforms exotic tropical fruit into a showstopping dessert that's as delicious as it is beautiful. The natural sweetness and subtle flavor of dragon fruit infuses both the tender cake layers and silky buttercream frosting, creating a sophisticated treat that will impress at any celebration.
I first created this recipe for my daughter's birthday after spotting some vibrant pink dragon fruits at our local market. The magical color and delicate flavor were such a hit that it's now our signature celebration cake for special occasions.
Ingredients
- All purpose flour: Creates the perfect tender crumb for this cake
- Baking powder and baking soda: Work together to create the ideal rise
- Unsalted butter: Adds richness and allows you to control the salt content
- Granulated sugar: Balances the subtle fruit flavor without overwhelming it
- Fresh dragon fruit puree: The star ingredient – look for bright pink varieties for the most vibrant color
- Pink gel food coloring: Optional but enhances the natural pink tones
- Vanilla extract: Complements the delicate dragon fruit flavor
- Powdered sugar: Creates a silky smooth buttercream texture
Step-by-Step Instructions
- Prepare the Cake Pans:
- Preheat your oven to 350°F and thoroughly grease and flour three 8-inch round cake pans. For easy removal, consider lining the bottoms with parchment paper circles. This extra step ensures your beautiful cake layers release perfectly.
- Mix the Dry Ingredients:
- Whisk together the flour, baking powder, baking soda, and salt in a medium bowl until evenly distributed. This step is crucial for even leavening throughout your cake. Use a whisk rather than a spoon to properly aerate and combine ingredients.
- Cream Butter and Sugar:
- In your stand mixer or with a hand mixer, beat the softened butter and granulated sugar on medium-high speed for a full 3 to 5 minutes until the mixture becomes noticeably lighter in both color and texture. This prolonged creaming incorporates air for a lighter cake crumb.
- Incorporate Eggs and Vanilla:
- Add eggs one at a time, beating for 30 seconds between each addition. This careful incorporation helps maintain the air structure you've created. After all eggs are added, mix in the vanilla extract until just combined.
- Add Dragon Fruit Puree:
- Gently fold in the dragon fruit puree and optional pink food coloring using a spatula. The mixture may look slightly curdled, which is normal. The natural enzymes in dragon fruit interact with the dairy, but this won't affect the final cake texture.
- Combine Wet and Dry Ingredients:
- Add the flour mixture to the wet ingredients in three portions, mixing on low speed just until combined after each addition. Stop mixing as soon as the flour disappears to avoid developing gluten which could make your cake tough.
- Bake the Cake Layers:
- Divide your batter evenly among the prepared pans, using a kitchen scale if available for perfectly equal layers. Bake for 25 to 30 minutes, rotating pans halfway through for even baking. Test for doneness when the centers spring back when lightly touched.
- Make the Dragon Fruit Buttercream:
- Beat softened butter until creamy before gradually adding powdered sugar one cup at a time. Add dragon fruit puree, vanilla extract, and salt, then beat on high speed for 3 to 5 minutes until extremely light and fluffy. Add optional pink gel coloring for a more vibrant shade.
- Assemble the Layer Cake:
- Once cakes are completely cooled, level the tops with a serrated knife if needed. Place the first layer on a cake board or serving plate, add a generous layer of buttercream, and repeat with remaining layers. Apply a thin crumb coat to seal in crumbs, chill for 15 minutes, then finish frosting.
- Add Decorative Touches:
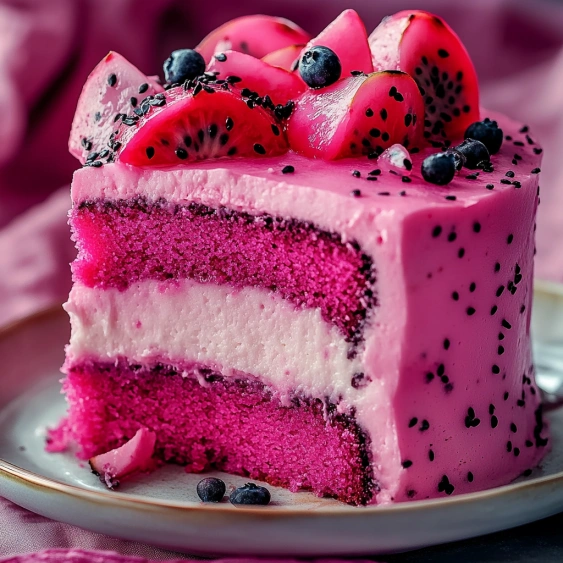
- Garnish your finished cake with fresh dragon fruit slices, edible flowers, or sprinkles as desired. For a more elaborate presentation, pipe additional buttercream decorations using various piping tips.
 Pin it
The secret to the most vibrant color in this cake is choosing the right dragon fruit variety. Look specifically for pink pitaya with red or magenta flesh rather than the white-fleshed variety. I discovered this difference after my first attempt yielded a beautifully flavored but disappointingly pale cake. Now I always specify bright pink flesh when shopping for this showstopping dessert.
Choosing the Right Dragon Fruit
Dragon fruit comes in different varieties, with the most common having either white or vibrant pink flesh. For this recipe, seek out the pink-fleshed variety (often labeled as red dragon fruit or pink pitaya) for natural coloring. The white-fleshed variety will work flavor-wise but won't give you the signature pink color. When selecting, look for firm fruits with bright, evenly colored skin that yield slightly to gentle pressure, similar to choosing a ripe avocado.
Make-Ahead and Storage Tips
This cake actually benefits from being made a day in advance, as the flavors have time to meld and develop. You can store the fully assembled cake in the refrigerator for up to 3 days, covered with a cake dome or loosely with plastic wrap to prevent it from absorbing refrigerator odors. For longer storage, individual cake layers can be frozen for up to 2 months when wrapped tightly in plastic wrap and aluminum foil. The buttercream can also be frozen separately for up to 1 month. Thaw overnight in the refrigerator before assembling.
Flavor Variations
While the classic recipe is stunning on its own, this versatile cake base welcomes creative adaptations. Try adding 1 teaspoon of coconut extract to the batter for a tropical twist, or incorporate 1/4 cup of lime zest for a citrusy complement to the dragon fruit. The buttercream can be enhanced with a tablespoon of coconut cream or mixed with cream cheese for a tangier frosting option. For a sophisticated version, consider brushing each cake layer with a simple syrup infused with rum or coconut liqueur before frosting.
 Pin it
Troubleshooting Tips
If your cake layers dome significantly during baking, reduce your oven temperature by 25 degrees as your oven may run hot. Flat, even layers are easier to stack and frost. Should your buttercream appear too soft or runny, refrigerate it for 15 minutes before continuing. If the dragon fruit puree seems too watery, strain through a fine mesh sieve before adding to the batter or buttercream. This removes excess moisture that could affect the final texture of your cake.
Frequently Asked Questions
- → Can I use frozen dragon fruit for this cake?
Yes, frozen dragon fruit works well for the puree. Thaw completely and drain excess liquid before measuring. You might need slightly less than the recipe calls for as frozen fruit tends to release more moisture.
- → How do I make dragon fruit puree?
To make dragon fruit puree, scoop the flesh from 2-3 ripe dragon fruits. Place in a blender or food processor and pulse until smooth. For a smoother consistency, you can strain through a fine mesh sieve to remove seeds, though this is optional.
- → How should I store this cake?
Store the assembled cake in an airtight container or cake keeper in the refrigerator for up to 4 days. Allow it to sit at room temperature for 30 minutes before serving for the best flavor and texture. If using fresh fruit decorations, add those just before serving.
- → Can I make this cake in advance?
Yes! The cake layers can be baked up to 2 days in advance and stored tightly wrapped at room temperature. The buttercream can be made 1 day ahead and refrigerated in an airtight container. Bring buttercream to room temperature and rewhip before assembling the cake.
- → What can I substitute for dragon fruit?
If dragon fruit is unavailable, you could substitute with strawberry puree or raspberry puree for a similar pink color and fruity flavor. The taste will be different but still delicious. You'll need approximately the same amount of puree.
- → Do I need to use pink food coloring?
The food coloring is completely optional. White-fleshed dragon fruit alone will give a very subtle pink color, while red-fleshed dragon fruit will provide a more vibrant natural pink. The food coloring just enhances the visual impact if desired.