
 Pin it
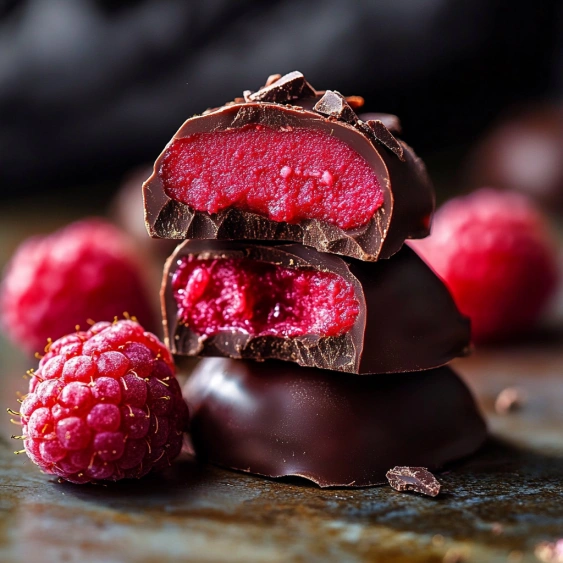
This raspberry chocolate candy cup recipe transforms simple ingredients into an indulgent treat that tastes like it came from a high-end chocolatier. The combination of silky raspberry cream filling and rich chocolate shells creates an irresistible treat perfect for special occasions or whenever you need a luxurious sweet bite.
I first created these for a Valentine's Day dinner at home when chocolate-covered strawberries seemed too predictable. The beautiful pink filling against the dark chocolate became an instant signature treat that friends now request for every special occasion.
Ingredients
- Raspberry Cream Filling:
- Maple syrup: provides natural sweetness with depth that complements the tart raspberries
- Tapioca starch: acts as the perfect thickener creating a silky smooth texture
- Frozen raspberries: give vibrant flavor and color choose berries with no added sugar
- Almond extract: enhances the berry flavor with subtle nutty notes
- Vanilla extract: balances the tartness of the raspberries
- Coconut oil: creates the creamy texture that melts beautifully; look for unrefined for best flavor
- Chocolate Candy Cup Shells:
- Semisweet chocolate chips: form the shell; choose high quality for best melting and flavor
- Coconut oil: helps thin the chocolate for perfect coating
- Optional freeze dried raspberries: add beautiful color and intensify the raspberry flavor
Step-by-Step Instructions
- Create the Raspberry Base:
- Cook the maple syrup and tapioca starch together until completely smooth before adding the frozen raspberries. Heat while stirring constantly until you notice the mixture changing from watery to thick and glossy about 5 minutes. The mixture should coat the back of a spoon when ready.
- Add Flavorings and Oil:
- Remove your thickened raspberry mixture from heat before adding the extracts which prevents flavor loss through evaporation. When incorporating the coconut oil whisk gently but thoroughly. The mixture may look separated at this stage which is completely normal.
- Strain and Process:
- Push the mixture through a fine mesh sieve using a spatula to extract all the flavorful sauce while leaving the seeds behind. Allow the strained mixture to cool until just barely warm to touch before blending. The high speed blending is crucial for emulsifying the coconut oil creating that silky mouthfeel.
- Create Chocolate Shells:
- Melt chocolate and coconut oil together slowly and gently. Watch the temperature carefully as overheated chocolate will become grainy and difficult to work with. The melted chocolate should be glossy and perfectly smooth.
- Form the Base Cups:
- Add a small spoonful of melted chocolate to each liner about 2 teaspoons and immediately tilt to create a thin shell that extends halfway up the sides. Work with one cup at a time for best results. The chocolate layer should be thin but with no transparent spots.
- Add the Filling:
- Once shells are firm spoon the raspberry filling into each cup keeping it centered with space around the edges. The filling should be level with the top edge of the first chocolate layer allowing room for the final chocolate seal.
- Seal with Chocolate:
- Cover each filled cup with remaining melted chocolate working quickly before the chocolate begins to set. Use a small spoon to direct the chocolate over the entire surface tilting gently to ensure complete coverage and a smooth top.
- Garnish and Set:
- Immediately after topping each cup with chocolate sprinkle with crushed freeze dried raspberries if using. The garnish needs to be added before the chocolate sets to properly adhere. Allow cups to fully set in refrigerator for the perfect texture.
 Pin it
The almond extract is my secret weapon in this recipe. I discovered its magic when I accidentally used it instead of vanilla in a raspberry mousse years ago. The subtle almond note creates a complex flavor that makes people wonder what that special something is without overpowering the fresh raspberry taste.
Perfect Storage
These raspberry chocolate cups keep beautifully in the refrigerator for up to one week in an airtight container. For longer storage they can be frozen for up to three months. When ready to enjoy frozen cups simply transfer to the refrigerator and allow them to thaw overnight. The texture remains nearly perfect thanks to the emulsified filling.
 Pin it
Simple Variations
This versatile recipe works with several berry substitutions. Blackberries create a deeper more intense flavor while strawberries offer a sweeter milder profile. For a mixed berry version use equal parts raspberries blueberries and blackberries. The procedure remains identical regardless of which berries you choose simply adjust sweetness with an extra tablespoon of maple syrup for particularly tart varieties.
Elegant Presentation
Serve these gorgeous treats on a simple white platter for maximum visual impact. For special occasions arrange on a tiered dessert stand with fresh raspberries and mint leaves scattered between levels. These chocolate cups look stunning when placed in individual paper candy cups inside a gift box tied with ribbon making them perfect for homemade holiday gifts or party favors.
Frequently Asked Questions
- → Can I use fresh raspberries instead of frozen?
Fresh raspberries can work, but frozen raspberries actually yield better results for this filling as they break down more easily when cooking and release more juice. If using fresh, you may need to add 1-2 tablespoons of water when cooking to achieve the right consistency.
- → How long do these raspberry chocolates stay fresh?
When stored in an airtight container in the refrigerator, these chocolates will stay fresh for up to 2 weeks. You can also freeze them for up to 3 months, though the texture may change slightly upon thawing.
- → Can I substitute the coconut oil?
For the filling, coconut oil provides the ideal texture when chilled. You could try substituting with refined cocoa butter, but the consistency may differ. In the chocolate shell, you can use shortening instead of coconut oil in equal amounts.
- → Why do I need to strain the raspberry sauce?
Straining removes the seeds, which is essential for achieving the smooth, creamy texture in the filling. Seeds would create an unpleasant gritty texture that contrasts with the silky chocolate.
- → What's the best chocolate to use for the shells?
Semi-sweet chocolate chips work best for balance, but you could use dark chocolate (up to 70% cacao) for a more intense flavor or milk chocolate for a sweeter result. Quality matters - use chocolate you enjoy eating on its own.
- → Can I make these chocolates without a blender?
A high-powered blender is important for properly emulsifying the coconut oil into the raspberry mixture. Without it, you might end up with a filling that separates. An immersion blender could work as an alternative if used thoroughly.