
 Pin it
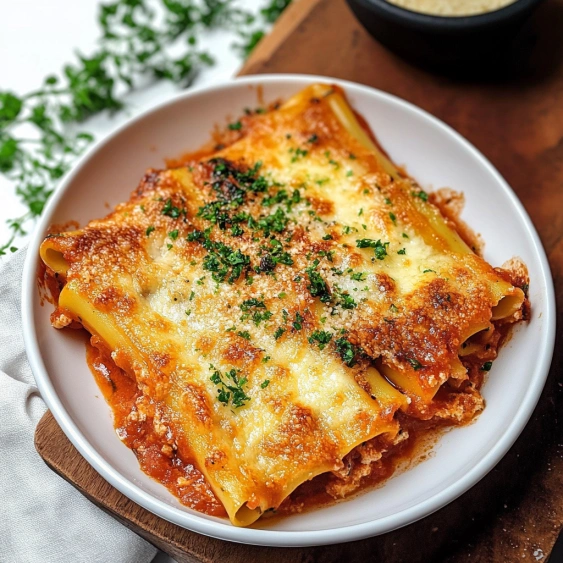
This no-boil manicotti recipe revolutionizes the traditional pasta-making process by eliminating the pre-boiling step entirely. The uncooked pasta shells get filled with a rich ricotta and spinach mixture, then bake directly in sauce until perfectly tender.
I discovered this technique during a particularly busy holiday season when I needed to feed a crowd without spending hours in the kitchen. My Italian grandmother was skeptical at first but now requests this version whenever she visits.
Ingredients
- Spaghetti sauce: creates the moisture needed to cook the pasta perfectly while adding rich tomato flavor
- Water: thins the sauce just enough to ensure the pasta cooks evenly
- Uncooked manicotti noodles: save prep time and actually absorb flavors better than pre-boiled pasta
- Fresh spinach: adds nutrition and color that frozen spinach cannot match
- Whole milk ricotta: provides the creamiest texture; look for Italian brands with minimal additives
- Mozzarella cheese: creates that irresistible melty top and stretchy texture
- Parmesan cheese: adds a sharp savory note that balances the creamy elements
- Egg: binds the filling, preventing it from becoming watery during baking
- Basil pesto: introduces complex herbal notes and richness; use homemade if possible
- Dried oregano: brings classic Italian flavor that intensifies during baking
- Garlic powder: offers convenience while infusing the filling with aromatic notes
Step-by-Step Instructions
- Prepare the Oven:
- Heat your oven to exactly 350°F. This moderate temperature allows the pasta to cook slowly while the cheese filling heats without becoming grainy or separated.
- Create the Sauce Base:
- Mix the spaghetti sauce and water thoroughly in a measuring cup or bowl. The water might seem unnecessary but it provides crucial moisture for cooking the raw pasta without making the final dish watery.
- Make the Filling:
- Combine chopped fresh spinach with ricotta cheese, portion of the mozzarella, Parmesan, egg, pesto, oregano, garlic powder, salt, and pepper in a large bowl. Mix thoroughly until completely incorporated, ensuring no streaks of egg remain visible. The filling should be creamy but hold its shape.
- Prepare for Filling:
- Transfer the cheese mixture to a piping bag or sturdy gallon-size plastic bag. This step saves tremendous time and creates less mess than trying to fill the delicate pasta tubes with a spoon.
- Create the Foundation:
- Spread half the sauce mixture evenly across the bottom of a 9×13 baking dish. This base layer prevents the pasta from sticking and starts the cooking process from the bottom up.
- Fill the Pasta:
- Cut the tip of your piping bag to match the width of the manicotti openings. Firmly but gently squeeze the filling into each dry pasta tube from both ends, ensuring they are completely filled without air pockets.
- Assemble the Dish:
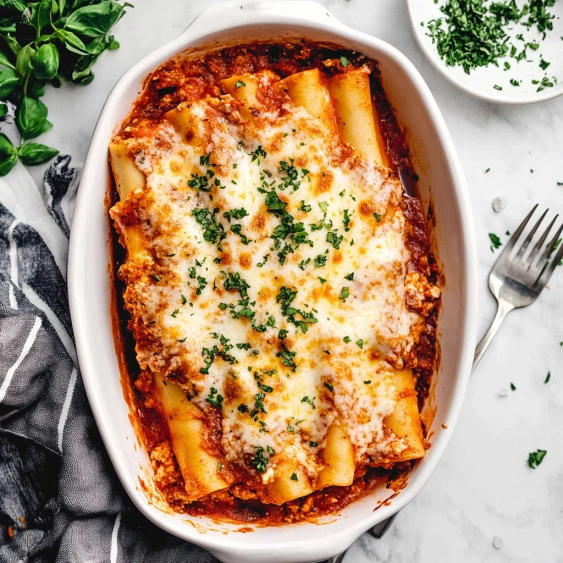
- Arrange the filled manicotti in a single layer in the sauce-lined baking dish, keeping a small space between each tube. Pour the remaining sauce evenly over the top, ensuring all pasta is covered.
- Add the Final Cheese:
- Sprinkle the remaining mozzarella cheese over the entire dish, which will create that beautiful golden bubbly crust everyone loves to pull apart.
- Initial Baking:
- Cover the dish tightly with aluminum foil. This creates a steam environment that cooks the pasta perfectly. Bake for exactly 50 minutes, which allows the pasta to soften while protecting the cheese from browning too quickly.
- Finish Uncovered:
- Remove the foil and continue baking for another 5-10 minutes until the pasta reaches al dente texture. For an extra golden top, broil for just 60-90 seconds, watching carefully to prevent burning.
 Pin it
The first time I served this to my Italian family they refused to believe I hadn't pre-boiled the manicotti. My uncle, who rarely compliments anything, actually asked for the recipe, which remains one of my proudest cooking moments.
Make Ahead Magic
This manicotti can be completely assembled up to a day before baking. Simply cover tightly with plastic wrap, then foil, and refrigerate. When ready to bake, remove from the refrigerator 30 minutes before cooking to take the chill off, then bake as directed, adding about 10-15 minutes to the covered baking time.
Perfect Substitutions
Vegetable Options: If spinach isn't your favorite, try kale, finely chopped broccoli, or even roasted red peppers for variety in the filling. Each brings different nutrition and flavor profiles while maintaining the moisture balance.
Cheese Flexibility: While whole milk ricotta creates the creamiest result, you can use part-skim ricotta to reduce calories. For an extra indulgent version, mix in 4 ounces of softened cream cheese to the filling for a velvety richness.
Sauce Selection: While traditional marinara works perfectly, this technique also succeeds with arrabbiata for spice lovers, vodka sauce for a touch of elegance, or even a combination of alfredo and marinara for a blush sauce experience.
Serving Suggestions
This manicotti pairs perfectly with a simple arugula salad dressed with lemon and olive oil. The peppery greens and bright acidity cut through the richness of the pasta. For a complete meal, add garlic bread or focaccia to collect every last bit of sauce from your plate.
 Pin it
Frequently Asked Questions
- → Why don't you need to boil the manicotti first?
The manicotti cooks directly in the baking dish because the recipe incorporates water into the sauce, creating enough moisture for the pasta to soften during baking. This one-step method eliminates the frustration of handling pre-boiled pasta that can easily tear.
- → Can I prepare this dish ahead of time?
Yes! You can assemble the entire dish up to 24 hours in advance and refrigerate it covered. When ready to bake, add about 10-15 minutes to the covered baking time to account for the chilled ingredients.
- → What can I substitute for spinach?
You can substitute kale, Swiss chard, or even sautéed mushrooms if you prefer. For a simpler version, you can omit the greens entirely and focus on the cheese filling with herbs.
- → How do I know when the manicotti is fully cooked?
The manicotti is done when the pasta feels tender when pierced with a fork. The dish should be bubbling around the edges, and the cheese on top should be melted and slightly golden after the final uncovered baking period.
- → Can I freeze this dish?
Absolutely! You can freeze it either before or after baking. If freezing unbaked, assemble the dish, cover tightly with foil and plastic wrap, and freeze for up to 3 months. Thaw overnight in the refrigerator before baking. If freezing after baking, allow to cool completely, portion if desired, and freeze in airtight containers for up to 2 months.
- → What's the best way to fill the manicotti shells?
Using a piping bag or zip-top bag with the corner snipped off is the easiest method. This allows you to fill the uncooked pasta tubes without breaking them, ensuring an even distribution of filling throughout each shell.