
 Pin it
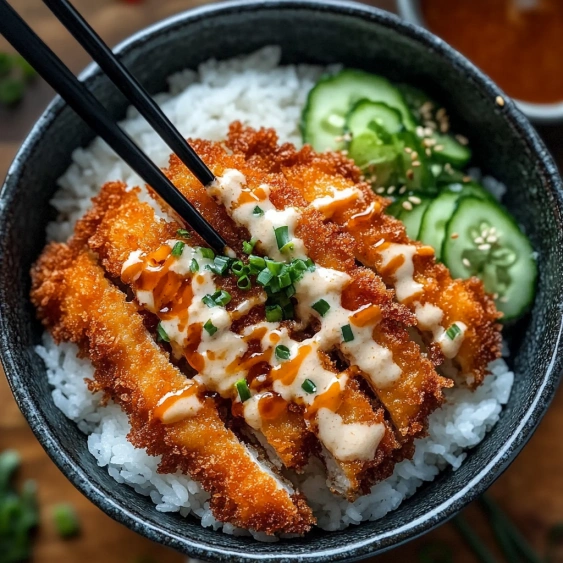
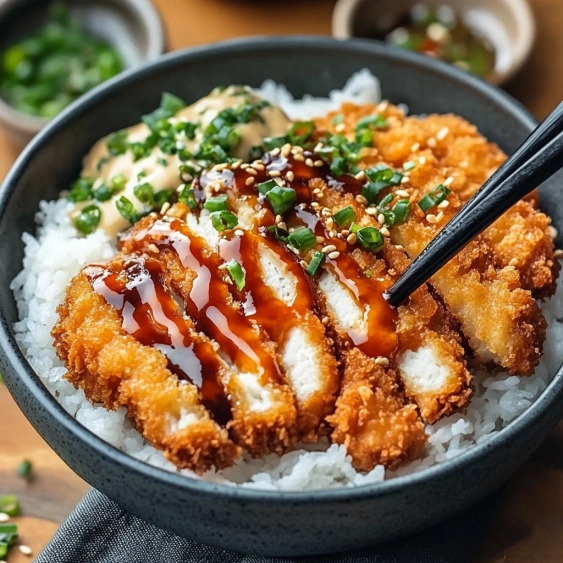
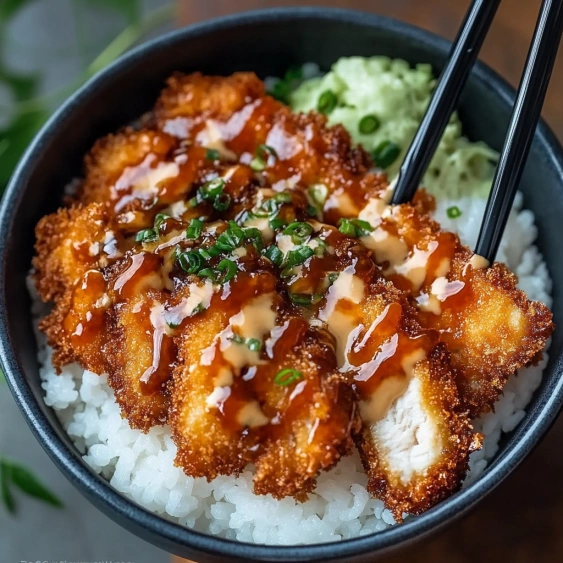
This crispy Japanese Katsu bowl is my weeknight secret weapon for turning simple ingredients into a restaurant-worthy meal that always impresses. The combination of crunchy panko-coated cutlets, fluffy rice and sweet-savory tonkatsu sauce creates the perfect comfort food experience.
I first made these katsu bowls after returning from a trip to Japan, desperately trying to recreate that perfect crunch and sauce. Now it's my go-to impressive dinner when friends come over, and everyone always asks for seconds.
Ingredients
- Chicken breasts or pork loin cutlets: These are the star proteins, pounded thin for quick cooking and maximum crispiness
- Panko breadcrumbs: Essential for that signature airy crunch that sets katsu apart from other breaded cutlets
- All purpose flour: Creates the base layer that helps the egg and breadcrumbs adhere properly
- Large eggs: Act as the glue between the flour and panko layers
- White rice: Preferably sushi rice for its perfect sticky texture that complements the crispy katsu
- Tonkatsu sauce: The sweet, tangy and savory condiment that ties everything together
- Frying oil: Vegetable or canola oil works best due to their neutral flavor and high smoke point
- Optional garnishes: Fresh parsley or green onions add a pop of color and freshness
Step-by-Step Instructions
- Prepare the meat:
- Pound chicken breasts or pork cutlets to an even half-inch thickness between plastic wrap or parchment paper. This ensures even cooking and maximum tenderness. Season both sides with salt and pepper to build flavor from the start.
- Set up breading station:
- Arrange three shallow dishes in a row. Fill the first with flour, the second with beaten eggs, and the third with panko breadcrumbs. This assembly line makes the breading process efficient and less messy.
- Bread the cutlets:
- Working with one piece at a time, dredge meat in flour and shake off excess. Next, dip completely in egg mixture allowing excess to drip off. Finally, press firmly into panko breadcrumbs, ensuring complete coverage and pressing gently to help the crumbs adhere.
- Heat the oil:
- Pour about half an inch of oil into a large, heavy bottomed frying pan and heat to 350°F. If you don't have a thermometer, test by dropping a few panko crumbs in the oil they should sizzle immediately without burning.
- Fry to perfection:
- Carefully place breaded cutlets in the hot oil without overcrowding the pan. Cook chicken for 3 to 4 minutes per side or pork for 2 to 3 minutes until deeply golden brown and crisp. The internal temperature should reach 165°F for chicken or 145°F for pork.
- Make the sauce:
- If creating homemade tonkatsu sauce, simply whisk together ketchup, Worcestershire sauce, soy sauce, and sugar in a small bowl until completely smooth. Taste and adjust seasonings if needed.
- Assemble and serve:
- Slice the cutlets into strips against the grain. Place a generous portion of warm rice in each bowl, arrange sliced katsu on top, and drizzle with tonkatsu sauce. Garnish with fresh herbs if desired and serve immediately while the katsu is still crispy.
 Pin it
The panko breadcrumbs are truly the magic ingredient here. Unlike regular breadcrumbs, panko creates an exceptionally light, airy crust that stays crispy longer. I learned this technique while taking a cooking class in Tokyo, where the instructor showed us how to press the panko gently rather than pressing too hard, which maintains those signature air pockets.
Authentic Technique Tips
Traditional Japanese katsu is always sliced before serving, which makes it easier to eat with chopsticks and creates a beautiful presentation. Cut your cutlets into half-inch strips after resting but before assembling the bowls. The proper cutting technique is to slice perpendicular to the grain of the meat for the most tender bite.
Make-Ahead and Storage
While katsu is best enjoyed fresh, you can prepare the components separately for quicker assembly. Bread the cutlets up to 8 hours ahead and store them covered in the refrigerator. The homemade tonkatsu sauce keeps well for up to two weeks in a sealed container. For leftovers, store the cutlets separately from the rice and sauce, then reheat the katsu in a 350°F oven for 5 to 7 minutes to restore crispiness.
 Pin it
Variations Worth Trying
This recipe adapts beautifully to different proteins and dietary needs. Try using firm tofu, sliced eggplant, or even portobello mushrooms for vegetarian versions. For a gluten-free adaptation, substitute rice flour for all-purpose flour and use gluten-free panko breadcrumbs. You can also create a curry katsu bowl by serving with Japanese curry instead of tonkatsu sauce, or make it into a sandwich called "katsu sando" using soft milk bread.
Frequently Asked Questions
- → What's the difference between chicken katsu and pork katsu?
The main difference is the protein used. Chicken katsu uses boneless chicken breasts, while pork katsu (tonkatsu) uses pork loin cutlets. The cooking time varies slightly - chicken needs 3-4 minutes per side, while pork requires 2-3 minutes. Both are prepared with the same breading technique and sauce, and the flavor profile is similar, though pork tends to be a bit richer.
- → Can I bake the katsu instead of frying?
Yes, you can bake katsu for a healthier version. Preheat your oven to 400°F (200°C), place the breaded cutlets on a baking sheet lined with parchment paper, spray or drizzle with a little oil, and bake for about 20 minutes, flipping halfway through. The coating won't be quite as crispy as deep-fried, but it's still delicious and uses much less oil.
- → What is tonkatsu sauce made of?
Traditional tonkatsu sauce is a sweet and tangy condiment. The homemade version in this dish combines ketchup, Worcestershire sauce, soy sauce, and sugar. Store-bought versions may also include fruit purees (often apple), vinegar, and spices. It's similar to a thicker, sweeter version of Worcestershire sauce with Japanese influences.
- → What sides go well with katsu bowls?
Traditional Japanese sides that complement katsu bowls include shredded cabbage salad with sesame dressing, miso soup, pickled vegetables (tsukemono), cucumber sunomono (vinegar salad), or a simple seaweed salad. For a complete meal, you might also add some steamed edamame or Japanese-style potato salad.
- → Why is panko used instead of regular breadcrumbs?
Panko breadcrumbs are Japanese-style breadcrumbs that are lighter, airier, and more flaky than traditional western breadcrumbs. They absorb less oil during frying, resulting in a lighter, crispier coating that stays crunchy longer. This texture is essential for authentic katsu, giving the dish its characteristic light and crispy exterior while keeping the meat juicy inside.
- → Can I prepare katsu in advance?
You can bread the cutlets up to a day in advance and keep them refrigerated. For best results, fry them just before serving. If you need to make them completely ahead of time, you can reheat pre-fried katsu in an oven at 350°F (175°C) for about 10 minutes. The cutlets won't be quite as crispy as freshly made, but they'll still be delicious.