
 Pin it
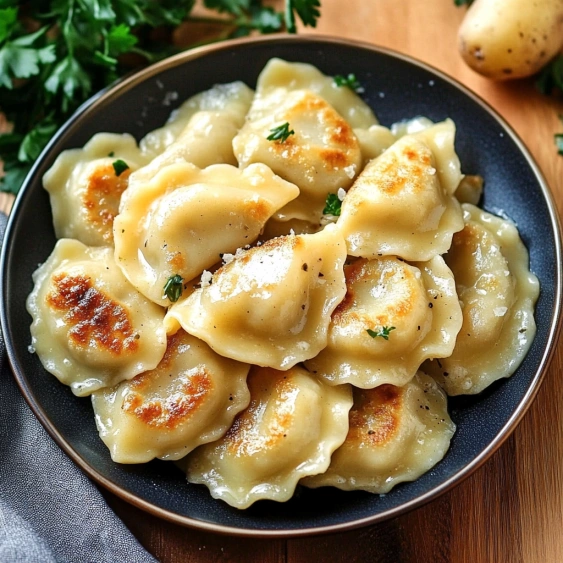
This authentic Polish potato and cheese pierogi recipe brings the heartwarming flavors of traditional Polish cuisine right to your kitchen. These delicate dumplings filled with creamy potato and cheese mixture offer the perfect balance of comfort and flavor that has been cherished across generations in Poland.
I learned this recipe from my Polish grandmother who would gather the whole family in her tiny kitchen every Sunday to make hundreds of these delicious dumplings. The process became our special bonding time and the taste instantly transports me back to those cherished moments.
Ingredients
- All purpose flour: Forms the foundation of the elastic yet tender dough that will cradle your filling
- Very warm water: Activates the gluten in the flour creating the perfect texture
- Butter: Enriches the dough adding subtle richness that complements the filling
- Polish twarog cheese: Brings authentic tangy flavor that makes these truly traditional
- Potatoes: Provide the hearty base for the filling use starchy varieties for best results
- Onions: Add aromatic sweetness that elevates the simple filling
- Salt and pepper: Balance all flavors ensure you season generously
Step-by-Step Instructions
- Prepare the Filling:
- Peel potatoes and boil them in generously salted water until fork tender about 15 to 20 minutes. Drain thoroughly and mash while still hot for the smoothest texture. Allow the mashed potatoes to cool completely before mixing with other ingredients to prevent the cheese from melting prematurely.
- Sauté the Aromatics:
- Heat oil in a skillet over medium low heat and add finely chopped onions. Cook slowly for about 5 minutes until translucent and soft but not browned. Browning will create a stronger flavor that can overpower the delicate cheese. Stir frequently to ensure even cooking.
- Create the Filling Mixture:
- Combine cooled mashed potatoes twarog cheese and sautéed onions in a large bowl. Season generously with salt and freshly ground black pepper. Use a potato masher to thoroughly combine all ingredients until smooth and uniform. Taste and adjust seasoning as needed.
- Make the Dough:
- Place flour salt and butter on a clean work surface. Using a large knife cut through the ingredients while gradually adding warm water. Continue mixing until the dough starts coming together. This method creates a light texture in the final dough.
- Knead the Dough:
- Once all water is incorporated knead the dough vigorously for 6 minutes until smooth elastic and slightly tacky but not sticky. The dough should feel soft and pliable. Cover with a bowl and let rest for 20 minutes to allow the gluten to relax making it easier to roll.
- Roll and Cut:
- Divide dough into three portions working with one at a time while keeping others covered. Roll each portion on a lightly floured surface to 2 3 mm thickness. Use a 7 cm round cutter or glass to cut circles from the dough gathering scraps to reuse.
- Fill and Seal:
- Place about a teaspoon of filling in the center of each dough circle. Fold the dough over the filling and press edges firmly together using fingertips. Ensure no air is trapped inside by gently pushing filling away from edges as you seal. Pinch edges twice for security.
- Boil the Pierogi:
- Bring a large pot of salted water to a rolling boil. Carefully drop pierogi into water one by one up to 15 per batch. Stir gently to prevent sticking. When pierogi float to the surface about 2 minutes continue cooking for 4 more minutes until dough is tender.
- Finish and Serve:
- Remove cooked pierogi with a slotted spoon allowing excess water to drain. Place on a serving dish and drizzle with melted butter to prevent sticking. Serve immediately for the best texture and flavor experience.
 Pin it
My absolute favorite part of making pierogi is the rhythmic process of sealing each one. My grandmother taught me that each pierogi should be sealed with love and intention. She would tell stories of her childhood in Poland while we worked which made every batch we created together taste even more special.
Storage Tips
Freshly made uncooked pierogi can be refrigerated for up to 24 hours on a floured tray covered with a clean kitchen towel. For longer storage freeze pierogi on a flour dusted tray until solid about 2 hours then transfer to freezer bags removing as much air as possible. They will keep for up to 3 months. Cook frozen pierogi directly from frozen adding 2 extra minutes to the boiling time.
Traditional Serving Suggestions
In Poland pierogi ruskie are commonly served with caramelized onions crispy bacon bits and a dollop of sour cream. The combination of these toppings creates a perfect balance of flavors and textures that complement the delicate dumplings. For a complete Polish feast serve alongside a simple cucumber salad dressed with sour cream dill and a splash of vinegar.
Ingredient Substitutions
While twarog cheese is traditional it can be difficult to find outside of Eastern European communities. A good substitute is a mixture of farmer cheese and sour cream or drained cottage cheese mixed with a small amount of cream cheese. For a modern twist you can replace the traditional filling with sauerkraut and mushrooms mashed beans and garlic or sweet fillings like blueberries or cherries with a touch of sugar.
 Pin it
Frequently Asked Questions
- → What is twaróg cheese and can I substitute it?
Twaróg is a Polish-style farmer's cheese with a mild, slightly tangy flavor and crumbly texture. If unavailable, you can substitute with farmer's cheese, quark, or a mixture of ricotta and cottage cheese (drained and mashed). The key is using a cheese that's not too wet to maintain the proper filling consistency.
- → Can I freeze these pierogi?
Yes, pierogi freeze exceptionally well. Arrange uncooked pierogi in a single layer on a flour-dusted tray until frozen solid, then transfer to freezer bags. Cook from frozen by dropping into boiling water - they'll need a few extra minutes. Alternatively, freeze cooked pierogi after they've cooled completely.
- → Why did my pierogi dough become too sticky?
Sticky dough usually results from adding too much water or not enough flour. The dough should be soft but manageable. If it's sticking, dust your hands and work surface with a small amount of flour. Be careful not to add too much flour as it can make the dough tough. Room temperature and humidity can also affect dough consistency.
- → How do I prevent my pierogi from opening during boiling?
To prevent pierogi from opening, ensure you've properly sealed the edges by pressing firmly with fingertips, going around the edge twice. Remove any air pockets by gently pushing the filling away from edges while sealing. Don't overfill the dumplings, and make sure no filling gets caught in the seal. Also, don't overcrowd the pot when boiling.
- → What are traditional ways to serve pierogi?
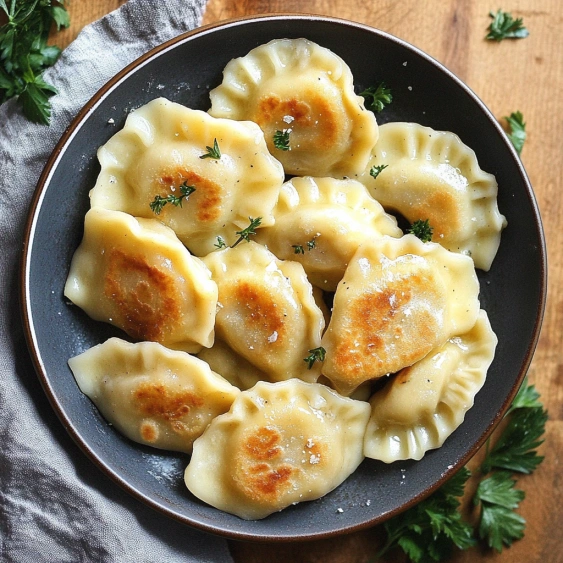
Traditional Polish serving methods include topping pierogi with melted butter, fried onions, crispy bacon bits, or pork cracklings (skwarki). Many Poles also enjoy them with a dollop of sour cream. For a complete meal, serve alongside a simple salad of sauerkraut or cucumber in sour cream (mizeria). Leftover pierogi can be pan-fried until golden for a delicious crispy texture.
- → How long does the dough need to rest and why?
The dough should rest for about 20 minutes after kneading. This resting period allows the gluten to relax, making the dough more elastic and easier to roll thin without springing back. It also helps the flour fully hydrate, resulting in a more pliable dough that's less likely to tear during the shaping process.