
 Pin it
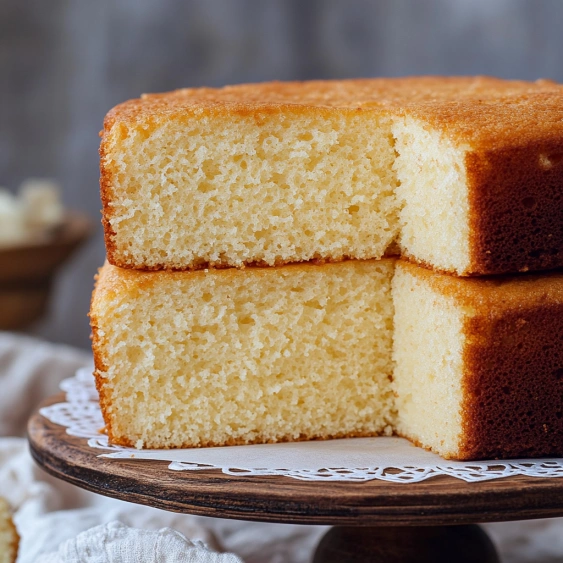
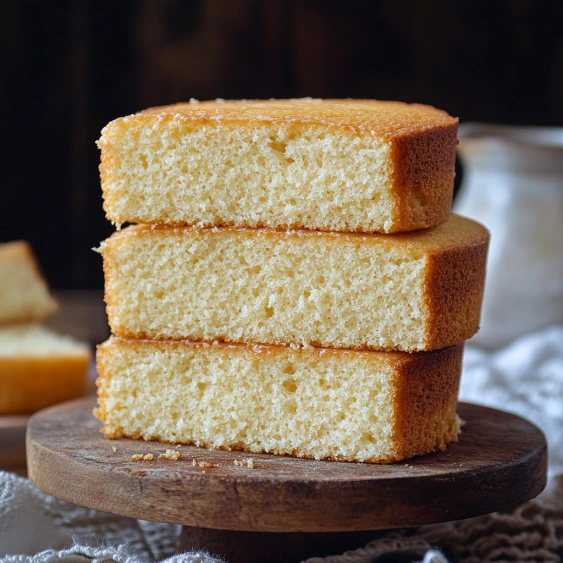
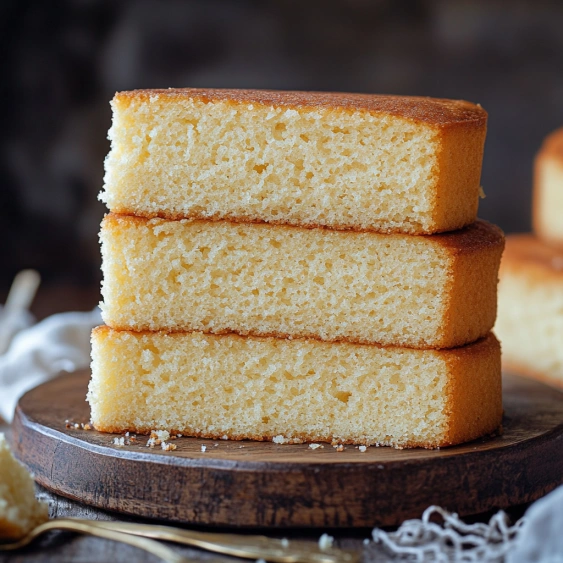
This sponge cake recipe has been my trusted foundation for countless celebration cakes, from birthdays to anniversaries. The delicate crumb and pure vanilla flavor create a versatile canvas that pairs beautifully with any filling or frosting you can imagine.
I developed this recipe after years of disappointing store bought cakes at family gatherings. Now this is the only cake my niece requests for her birthday each year a true testament to its perfect sweetness and texture.
Ingredients
- Eggs: At room temperature crucial for achieving maximum volume in your batter
- Granulated sugar: Provides the perfect sweetness while helping create structure
- Vanilla extract: Use pure extract for the best flavor profile
- Whole milk: Adds richness and moisture to the final cake
- Vegetable oil: Creates a more tender crumb than butter would
- Cake flour: Gives the lightest texture but all purpose works well too
Step-by-Step Instructions
- Preparation:
- Preheat your oven to 170°C or 340°F without the fan setting. Ensure all ingredients have reached room temperature for proper incorporation. Line a 20 cm or 8 inch cake pan with parchment paper on both bottom and sides. Prepare a cake strip soaked in water to promote even baking.
- Whipping the Base:
- Combine eggs vanilla extract and sugar in a mixing bowl. Whip with an electric mixer on high speed for a full 5 minutes. This extended mixing creates the ribbon stage where the mixture becomes extremely pale thick and forms ribbons when the beater is lifted. This step incorporates crucial air that gives the cake its light texture.
- Stabilizing the Mixture:
- Reduce your mixer speed and continue whipping for another 1 to 2 minutes. This breaks larger air bubbles into smaller ones ensuring a fine even crumb in your finished cake rather than large holes.
- Incorporating Dry Ingredients:
- Sift the flour into the whipped egg mixture. Using a rubber spatula gently fold the flour in with sweeping motions from bottom to top. Work carefully to maintain as much air as possible in the batter.
- Adding Liquids:
- Pour in the room temperature milk and oil. Use cut and fold movements to incorporate these wet ingredients just until combined. Overmixing at this stage will deflate your carefully built structure.
- Baking:
- Transfer the batter to your prepared pan. Bake at 170°C or 340°F without fan for approximately 40 minutes. Resist opening the oven door during the first 30 minutes as temperature fluctuations can cause the cake to sink. Test for doneness with a toothpick which should come out clean.
- Cooling:
- Turn the finished cake upside down onto a wire cooling rack. Allow it to cool completely before cutting or decorating according to your specific cake recipe.
 Pin it
My favorite part of this recipe is the magical transformation that happens during the extended whipping process. I still remember the first time I achieved the perfect ribbon stage the satisfaction of seeing those glossy trails of batter falling back into the bowl told me I was on my way to sponge cake success.
The Secret to Perfect Texture
The ribbon stage is truly the heart of this recipe. When properly whipped the egg mixture should fall from the beater in thick ribbons that sit on top of the batter for several seconds before slowly melting back in. This structure is what gives the cake its signature lightness without using chemical leaveners. If you rush this step your cake will be dense rather than airy so be patient with your mixer.
Troubleshooting Common Issues
Cake sinking in the center usually indicates underbaking or opening the oven door too early. The dramatic temperature change causes the still fragile structure to collapse. Another common cause is overmixing after adding flour which deflates those precious air bubbles. Remember to fold gently and minimally when incorporating dry ingredients.
Flavor Variations
While vanilla creates a classic base there are endless ways to customize this sponge cake. Try adding lemon or orange zest for a citrus version perfect for summer. A teaspoon of almond extract creates a sophisticated flavor profile ideal for special occasions. For chocolate lovers substitute 2 tablespoons of the flour with cocoa powder for a light chocolate sponge that pairs beautifully with berries or chocolate frosting.
 Pin it
Storage and Serving
This cake maintains its texture best when stored at room temperature in an airtight container for up to three days. If unfrosted wrap it tightly in plastic wrap to prevent it from drying out. The cake actually improves slightly after a day as the flavors meld together. For longer storage freeze unfrosted layers wrapped tightly in plastic and foil for up to three months. Thaw completely at room temperature before decorating.
Frequently Asked Questions
- → What is the ribbon stage and why is it important?
The ribbon stage refers to whipping eggs and sugar until the mixture becomes thick, pale and forms a 'ribbon' when the whisk is lifted. This stage is crucial because it incorporates air into the batter, creating the light, fluffy texture essential for a proper sponge cake. Without achieving this stage, the cake would be dense and flat instead of airy and springy.
- → Can I substitute all-purpose flour for cake flour?
Yes, all-purpose flour works as a substitute for cake flour in this sponge cake. Cake flour produces a slightly more tender crumb due to its lower protein content, but all-purpose flour will still yield excellent results. If using all-purpose, you might consider replacing 2 tablespoons of each cup with cornstarch to more closely mimic cake flour's properties.
- → Why shouldn't I open the oven door during the first 30 minutes?
Opening the oven door during the first 30 minutes of baking introduces cold air that can cause the cake to collapse. During this critical period, the cake structure is still setting, and sudden temperature changes can disrupt the rising process, resulting in a dense or sunken center. Patience during this initial baking phase helps ensure proper height and texture.
- → What is the purpose of the 'cut and fold' technique?
The 'cut and fold' technique gently incorporates ingredients without deflating the air bubbles created during whipping. It involves using a spatula to cut through the batter vertically, then folding the mixture over itself. This preserves the volume and lightness of the batter, which is essential for achieving the characteristic airy texture of sponge cake.
- → Why flip the cake upside down while cooling?
Flipping the cake upside down while cooling prevents it from collapsing as it cools. The cake structure is still setting during the cooling process, and gravity can help maintain its height and light texture. This technique is particularly important for tall, airy cakes like sponges that might otherwise sink in the center.
- → How do I know when my sponge cake is properly baked?
A properly baked sponge cake will spring back when lightly pressed in the center and a toothpick inserted into the middle will come out clean with no wet batter. The cake should be golden brown on top and slightly pulled away from the sides of the pan. Overbaking will result in a dry cake, while underbaking will cause it to sink after removal from the oven.