
 Pin it
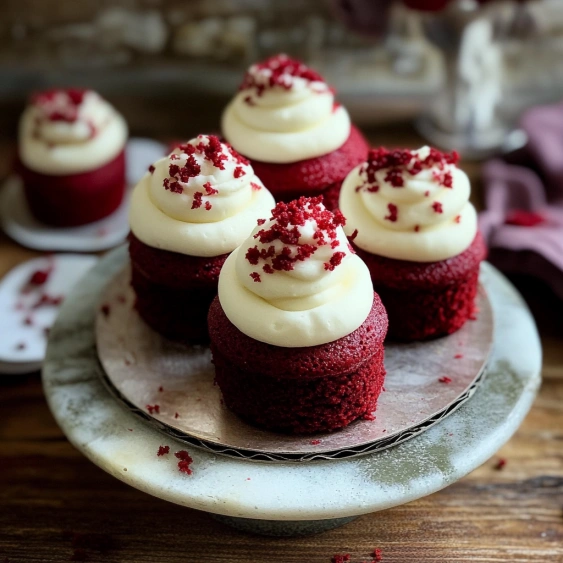
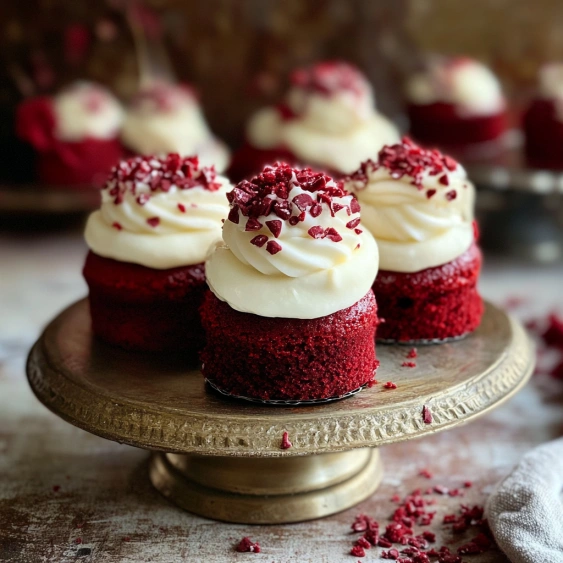
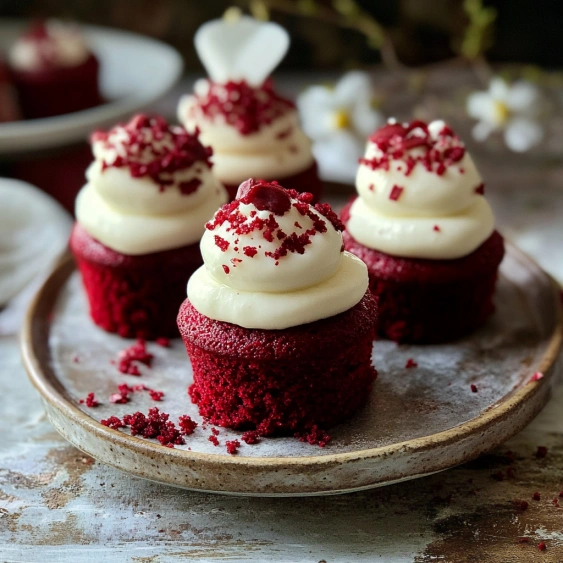
This red velvet mini cake recipe transforms the classic dessert into adorable individual servings that impress with their moist texture and professional finish. Each bite delivers that signature red velvet flavor with a cream cheese frosting that's simply irresistible.
I first made these for my sister's bridal shower and everyone thought they were from an upscale bakery. The cake truffles on top add that special touch that makes guests ask for your secret recipe every time.
Ingredients
- All Purpose Flour: Provides the perfect structure without being too heavy. Look for unbleached varieties for best results.
- Instant Clearjel: Creates that melt in your mouth texture that sets this recipe apart from others. This commercial bakery ingredient makes all the difference.
- Unsweetened Cocoa Powder: Delivers that subtle chocolate flavor authentic to red velvet. Dutch processed works best for rich color.
- Buttermilk: Adds tanginess and creates the tender crumb. Use full fat for best results.
- Red Food Coloring: Gives the signature vibrant color. Gel coloring provides intensity with less liquid.
- Cream Cheese: Creates that classic tangy frosting that pairs perfectly with red velvet. Always use full fat for proper consistency.
Step-by-Step Instructions
- Prepare The Pan:
- Line a quarter sheet pan with parchment and spray with cooking spray. This preparation ensures your cake releases perfectly without any sticking.
- Mix Dry Ingredients:
- Sift all dry ingredients together thoroughly. This crucial step eliminates lumps and ensures even distribution of leavening agents for a perfect rise.
- Combine Wet Ingredients:
- Whisk eggs, buttermilk, water, oil and vanilla until completely smooth. The proper emulsion of these ingredients creates the foundation for a tender cake.
- Create The Batter:
- Pour wet ingredients over dry ingredients and add apple cider vinegar just before stirring. Watch for the slight bubbling reaction which activates the leavening. Then add melted butter and red food coloring, whisking until completely uniform.
- Bake With Precision:
- Pour batter into prepared pan and bake at 325°F for 16 minutes, then reduce temperature to 300°F without opening the oven door. This temperature adjustment prevents the cake from doming and creates a perfectly flat surface.
- Cool And Freeze:
- Allow cake to cool completely before wrapping thoroughly and freezing. Working with cold cake makes the cutting and decorating process significantly easier and prevents crumbs.
- Make The Buttercream:
- Beat cream cheese until softened, then add butter and shortening until completely smooth. Gradually incorporate the powdered sugar mixture with Instant Clearjel, finishing with vanilla. Beat on high to incorporate air for a light texture.
- Assemble The Mini Cakes:
- Cut cold cake into circles, then layer with buttercream. Working with frozen cake allows for clean cuts and easy handling without breaking the delicate texture.
- Finish With Decoration:
- Top each mini cake with red velvet dust and a cake truffle for that professional bakery appearance. These finishing touches transform simple cakes into showstopping desserts.
 Pin it
The Instant Clearjel is truly my secret weapon in this recipe. I discovered it after wondering why my homemade cakes never matched the texture of professional bakeries. Once I incorporated this ingredient, my family could not believe the difference in moisture and texture.
Making Ahead
These mini cakes are perfect for advance preparation. You can bake the sheet cake up to two weeks before your event and keep it frozen until assembly. The buttercream can be made 3 days ahead and stored in the refrigerator. Just bring it to room temperature and re-whip before using. Assembled cakes stay fresh in an airtight container in the refrigerator for up to three days, making them perfect for busy entertaining schedules.
Ingredient Substitutions
If you cannot find Instant Clearjel, you can substitute with cornstarch though the texture will be slightly different. For a natural alternative to red food coloring, try beet powder, though you will need about 3 tablespoons to achieve a similar color intensity. Dairy free adaptations work well with plant based butter and cream cheese alternatives, though the frosting may be slightly softer.
 Pin it
Serving Suggestions
These mini cakes pair beautifully with a dark coffee or espresso to balance the sweetness. For a stunning dessert table, arrange them on a tiered stand interspersed with fresh berries or edible flowers. When serving at a celebration, consider adding personalized touches like monogrammed chocolate pieces or custom colored sprinkles to coordinate with your event theme.
Frequently Asked Questions
- → What is Instant Clearjel and can I substitute it?
Instant Clearjel is a food starch used in commercial baking that helps create a moist, tender texture. If unavailable, you can substitute with cornstarch, though the texture may differ slightly. For the buttercream, simply omit it if you can't find it, but note the frosting might be less stable.
- → Can I make these cakes ahead of time?
Yes! The cake layers can be baked, wrapped thoroughly in plastic wrap, and frozen for up to two weeks in advance. This actually makes assembly easier as cold or frozen cakes are simpler to work with. The finished cakes can be stored in an airtight container for up to 2 days or frozen for longer storage.
- → How do I get the cake truffle topping just right?
To make the cake truffles, combine leftover cake scraps into a soft dough-like consistency. Form into small balls using a 4-tsp cookie scoop, then dip in coating chocolate. While the chocolate is still wet, sprinkle with red velvet dust made from dried cake crumbs for a professional finish.
- → Why do you change the oven temperature during baking?
The two-stage baking process (starting at 325°F then reducing to 300°F) helps the cake rise properly while ensuring even baking throughout. This technique prevents the cake from doming too much or drying out on the edges while the center finishes cooking.
- → What's the purpose of adding apple cider vinegar to the batter?
Apple cider vinegar serves two important functions: it reacts with the baking soda to help the cake rise properly, and it enhances the classic tangy flavor profile of traditional red velvet cake. You'll notice it bubbles slightly when added - this reaction is creating carbon dioxide gas that helps create a lighter texture.
- → Can I make this as a standard cake instead of mini cakes?
Absolutely! You can bake the batter in two 8-inch round cake pans instead of a sheet pan. Adjust the baking time to approximately 25-30 minutes at 325°F, then check for doneness. Layer with the same buttercream frosting and decorate as desired.