
 Pin it
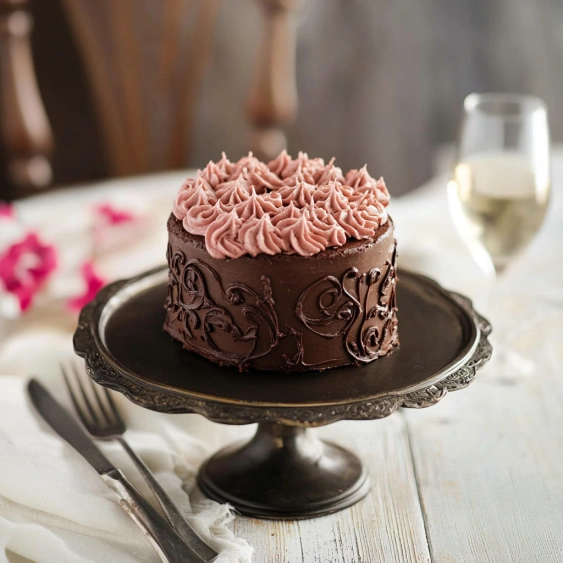
This mini chocolate cake is a perfect dessert for celebrating intimate occasions or satisfying those chocolate cravings without making a full-sized cake. The combination of rich chocolate cake layers and decadent frosting creates an impressive yet manageable treat that looks as good as it tastes.
I first made this mini chocolate cake for my husband's birthday during lockdown when we couldn't host a party. The smaller size was perfect for just us two, and now it's become our special tradition for milestone celebrations where we want something more elegant than cupcakes but less overwhelming than a full cake.
Ingredients
- All purpose flour: creates the perfect tender crumb structure for this cake
- Baking powder: provides just the right amount of lift for these small layers
- Unsweetened cocoa powder: gives deep chocolate flavor without added sweetness
- Semisweet chocolate: adds richness and complexity to both cake and frosting
- Unsalted butter: creates a velvety texture in both cake and frosting
- Granulated sugar: balances the bitterness of the chocolate without overwhelming
- Room temperature eggs: incorporate better for a lighter texture
- Warm milk: helps melted chocolate incorporate smoothly into the batter
- Natural red food coloring: creates a stunning visual contrast without artificial ingredients
Step-by-Step Instructions
- Prepare the pans:
- Properly grease two 4inch springform pans to ensure your cakes release perfectly. Position your oven rack in the center for even heat distribution and preheat to 325°F which allows the small cakes to bake through without burning.
- Mix dry ingredients:
- Sifting together flour, baking powder, salt and cocoa powder eliminates lumps and ensures even distribution of leavening agents throughout the batter. This step is crucial for a smooth consistent texture.
- Melt the chocolate:
- Carefully microwave your chopped chocolate in short bursts, stirring between each interval to prevent scorching. The chocolate should be completely smooth but not hot enough to cook the eggs when added to the batter later.
- Cream butter and sugar:
- Beat these ingredients for the full 45 minutes until genuinely light and fluffy. This incorporates air into the mixture which helps create the cake's tender crumb structure. Rushing this step results in a denser cake.
- Add wet ingredients:
- Incorporate eggs one at a time, beating well after each addition to maintain the emulsion. Add warmed milk gradually. If the mixture looks curdled, continue mixing gently as it will come together in the next step.
- Combine wet and dry:
- Fold the flour mixture and melted chocolate into the butter mixture using a gentle hand. Overmixing at this stage develops gluten which toughens the cake. Stop folding as soon as the batter looks uniform and smooth.
- Bake with precision:
- Divide batter evenly between pans, ideally using a kitchen scale for perfect layers. Bake until a toothpick comes out clean, approximately 40–50 minutes. The small size requires careful timing to avoid overbaking.
- Cool completely:
- Allow cakes to cool in pans for exactly 10 minutes before removing to a wire rack. This timing allows the structure to set while preventing condensation from making the cakes soggy. Complete cooling is essential before frosting.
 Pin it
My favorite element of this cake is the combination of both cocoa powder and melted chocolate in the batter. This dual approach creates remarkable depth of flavor that elevates it beyond typical chocolate cakes. When my daughter first tasted it, she declared it the "most chocolatey cake ever" which has become our family nickname for this special recipe.
Achieving Perfect Layers
The small cake size makes even layers especially important for visual appeal. To ensure perfectly flat layers, I recommend using cake strips around the pans during baking. You can purchase silicone ones or make your own by soaking strips of towel in water and wrapping them in foil. This helps the cake bake more evenly by insulating the edges, preventing the center from doming up.
 Pin it
Frosting Techniques
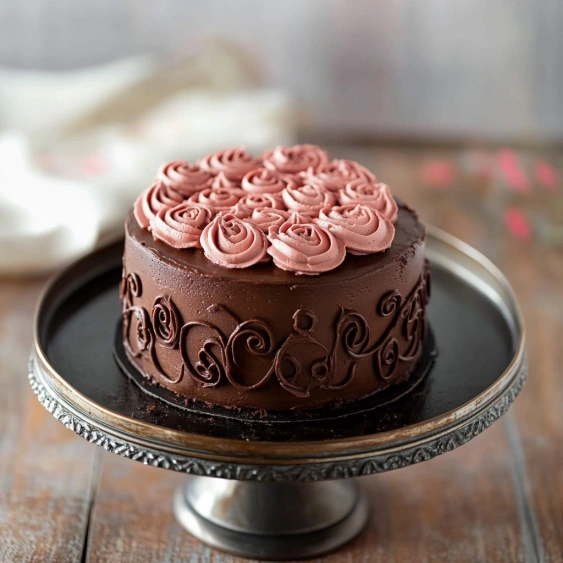
The dual frosting approach with chocolate base and red/white piping creates a professional looking finish even for beginners. When making the crumb coat, use a thin layer of frosting to seal in any loose crumbs, then refrigerate for the full 30 minutes before adding the final coat. This prevents crumbs from showing through your finished cake. For the swirled piping effect, avoid overmixing the red and white frostings in the bag to maintain distinct color separation.
Make Ahead Options
This cake actually improves with a bit of time as flavors meld together. You can bake the layers up to 2 days ahead and store them wrapped tightly in plastic at room temperature. The chocolate frosting can be made 1 day ahead and stored in the refrigerator but will need to come to room temperature before spreading. The fully assembled cake tastes best when allowed to sit at room temperature for 30 minutes before serving, which allows the frosting to soften slightly.
Frequently Asked Questions
- → Can I make this cake ahead of time?
Yes, you can make this cake 1-2 days in advance. Store it in an airtight container in the refrigerator, but bring it to room temperature about 30 minutes before serving for the best flavor and texture.
- → What can I substitute for the springform pans?
If you don't have 4-inch springform pans, you can use regular 4-inch cake pans lined with parchment paper. You can also use ramekins of similar size, though you may need to adjust baking time slightly.
- → How do I know when the cake is done baking?
Insert a toothpick into the center of the cake - it should come out clean or with a few moist crumbs. The cake should also spring back slightly when gently pressed in the center.
- → Can I use natural food coloring for the frosting?
Yes, natural food coloring works well. Beet powder, freeze-dried strawberry powder, or commercial natural food colors can create beautiful pink and red shades without artificial ingredients.
- → How do I prevent my cake layers from doming?
Bake at a slightly lower temperature (325°F as specified) and make sure your batter is evenly distributed in the pans. You can also use cake strips around the pans to help them bake more evenly.
- → Can I freeze this cake?
Yes, the cake can be frozen (with or without frosting) for up to 2 months. Wrap unfrosted layers tightly in plastic wrap and aluminum foil, or store frosted cake in an airtight container. Thaw overnight in the refrigerator.