
 Pin it
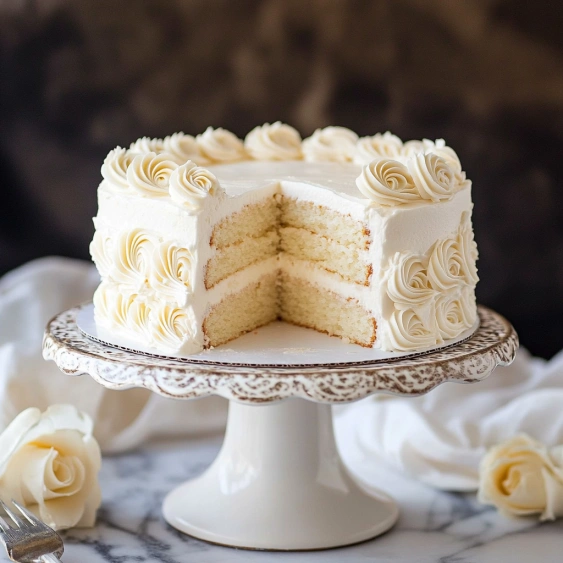
This vanilla cake recipe creates a perfectly moist and flavorful 6-inch cake that's ideal for small celebrations or when you're craving something sweet without leftovers. The classic vanilla flavor pairs with a silky buttercream frosting that's easy to customize for any occasion.
I developed this recipe after years of making oversized layer cakes that would go stale before we could finish them. This smaller version has become our family's go-to for birthday celebrations and impromptu dessert nights when we want something special without waste.
Ingredients
- Unsalted butter: Adds richness and helps create that tender crumb texture every cake needs
- Granulated sugar: Provides just the right sweetness while helping to aerate the batter during creaming
- Whole milk: Contributes moisture and creates a velvety texture you cannot achieve with lower fat alternatives
- Vanilla extract: The star flavor component; use pure extract for the best flavor profile
- Apple cider vinegar: Activates the baking soda creating the perfect rise and tender crumb
- All-purpose flour: Provides structure without making the cake too dense
- Baking soda: Works with the vinegar to create lift and airiness
- Fine salt: Enhances all the flavors and balances the sweetness
Step-by-Step Instructions
- Prepare the Pan:
- Preheat your oven to 350°F and thoroughly spray your 6-inch cake pan with cooking spray. The parchment paper round on the bottom is non-negotiable; it ensures your cake releases perfectly every time. Make sure to trace and cut the parchment to fit exactly.
- Cream Butter and Sugar:
- Beat the softened butter and sugar for a full 1-2 minutes until the mixture becomes noticeably lighter in both color and texture. This step incorporates air, which directly affects the cake's final texture. The mixture should look almost fluffy before moving on.
- Add Wet Ingredients:
- Incorporate the egg and vanilla thoroughly. The batter might look slightly curdled at this stage which is completely normal. The vanilla amount might seem generous but trust me this is what gives the cake its distinctive flavor profile.
- Alternate Dry and Wet Ingredients:
- Whisking the dry ingredients separately ensures even distribution of the leavening agents. Adding them alternately with the milk mixture prevents overworking the gluten in the flour which would make your cake tough. Mix just until combined after each addition.
- Bake with Care:
- Pour the batter into your prepared pan and smooth the top for even baking. The small sheet pan underneath catches any potential overflow and helps with even heat distribution. The 37-39 minute bake time is crucial; watch for a clean cake tester and golden edges.
- Cool Completely:
- Patience is key here. Let the cake cool in the pan on a wire rack before attempting removal. The cooling process allows the structure to set properly and prevents breaking.
- Make the Buttercream:
- Beat the butter until noticeably lighter in color before adding other ingredients. The heavy cream creates a silky smooth consistency that spreads beautifully. Take your time with this step; the longer you beat the buttercream, the lighter and fluffier it becomes.
- Frost with Precision:
- Apply a thin crumb coat first, especially if working with a previously frozen cake. This seals in any loose crumbs before the final layer of frosting. Use a smooth motion with an offset spatula for the cleanest finish.
- Pipe Decorative Elements:
- The piping technique creates professional-looking decorations even for beginners. Start from the center of each rose and work outward with steady pressure for the most attractive results.
 Pin it
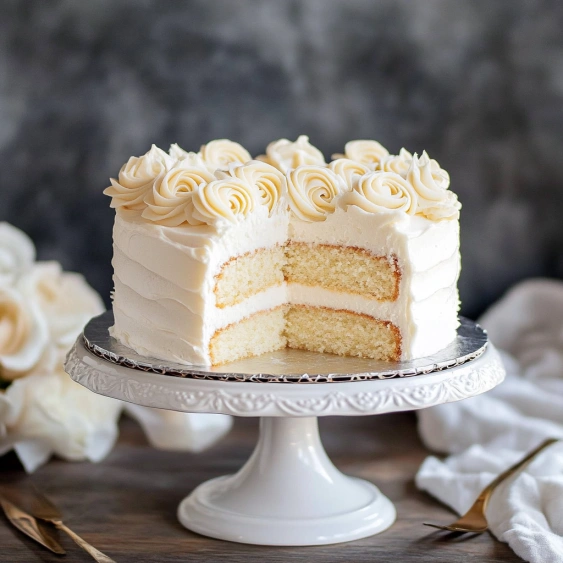
I discovered that adding the full tablespoon of vanilla extract was a game changer in this recipe. My grandmother always said vanilla is to baking what salt is to cooking; it enhances every other flavor. This cake proves her right with its perfectly balanced sweetness and remarkable vanilla aroma.
Storing Your Cake
This cake maintains its moisture remarkably well when stored properly. Place it in an airtight container at room temperature for up to three days. If you need to keep it longer, refrigerate it but allow it to come to room temperature before serving for the best texture and flavor experience. The cake also freezes beautifully unfrosted or even with a crumb coat of frosting. Wrap it tightly in plastic wrap followed by aluminum foil and freeze for up to three months.
Easy Variations
The beauty of this vanilla cake lies in its versatility. Fold in fresh berries before baking for a fruity twist. Replace the vanilla extract with almond extract and add sliced almonds to the batter for an elegant almond cake. For chocolate lovers, add 2 tablespoons of cocoa powder to the dry ingredients and reduce the flour by the same amount. The buttercream can be flavored with citrus zest, coffee extract, or a splash of liqueur to complement your cake variation.
 Pin it
Serving Suggestions
This cake shines as a dessert for intimate gatherings. Serve slices with fresh berries and a dollop of whipped cream for a simple yet elegant presentation. For a more indulgent experience, warm each slice slightly and top with a scoop of vanilla ice cream and caramel sauce. The cake also pairs beautifully with afternoon tea or coffee, offering the perfect sweet balance to the bitter notes in your beverage.
Frequently Asked Questions
- → Can I double this vanilla cake recipe for a larger cake?
Yes, you can double the ingredients for a larger cake. Use two 6-inch pans for a layer cake or one 8-inch or 9-inch pan for a single layer. You'll need to adjust baking time - start checking at 30 minutes for larger pans.
- → Why is apple cider vinegar used in this cake?
Apple cider vinegar reacts with the baking soda to create a light, tender crumb. It helps the cake rise properly and creates a more delicate texture without adding any vinegar flavor to the finished cake.
- → Can I make this cake in advance?
Yes! You can bake the cake up to 2 days ahead and store it well-wrapped at room temperature, or freeze it for up to 3 months. The recipe even mentions applying a crumb coat if using a frozen cake before the final frosting.
- → What if I don't have a piping bag for the buttercream roses?
No problem! You can simply spread all the buttercream on top and sides of the cake for a smooth finish. Alternatively, use a zip-top bag with the corner snipped off as an improvised piping bag.
- → Can I substitute the whole milk in this recipe?
Yes, you can use 2% milk or even buttermilk as a substitute. If using buttermilk, omit the apple cider vinegar since buttermilk already provides the necessary acidity.
- → How do I know when the cake is done baking?
Insert a toothpick or cake tester into the center of the cake. It should come out clean or with just a few moist crumbs (not wet batter). The cake should also spring back slightly when touched in the center.