
 Pin it
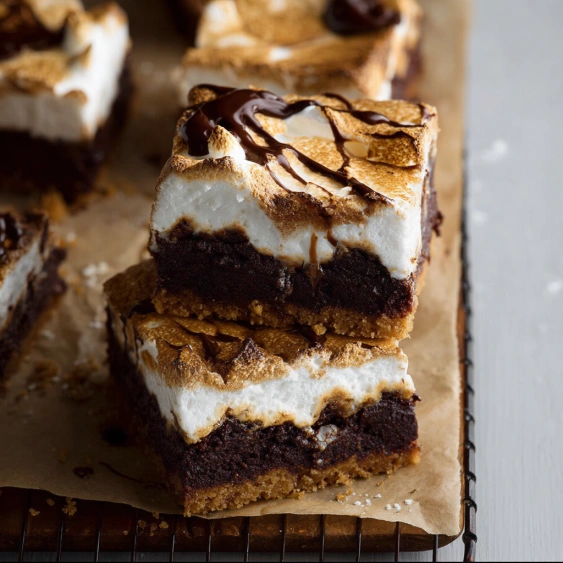
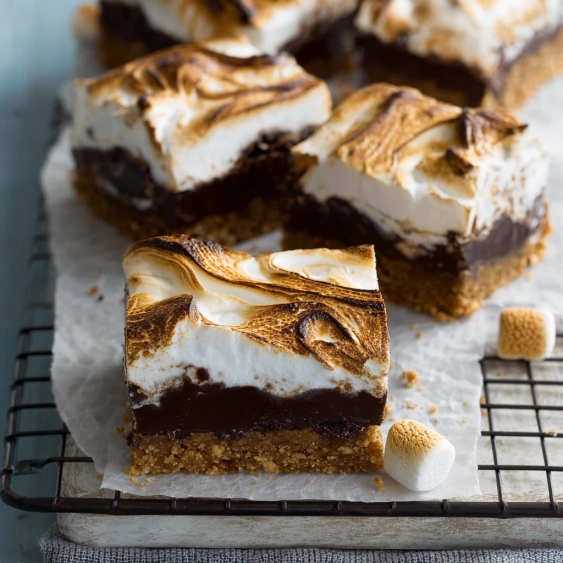
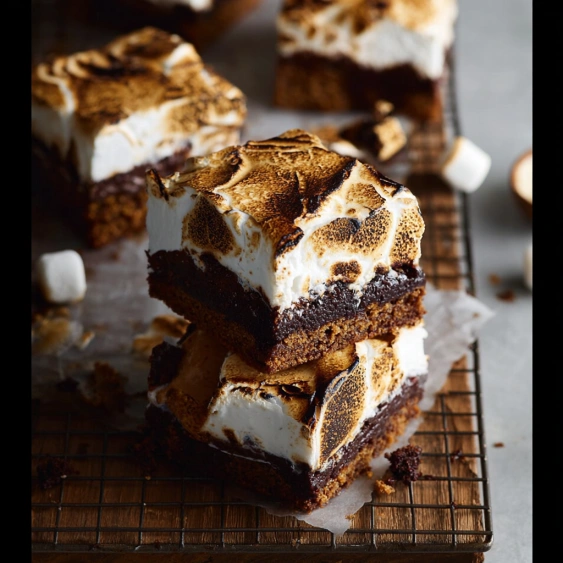
This s'mores brownie recipe transforms the classic campfire treat into a decadent dessert you can enjoy year-round. The combination of rich chocolate brownies, graham cracker crust, and toasted marshmallow topping creates the perfect indoor s'mores experience without the campfire.
I first made these for my nephew's birthday when rain cancelled our backyard campfire plans. The look on his face when I brought out these brownies instead of traditional s'mores was priceless. Now they're requested at every family gathering.
Ingredients
- Graham crackers: form the essential s'mores base and provide that signature honey-graham flavor
- Unsalted butter: creates richness while allowing you to control the salt level
- Unsweetened chocolate: produces an intense chocolate flavor that balances the sweet marshmallow topping
- All purpose flour and cake flour: combination creates the perfect brownie texture
- Baking powder: gives just enough lift without making them too cakey
- Salt: enhances all the flavors and balances the sweetness
- Granulated sugar: sweetens and helps create that shiny top crust
- Eggs: provide structure and richness
- Vanilla extract: adds depth and warmth to the chocolate flavor
- Marshmallow fluff: delivers that gooey marshmallow layer without the mess of melting individual marshmallows
Step-by-Step Instructions
- Prepare the Pan:
- Line your baking pan with parchment paper and create the graham cracker layer. This foundation is crucial for the authentic s'mores flavor and texture. Don't worry about getting perfect graham cracker placement. A few cracks or overlaps actually add to the rustic charm of the final dessert.
- Create the Chocolate Base:
- Melt the butter and chocolate together slowly over medium-low heat. This gentle melting preserves the chocolate's flavor compounds and prevents it from seizing. Keep stirring constantly until completely smooth with no remaining chocolate pieces. The mixture should look glossy and silky.
- Mix the Wet Ingredients:
- Beat the eggs and sugar until they become pale yellow and fluffy. This incorporates air and creates the structure for your brownies. When you add the chocolate mixture, make sure it's slightly cooled so it doesn't cook the eggs. The resulting mixture should look glossy and smooth.
- Add Dry Ingredients:
- Incorporate the flours, baking powder and salt with a light hand. Overmixing at this stage activates the gluten in the flour and will make your brownies tough instead of fudgy. Stop mixing as soon as no flour streaks remain visible in the batter.
- Bake to Perfection:
- Pour the batter carefully over your graham cracker base and spread evenly. The baking time is crucial. You want the edges set but the center still slightly moist. When testing with a knife, a few moist crumbs clinging to it indicates perfect doneness for fudgy brownies.
- Add the Marshmallow Layer:
- Once completely cooled, spread the marshmallow fluff across the top. Create dramatic swirls and peaks with your spoon. These textured areas will brown beautifully when toasted and add visual interest to your brownies.
- Toast the Marshmallow:
- Use a kitchen torch for precise control or broil briefly in the oven. The caramelization that happens during toasting transforms the plain marshmallow into something magical with complex flavor notes. Watch carefully as it can quickly go from golden to burnt.
 Pin it
The marshmallow topping is what makes this recipe truly special. I discovered that using marshmallow fluff instead of regular marshmallows creates a more consistent layer and avoids the dryness that can happen when marshmallows cool. The first time I torched the top and watched it turn golden brown, my kitchen filled with that unmistakable campfire aroma that immediately transported me back to childhood summers.
Make-Ahead Options
These brownies actually taste better the day after baking. The flavors meld together, and the graham cracker layer softens slightly to create the perfect texture. You can make the brownie base up to two days ahead and add the marshmallow topping just before serving. This makes them perfect for planning ahead for parties or special occasions.
Serving Suggestions
Serve these brownies slightly warm for the ultimate gooey experience. A scoop of vanilla ice cream on the side creates a hot-and-cold contrast that's irresistible. For an extra chocolate punch, drizzle some warm chocolate sauce over the toasted marshmallow layer just before serving. At summer gatherings, I've served these alongside a fruit platter for a refreshing counterpoint to the rich brownies.
 Pin it
Storage Tips
Store any leftover brownies in an airtight container at room temperature for up to three days. The marshmallow layer will gradually soften and meld with the brownie, which many of my family members actually prefer. For longer storage, you can freeze the brownie base without the marshmallow topping for up to a month. Thaw at room temperature and add fresh marshmallow fluff before serving.
Frequently Asked Questions
- → Can I use regular flour instead of cake flour?
Yes, you can substitute all-purpose flour for cake flour. For every 3/4 cup of cake flour, use 3/4 cup all-purpose flour minus 1.5 tablespoons, plus 1.5 tablespoons of cornstarch. This will give you a similar texture to using cake flour.
- → How do I store these brownies?
Store the brownies in an airtight container in the refrigerator for up to 5 days. The cold temperature helps maintain the integrity of the marshmallow layer. Let them come to room temperature for about 20 minutes before serving for the best texture and flavor.
- → Can I substitute marshmallows for marshmallow fluff?
Yes, you can use regular marshmallows instead of fluff. Arrange about 3-4 cups of mini marshmallows or regular marshmallows cut in half over the cooled brownies, then toast them under the broiler or with a kitchen torch. The texture will be slightly different but still delicious.
- → Why do I need to refrigerate the brownies before cutting?
Refrigerating helps all three layers set properly, making it easier to get clean cuts through the marshmallow topping, brownie center, and graham cracker base. Without chilling, the marshmallow layer might pull and stretch, creating messy slices.
- → Can I make these brownies in advance?
Yes, you can make these up to 2 days in advance. Prepare through all steps, including toasting the marshmallow layer, then refrigerate in an airtight container. The graham cracker base may soften slightly over time but will still taste delicious.
- → What's the best way to toast the marshmallow topping without a kitchen torch?
If you don't have a kitchen torch, place the brownies (with the marshmallow layer added) under your oven's broiler for 1-2 minutes. Watch them constantly as marshmallow can go from perfectly toasted to burnt very quickly. Position the pan on the middle rack, not too close to the broiler.