
 Pin it
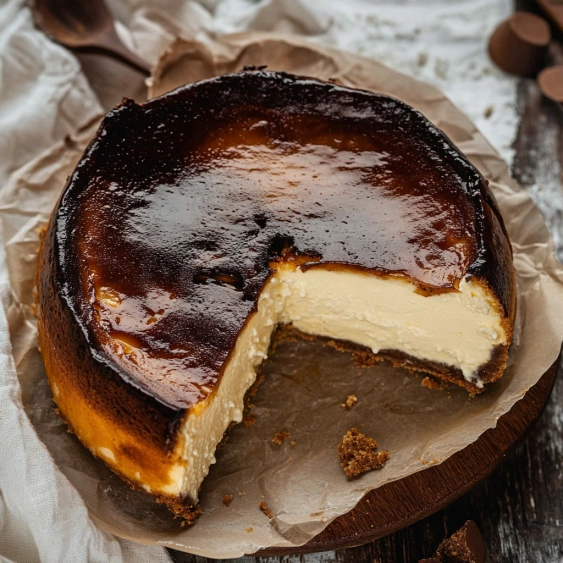
This rustic Basque burnt cheesecake delivers creamy interior beneath a caramelized top that's intentionally darkened for exceptional flavor contrast. After discovering this recipe during a trip to San Sebastián, I've simplified it without sacrificing authenticity, making it accessible for home bakers.
My family initially questioned the "burnt" aspect until that first bite silenced all doubts. Now this has become our most requested dessert for celebrations.
Ingredients
- Cream cheese: At room temperature essential for a lump-free batter, full-fat Philadelphia creates the richest texture
- Granulated sugar: Provides sweetness that caramelizes beautifully on top
- Eggs: At room temperature crucial for proper incorporation and texture, cold eggs can cause lumps
- Heavy cream: With high fat content gives that signature silky interior
- All purpose flour: Just a touch to stabilize the texture while maintaining creaminess
Step-by-Step Instructions
- Prepare the pan:
- Line an 8-inch springform with two overlapping sheets of parchment paper, allowing them to extend about 2 inches above the rim. This extra height contains the cake as it rises during baking and creates that distinctive rustic look. Do not trim or fold the corners neatly, the wrinkled appearance is part of its charm.
- Mix the base:
- Start with room temperature cream cheese and gradually add sugar and flour while mixing at low speed. This gradual approach prevents lumps from forming. The mixture should become smooth but not airy, we are not trying to incorporate air into the batter.
- Add eggs:
- Incorporate eggs one at a time at low speed, ensuring each is fully integrated before adding the next. Patience here prevents a lumpy texture. The batter will become more liquid but should remain smooth throughout this process.
- Complete the batter:
- Slowly pour in the room temperature heavy cream while continuing to mix at low speed. The batter will now look quite liquid, with a consistency similar to a thick pancake batter. This is exactly what we want.
- Bake to perfection:
- Pour the batter into your prepared pan and bake in a hot oven until the top becomes deeply caramelized. The center should maintain a significant jiggle when gently shaken. This wobble ensures the signature creamy texture after cooling.
- Cool and set:
- Allow the cake to cool completely at room temperature before refrigerating for at least 4 hours. This cooling process is crucial for developing the contrasting textures, from the caramelized exterior to the custard-like center.
 Pin it
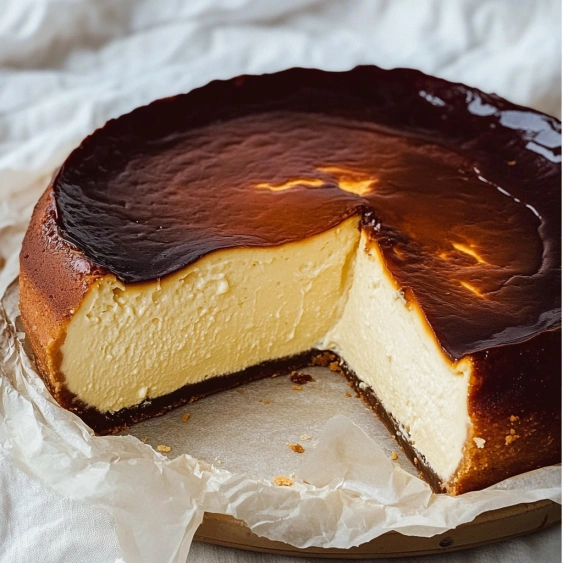
The first time I served this to guests, everyone was skeptical about the intentionally burnt appearance. One bite in, my brother-in-law declared it the best cheesecake he had ever tasted and now requests it for his birthday every year instead of traditional cake.
Temperature Matters
The success of this cheesecake depends heavily on ingredient temperature. Cold ingredients straight from the refrigerator will create lumps that never fully incorporate. Set your cream cheese, eggs, and heavy cream out at least two hours before baking. In winter months, I place my mixing bowl in warm water for a few minutes to take the chill off before adding ingredients.
Storage and Serving
While many cheesecakes can last up to a week refrigerated, this particular version is best consumed within two days of baking. The delicate texture begins to break down after that point. Store it covered in the refrigerator, but avoid pressing plastic wrap directly onto the surface as it will stick to the caramelized top. For the best flavor experience, remove from the refrigerator 30 minutes before serving to take the chill off.
Cultural Background
Originating from La Viña restaurant in San Sebastián, Spain, this cheesecake broke all traditional rules when it appeared in the 1990s. Unlike its American counterpart with graham cracker crust and water bath technique, this Spanish version embraces high heat and simplicity. What began as a regional specialty has become a global sensation precisely because it celebrates imperfection, with its rustic appearance and intentionally burnt top.
 Pin it
Frequently Asked Questions
- → Why is my Basque cheesecake cracking?
Cracking typically occurs from overmixing (which incorporates too much air) or from sudden temperature changes. Mix ingredients on low speed without whipping, ensure all ingredients are at room temperature, and allow the cheesecake to cool gradually at room temperature before refrigerating.
- → How do I know when my Basque burnt cheesecake is done?
The cheesecake is ready when the top is puffed and caramelized, the edges look set, and the center remains jiggly but not liquid. This usually takes about 40 minutes at 220°C/430°F, but start checking after 30 minutes as ovens vary.
- → Can I make Basque burnt cheesecake ahead of time?
Yes! This cheesecake actually benefits from chilling at least 4 hours to set properly. You can prepare it a day in advance and keep it refrigerated until serving time for optimal texture and flavor.
- → Why does Basque cheesecake need flour?
The small amount of flour (30g) helps stabilize the structure of the cheesecake, giving it a slightly firmer texture while maintaining its creamy center. It also helps prevent excessive cracking during baking.
- → Can I freeze Basque burnt cheesecake?
Yes, you can freeze it for up to 1 month. Cool completely, then wrap tightly in plastic wrap followed by aluminum foil. Thaw overnight in the refrigerator before serving. The texture may change slightly but will still be delicious.
- → Why is room temperature important for the ingredients?
Room temperature ingredients blend more smoothly and evenly, preventing lumps in the batter. Cold ingredients can cause the batter to seize or become grainy, affecting the final texture of your cheesecake.